Spaces
Introducing Spaces - the smart and flexible desk and meeting room booking add-on for Sign In App. Embrace the hybrid workforce and manage reduced site capacity with Spaces. Easily monitor who is expected on site and how your office space is being used.
How to enable Spaces
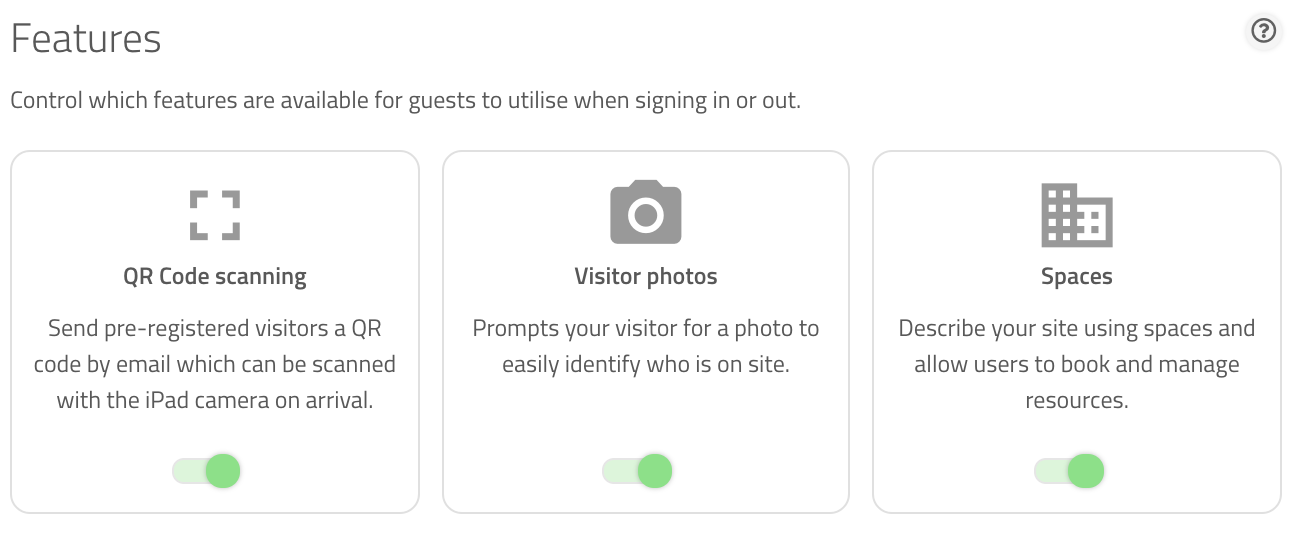
To enable Spaces for a Site, first log in to the online portal and go to Manage > Sites > Select a site > Features and enable Spaces. This is done on a site level so if you’d like to use Spaces at more than one site you will need to follow the same steps for each site. Once you’ve enabled Spaces for your sites you should see the Spaces tab show in between Today and Reports in the main menu.
Manage spaces
To get started with Spaces you will need to plan out your available spaces for staff to book. In this guide, we will walk you through a basic example to show you how the Spaces designer works and the features you can make use of.
Site settings
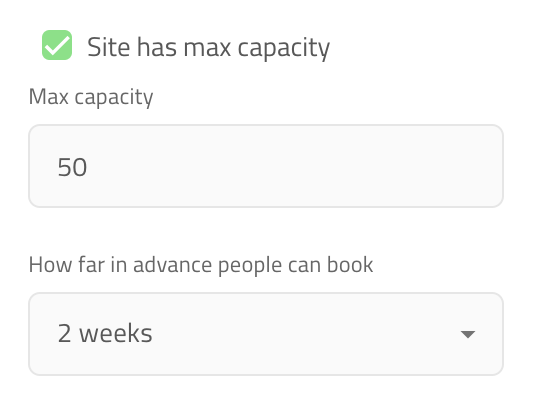
Before we start creating the floorplan for Spaces there are a couple of site settings that you might need to configure. Click Spaces > Manage spaces and you can set a site Max capacity, this can help you manage capacity on site by restricting the number of bookings at any one time. You can also limit How far in advance people can book a space.
Spaces vs zones
When using Spaces it’s important to understand the difference between spaces and zones. Zones are used to define buildings, floors and rooms (or departments). You can’t book a zone, but it’s used to define the area that contains your bookable spaces. Spaces exist within zones and are bookable. These can represent desks, meeting rooms, or breakout areas. Both spaces and zones can have a max capacity allowing you to effectively spread bookings out throughout your site.
Add a zone
First, navigate to the Spaces tab from the online management portal and then click Manage Spaces. We will start by creating a Zone to represent our ground floor. We will start with a Zone, since Spaces can’t be added without a Zone. Clicking +Add new in the right column will show a few options - Space, Zone, Upload a floor plan.
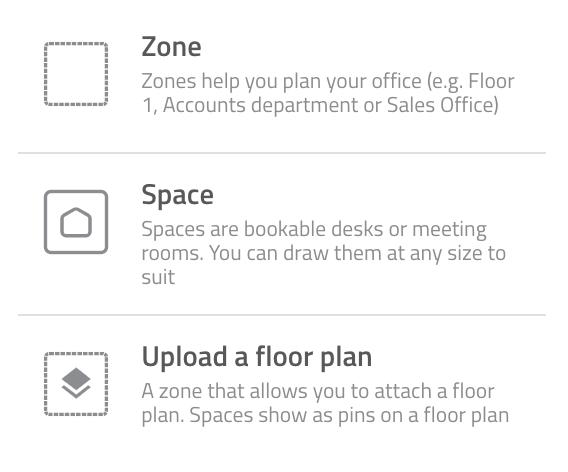
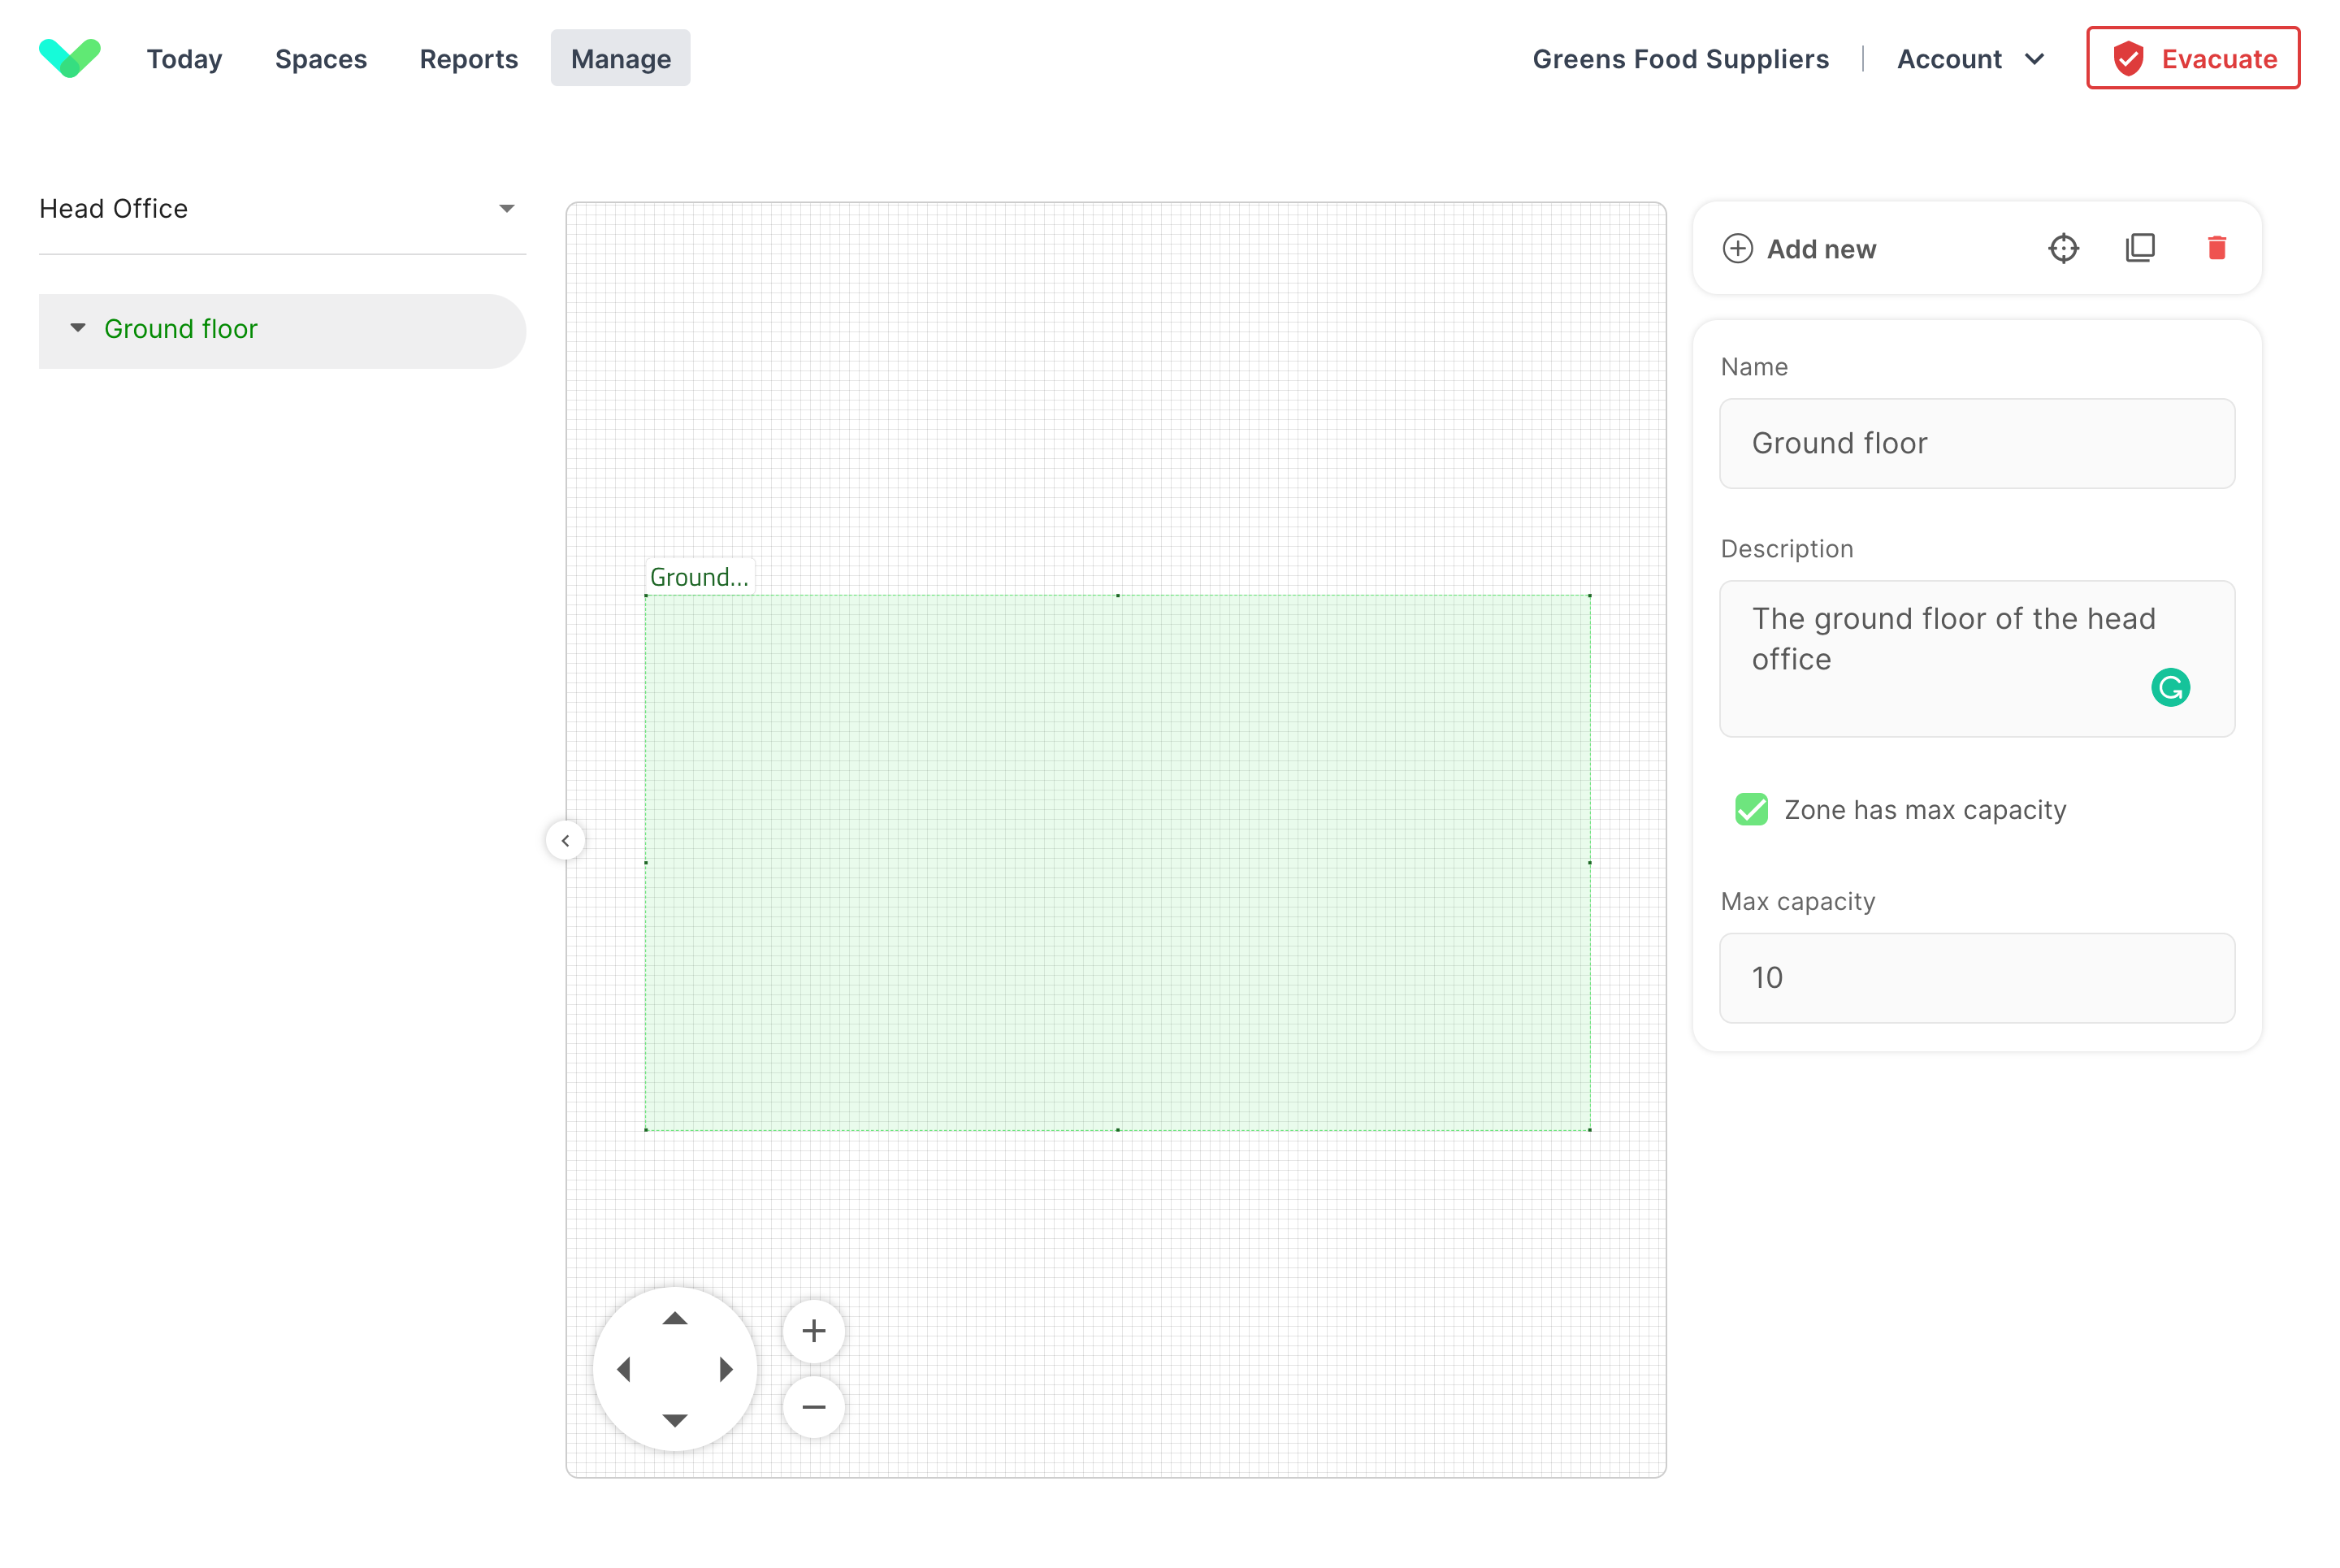
To get started, select Zone and drag in the canvas to create your new Zone. With the new Zone selected, we can add a brief description and a max capacity of 10 people. Once you’ve added the Zone you can move, resize, and edit it.
Tip
You can restrict which zones a repeat visitor is able to book a space in, just head to Manage > Groups > Select group > Members, search for the member, click Edit on the member and then on the left side select Spaces. From there you can set which zones that member is allowed to book a space in. Click here to read more about this feature.
Add a space
Next we’re going to add a desk for one person. Click +Add new then select Space and drag a smaller area inside your Zone to represent our desk. Most desks are rectangles, so we draw a rectangle at a size that makes sense when compared to its parent Zone.
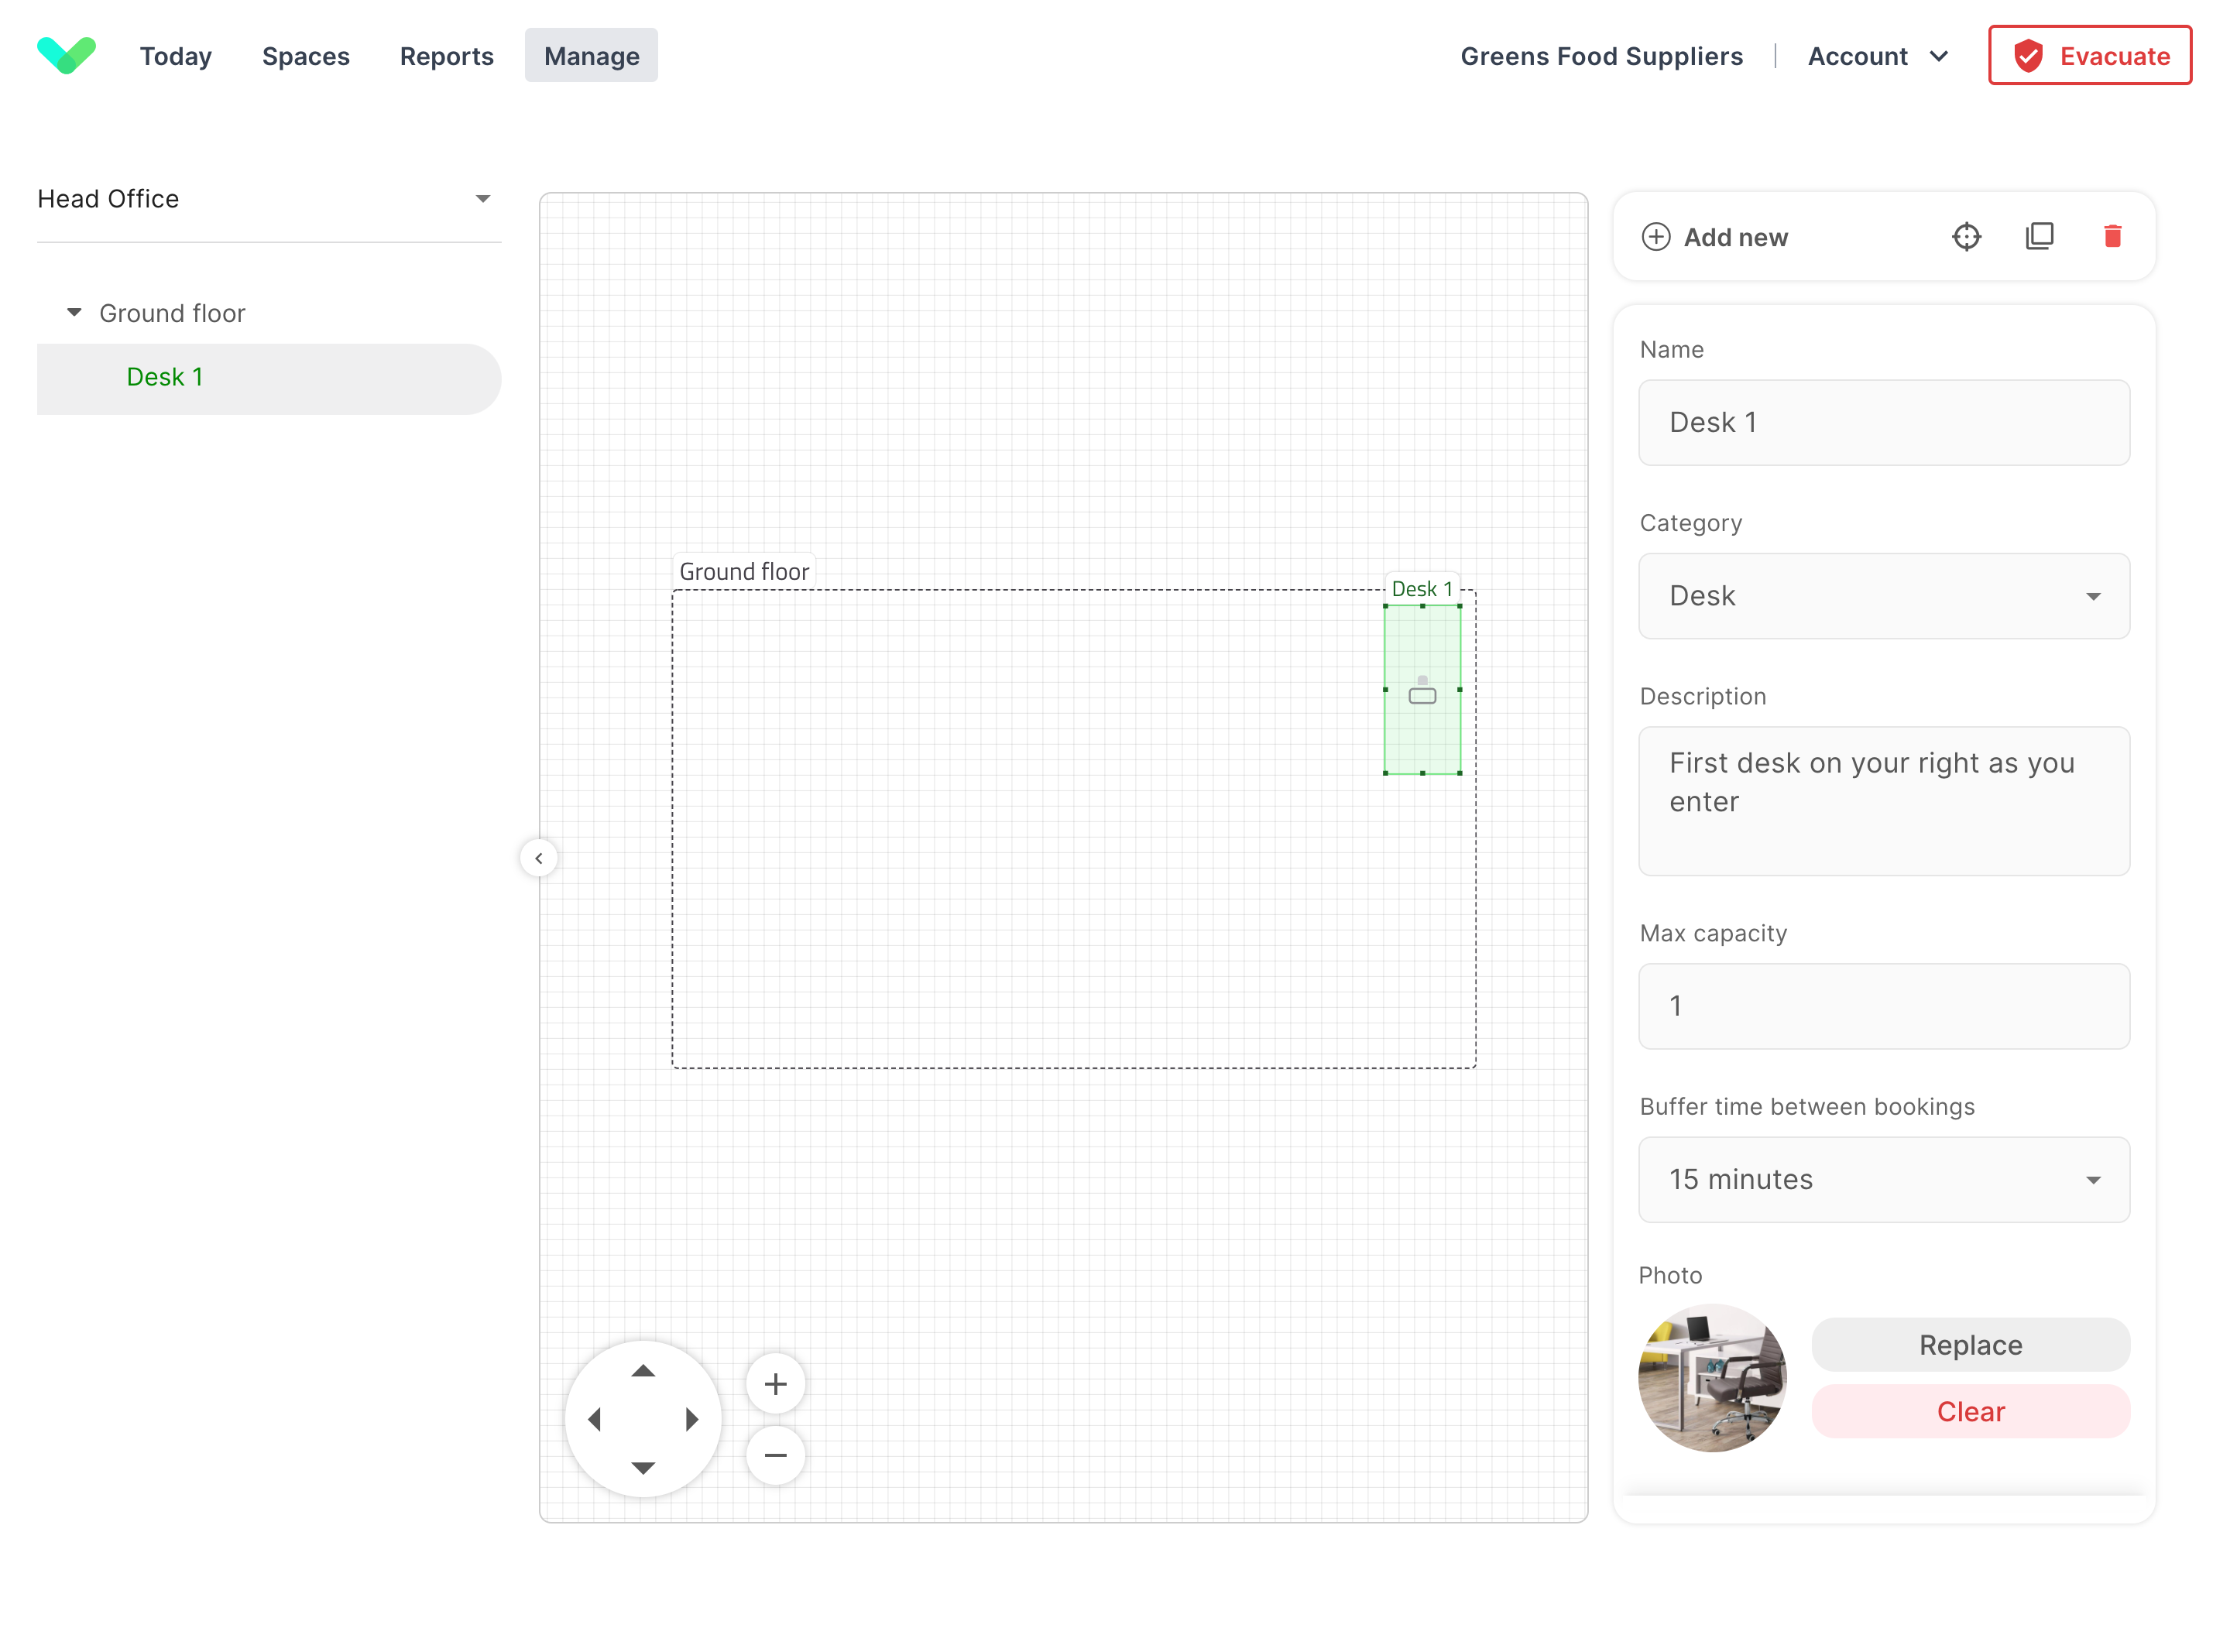
With the space highlighted, we can select the Desk category, add a brief description (including where the desk is located), set the max capacity to 1, upload a photo of the desk, and add Tags which can help your users filter and find the right space when searching. You can also disable the space if it’s not available for booking.
Ignore max capacity
By default all spaces are included in the site max capacity. There might be some spaces you don't want to include in this calculation, for example, desks should be included, but not meeting rooms or parking spaces. To do this tick 'Ignore when calculating occupancy' when creating or inspecting a space.

Buffer time
A space can be booked as soon as the previous booking has finished. If you need to allow for time between bookings - perhaps the desk needs cleaning or the meeting room restocked with refreshments - a buffer time can be added. A buffer time ensures adequate time is left between bookings.

Lock spaces designer
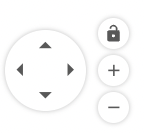
Sometimes, when panning around the spaces designer you may find yourself accidentally dragging a space or zone out of position. You can click the padlock in the bottom left corner to lock the designer meaning you can pan around without moving any spaces.
Tip
Pressing and holding the space bar inverts the current lock behaviour.
If you have the designer unlocked you can press and hold space to pan around and the spaces and zones will be locked in place. Alternatively, with the designer locked you can press and hold space to reposition spaces or zones.
Schedule downtime
Disabling a space means no one can book that space from the time you disable it onwards. You may want to prevent bookings for a period of time, but want users to be able to book the space before and after that - perhaps a meeting room is being redecorated. This is where scheduled downtime is useful. When you edit a space, you should see at the bottom of the modal on the right there is a schedule downtime option.
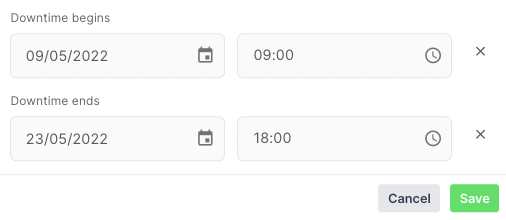
In this example, we’ve scheduled some downtime between May 9th and May 23rd, users can book before and after those dates.
Tip
Spaces with scheduled downtime with have a clock icon, if the scheduled downtime is current you will also see a disabled icon.
For this example, we’ve added 7 more spaces with the category ‘Desk’. An easy way to do this is to click the duplicate button next to the trash can icon whilst you’ve got a space selected, you can then duplicate an existing space with all the same details.
Tip
With the duplicate option selected, hold the shift key on your keyboard as you click to create multiple copies of a space. As you create each copy, the space’s name will update with the next number automatically, so if you name the first desk 'Desk 1', the copies will be named 'Desk 2', 'Desk 3' and so on. You can also copy entire Zones with the duplicate option.
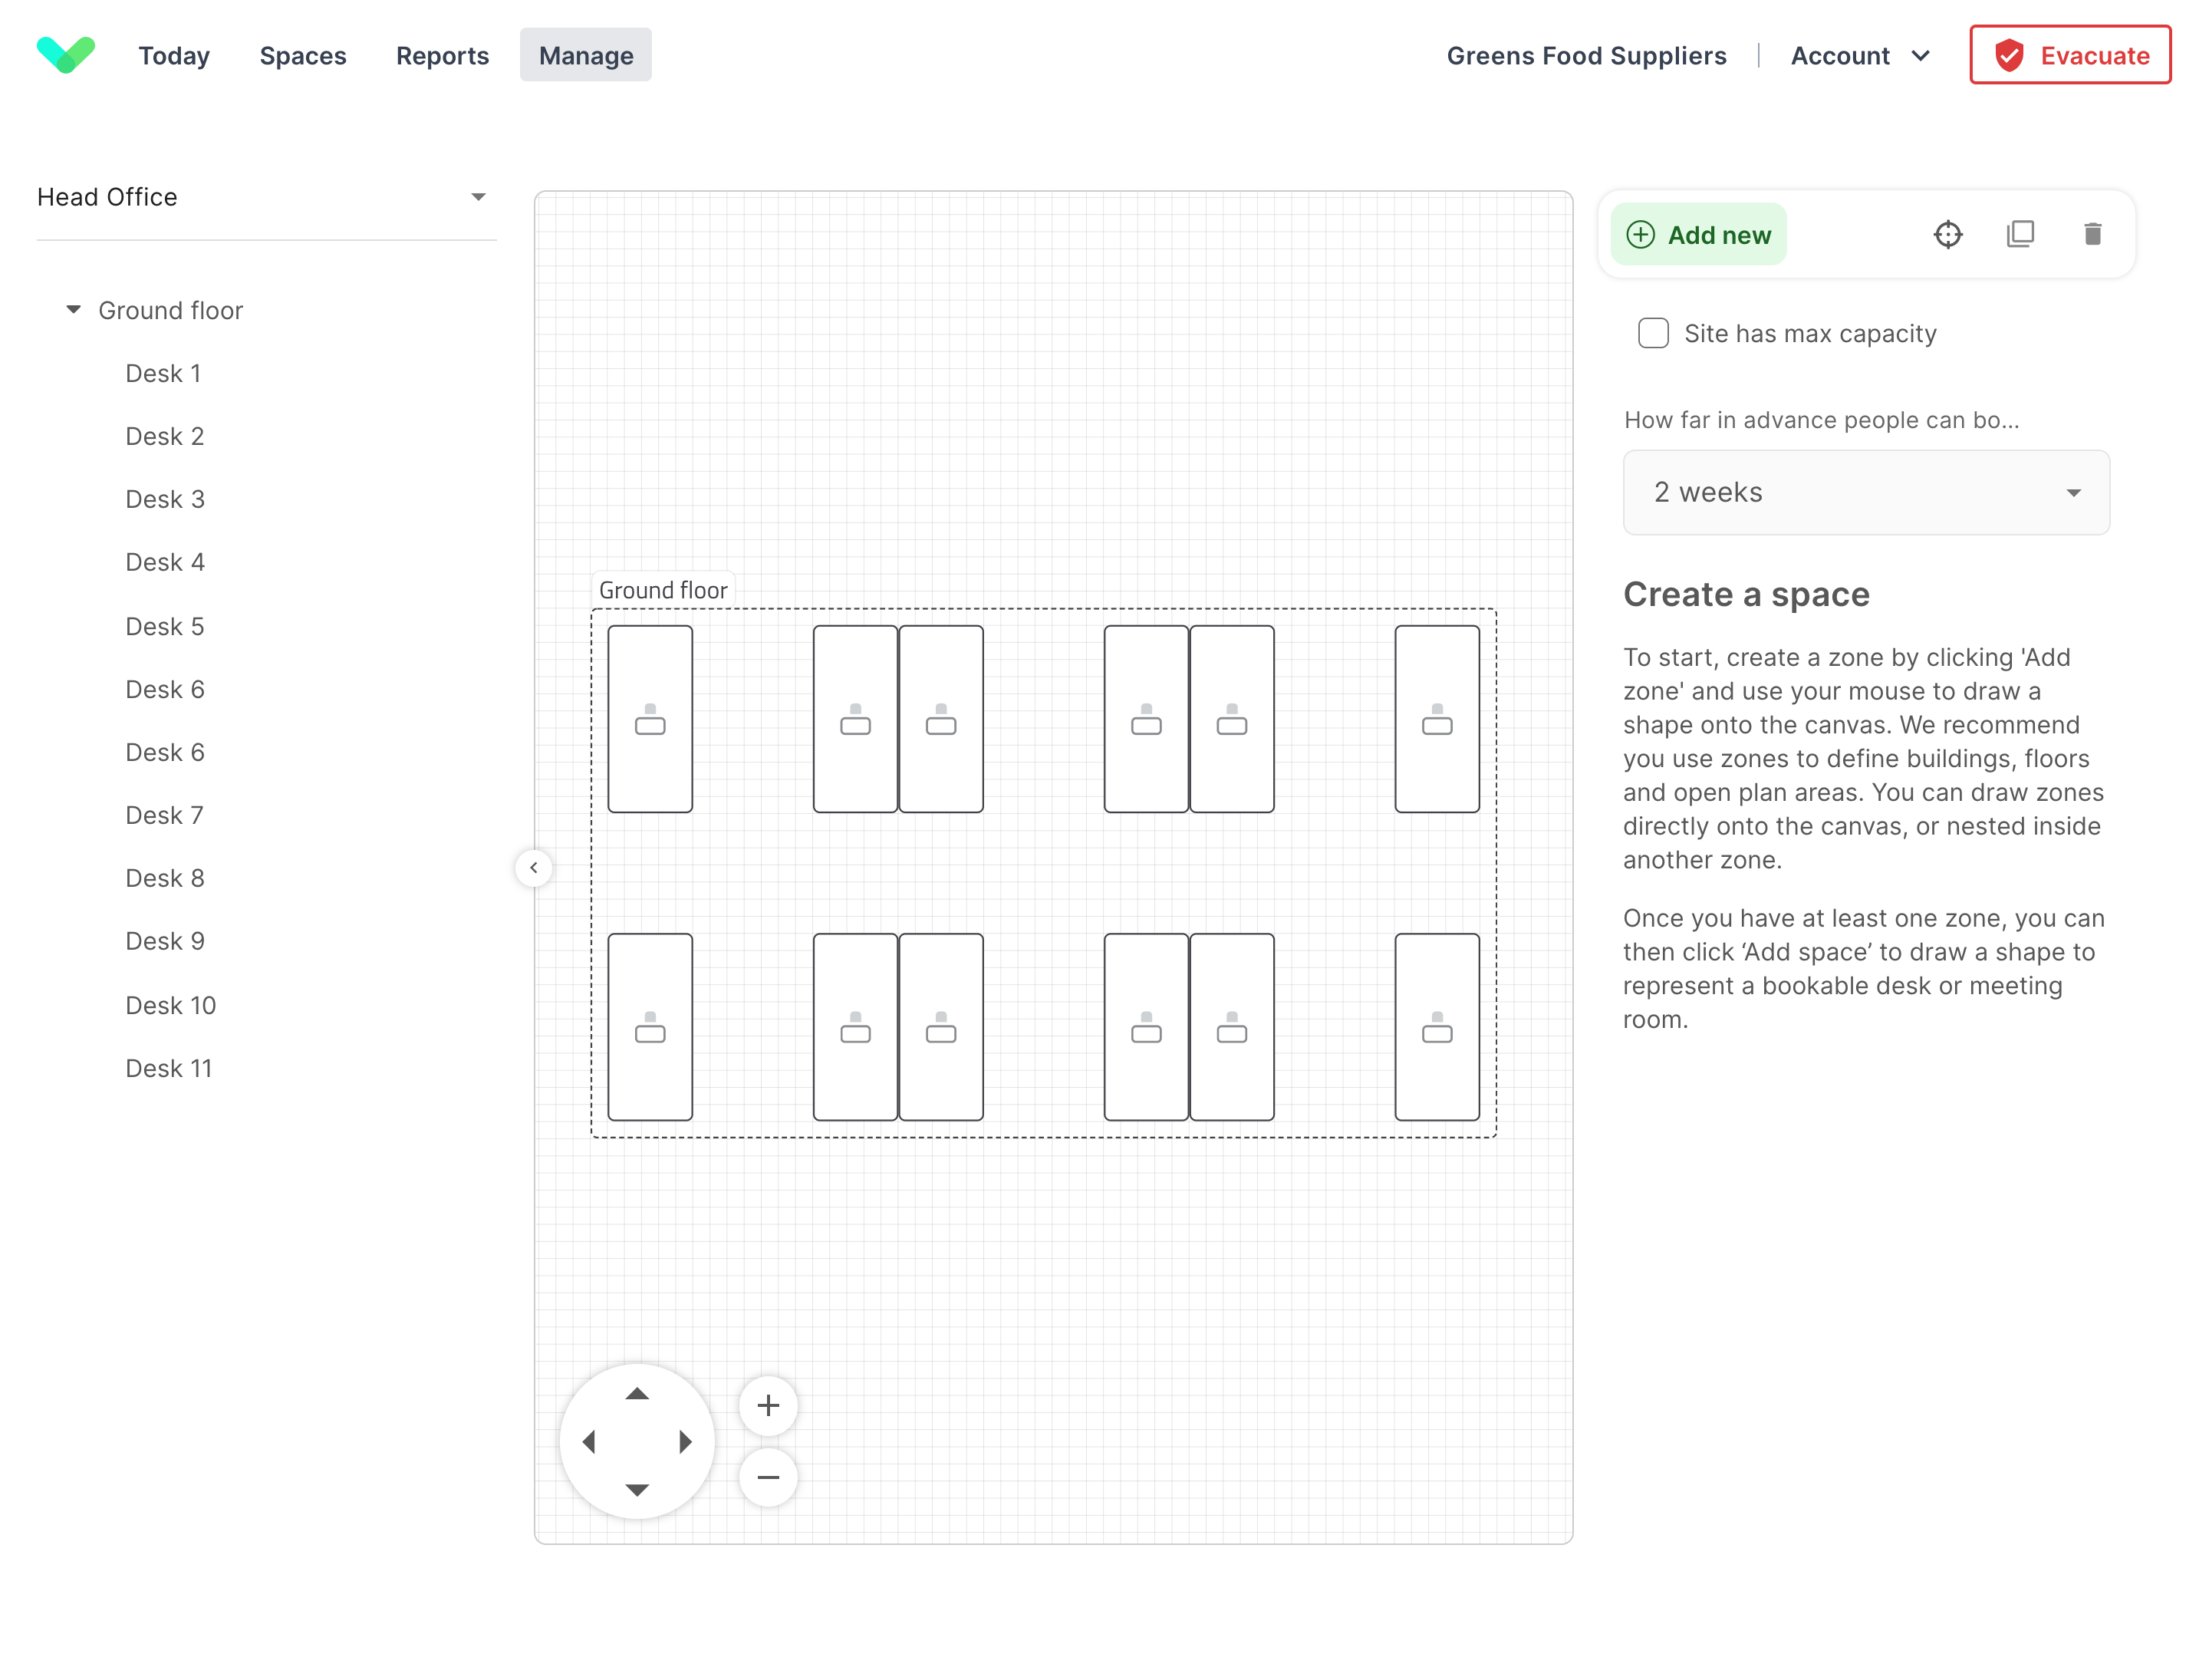
In addition to our desks, we’ve also got a larger table that can be used for meetings. Click the +Add new button and select Space and draw a larger area. We’ve named this ‘Meeting table' added the category ‘Meeting room’ (we’ll talk a bit more about this later), added a description, set the max capacity to 6 and added a ‘Conference phone’ tag showing you can make conference calls from this table.
Tip
When adding tags, press the return/enter key to save each tag. You’ll know it’s saved because it changes to a grey box with a delete icon (see below for an example)
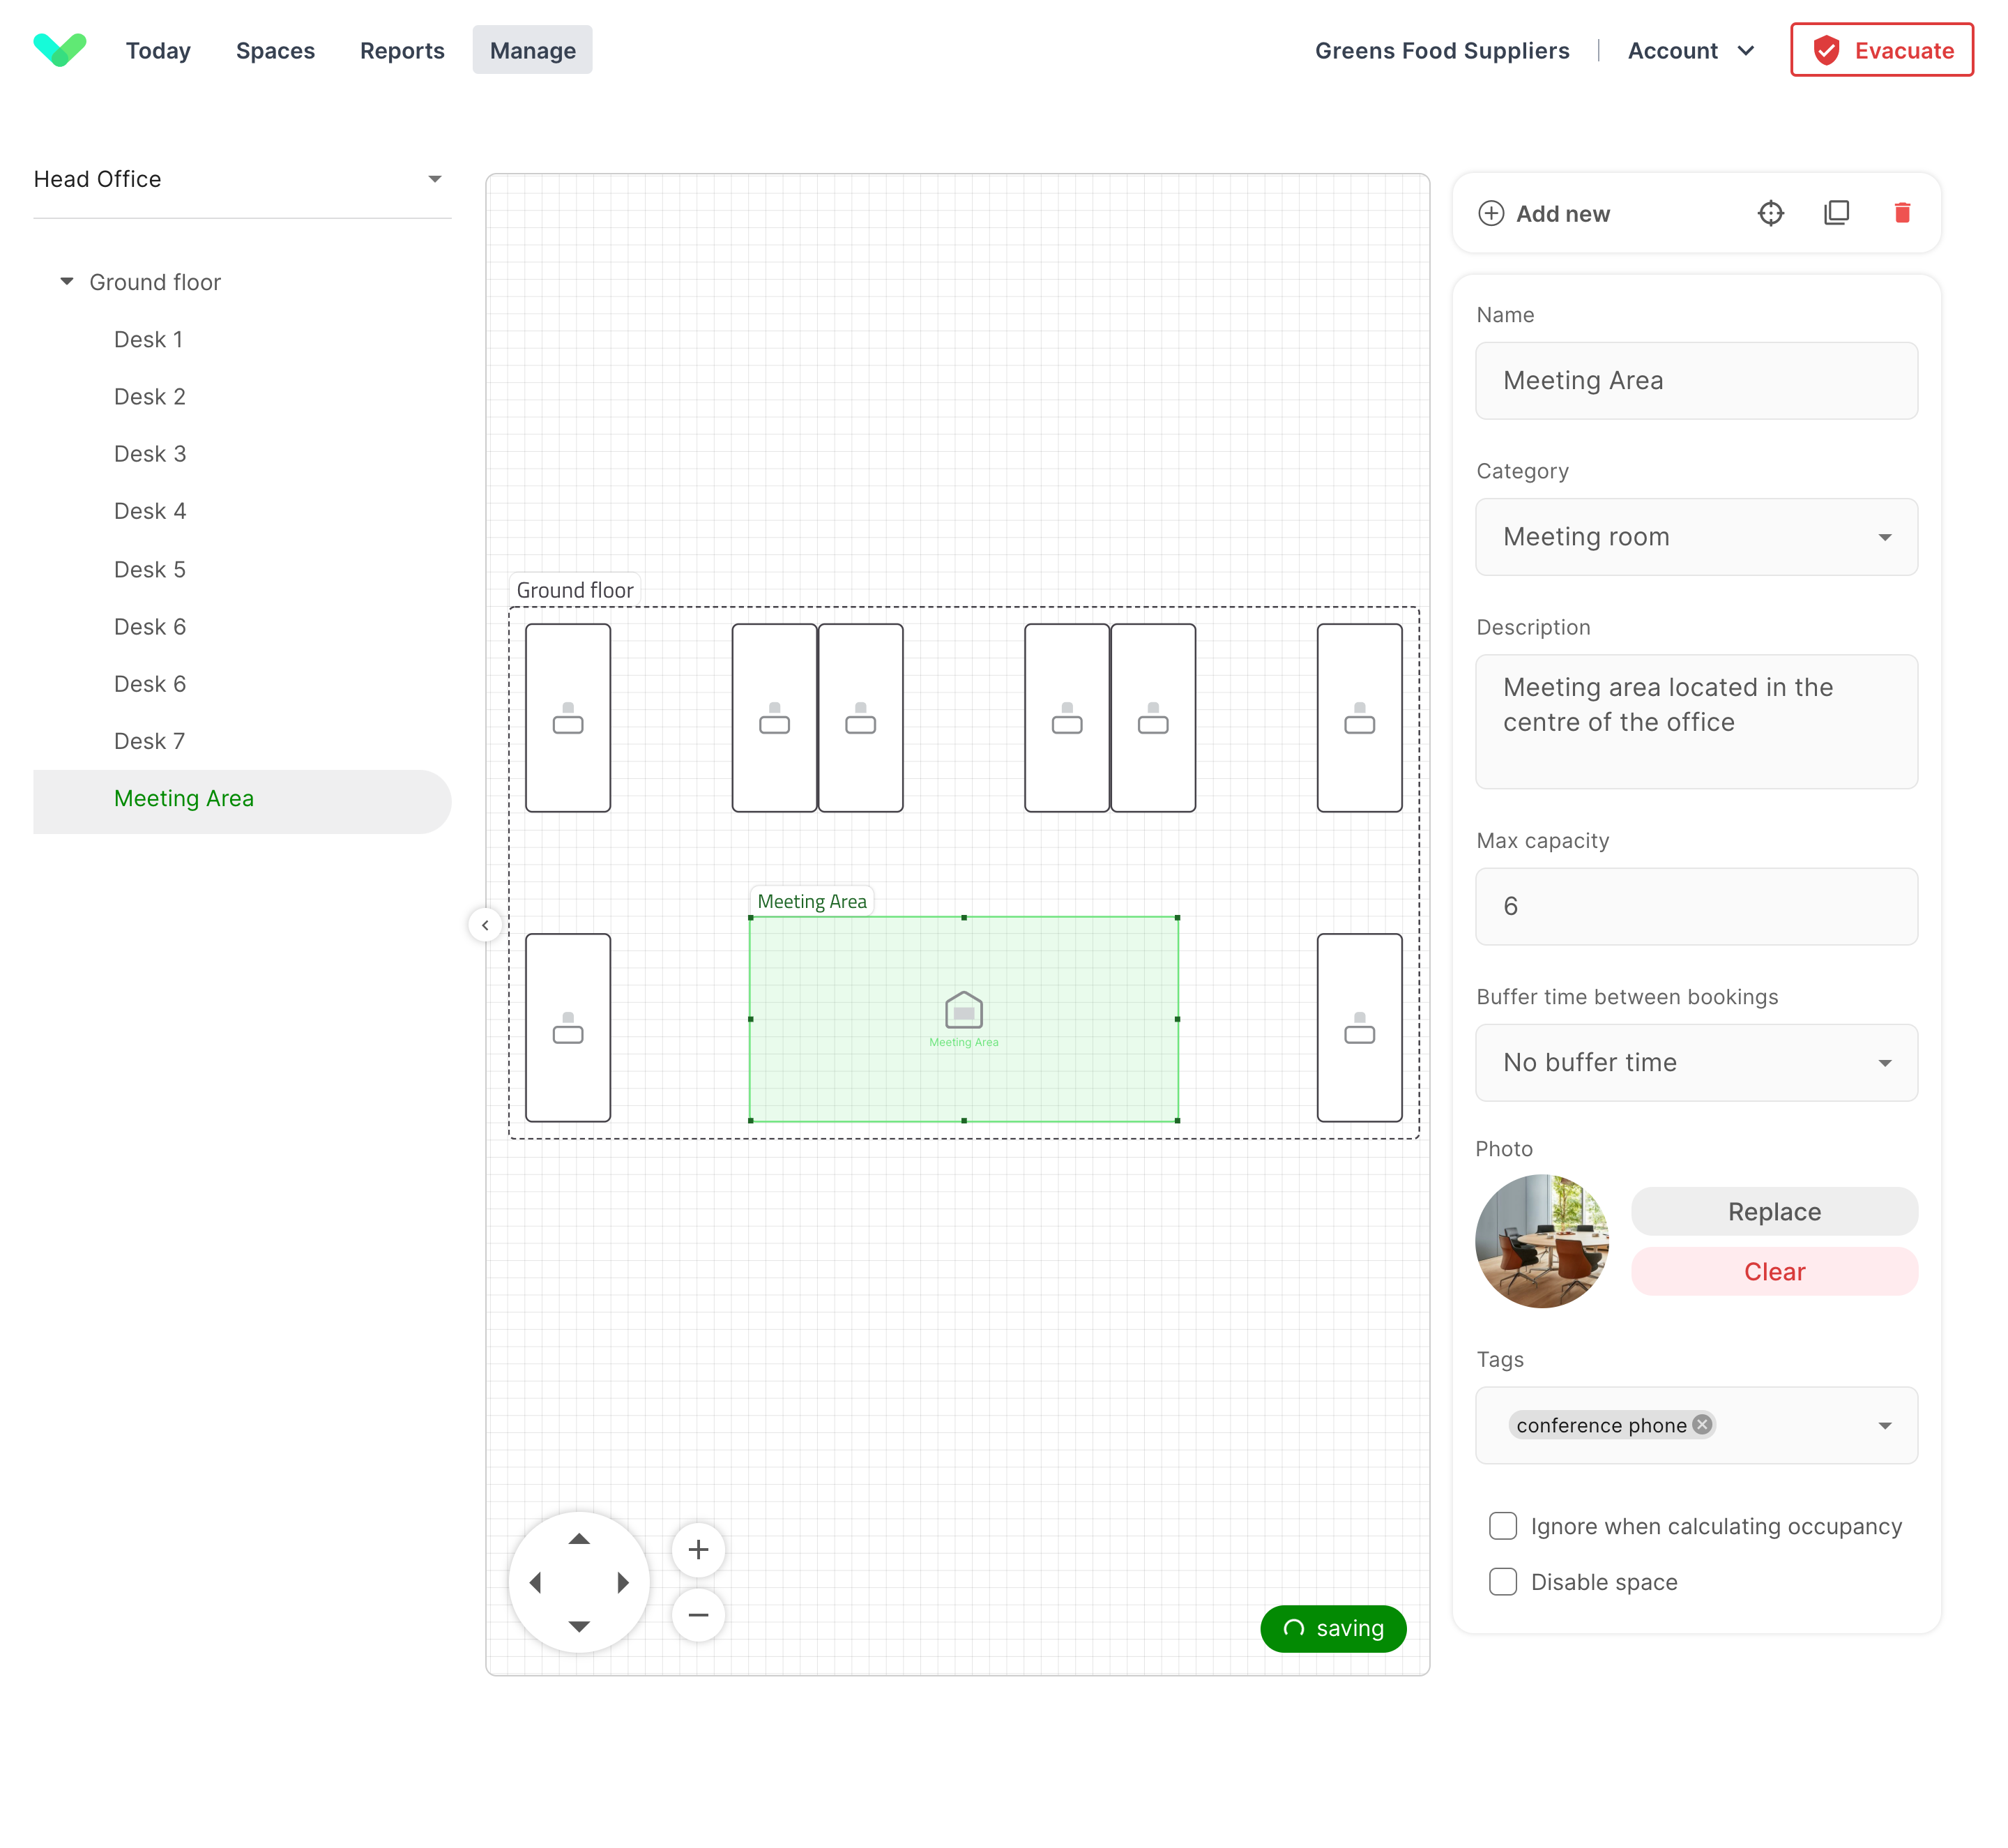
The last thing we need for this plan is to limit the number of people who can book the desks in each area of the office.
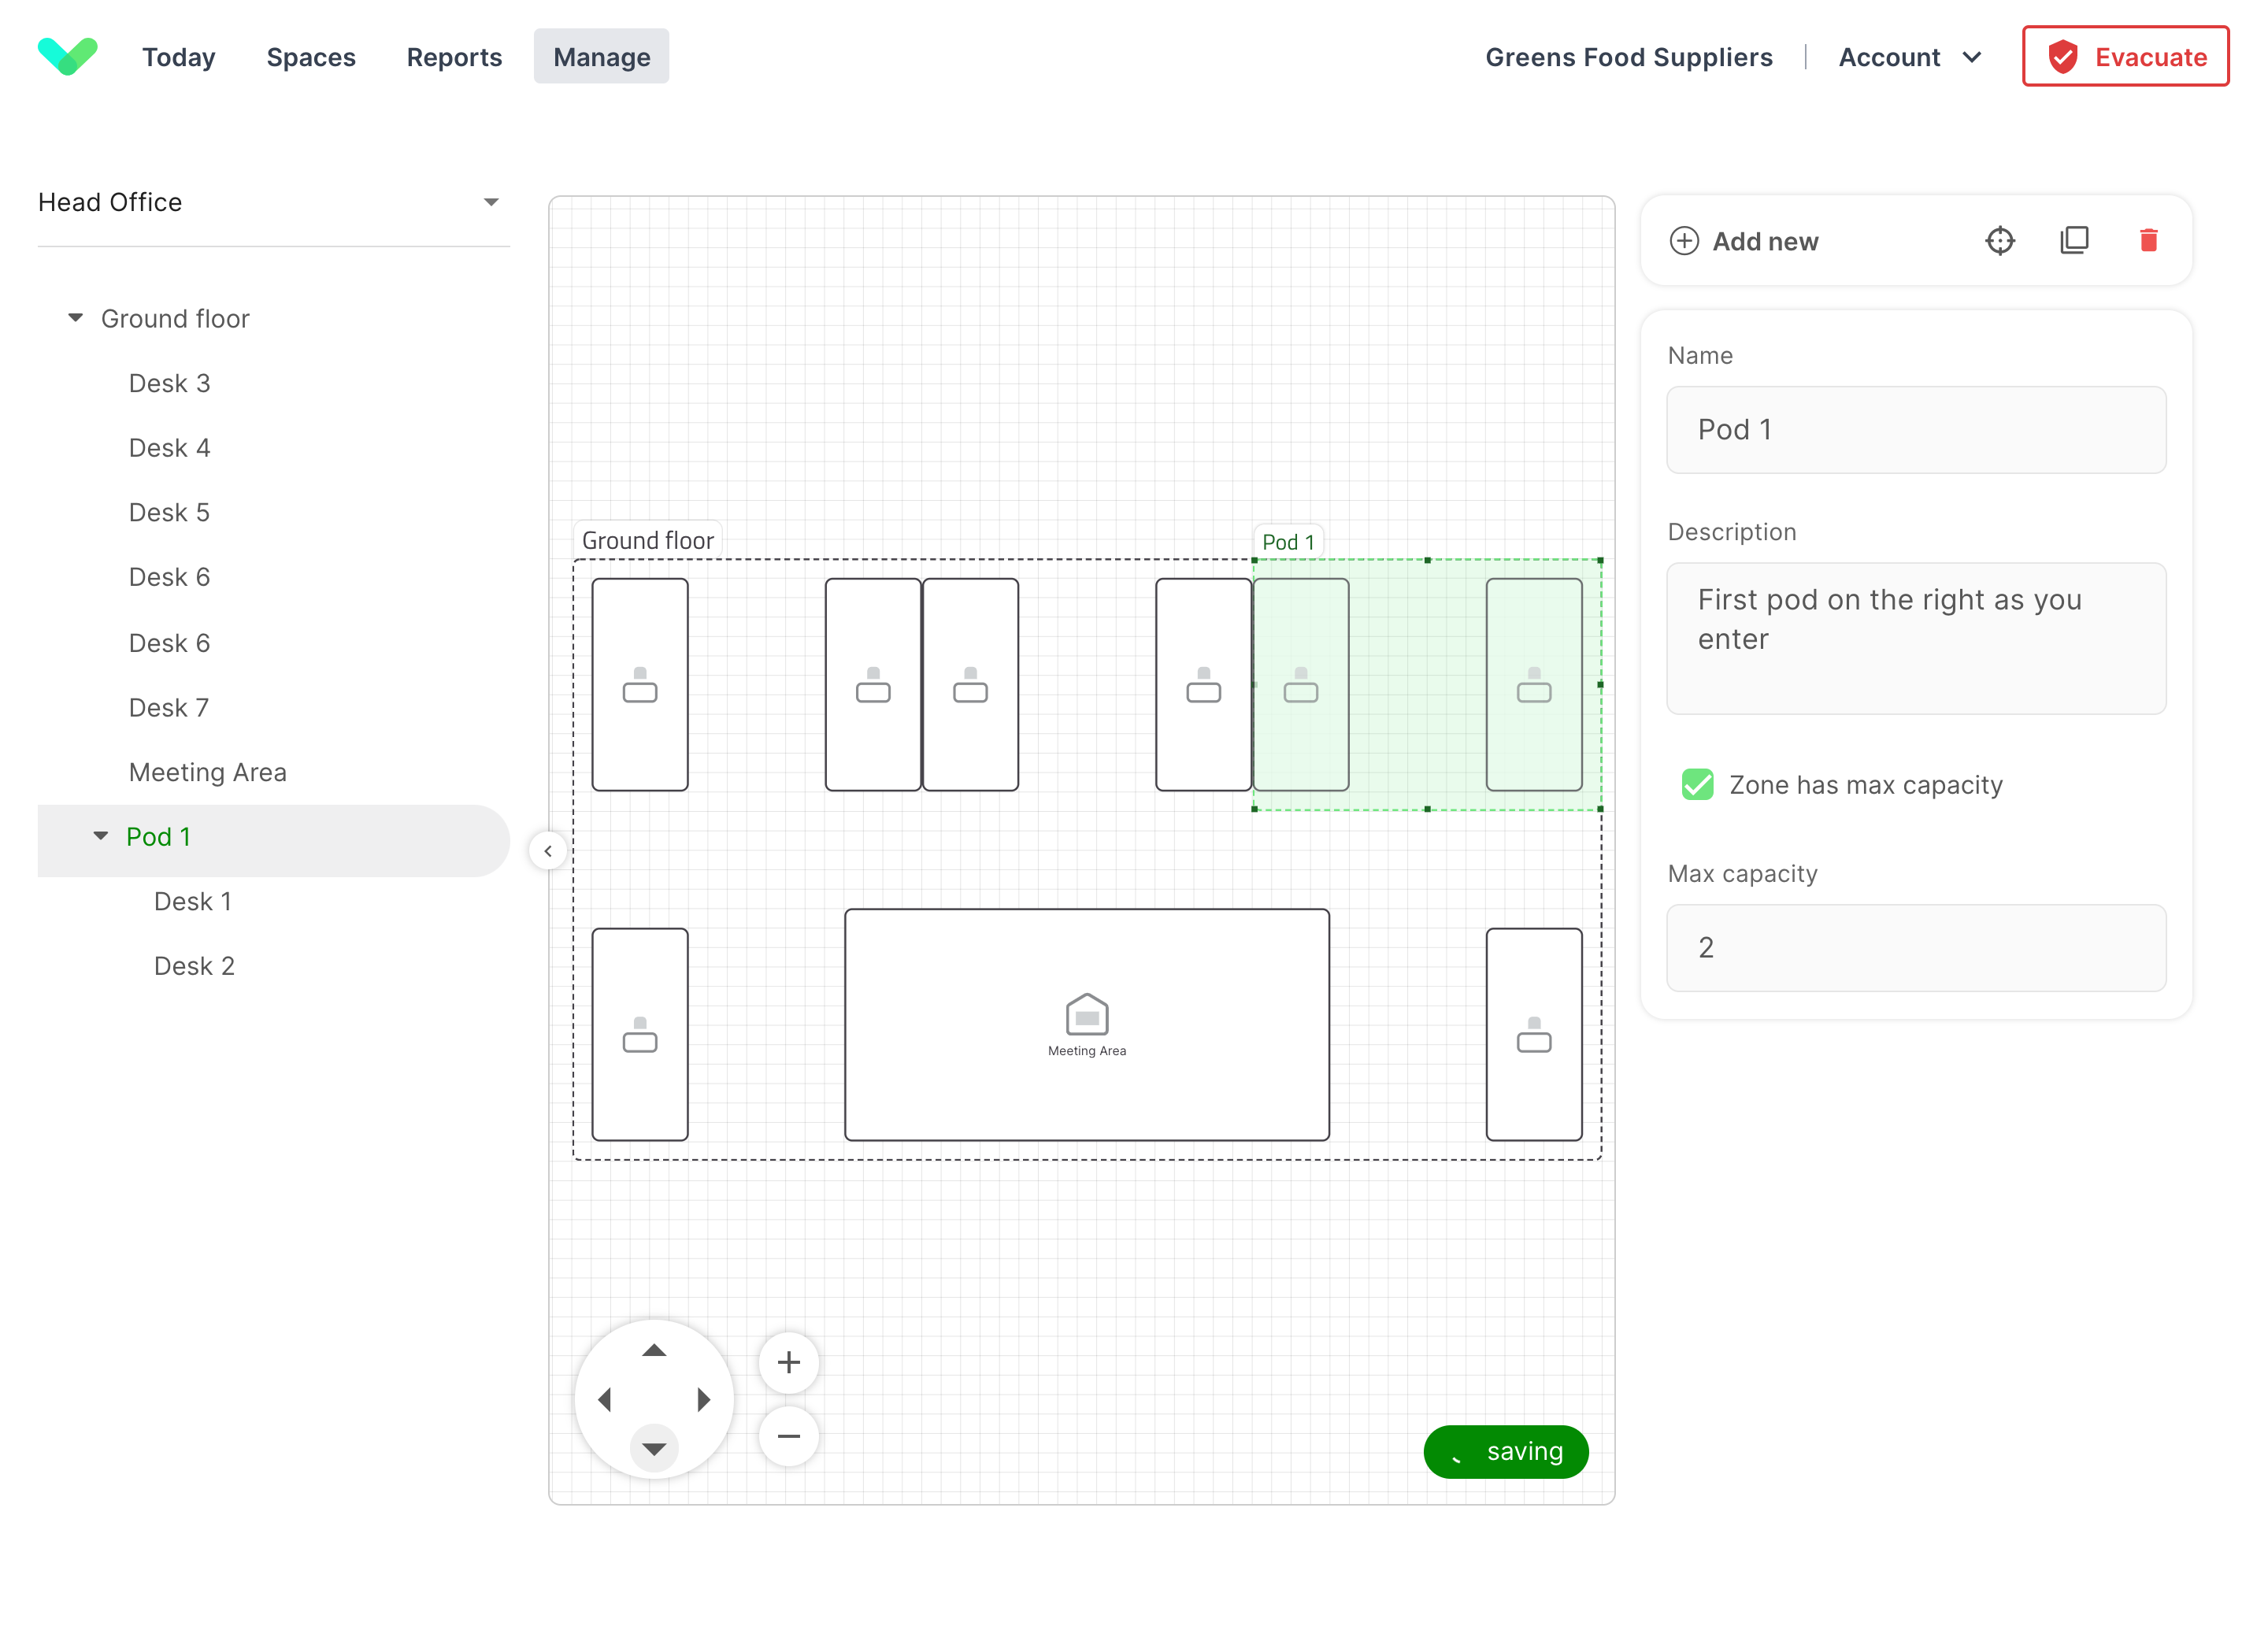
We’ve added a new zone called ‘First pod’ that contains the first 3 desks to make a pod of desks. We can now set the max capacity for this pod to 2. This means only 2 of the desks can be booked at any one time. This helps ensure people are evenly distributed throughout your workplace.
Add a floor plan
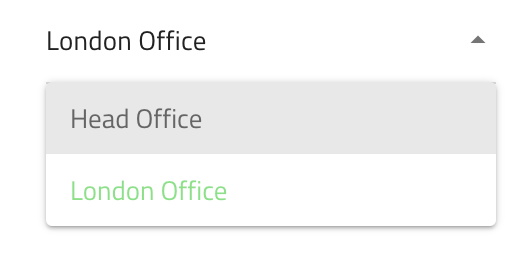
If you have a larger office or an existing floor plan you may prefer to add a floor plan to the Spaces designer. We will add a floor plan to a different Sign In App site, you can change site by clicking the site name at the top of the column on the left side and selecting from the dropdown.
To add a floor plan click +Add new and select Add a floor plan and then draw an area, this will contain your floor plan so try and make it roughly the same shape, but you can always edit this after.
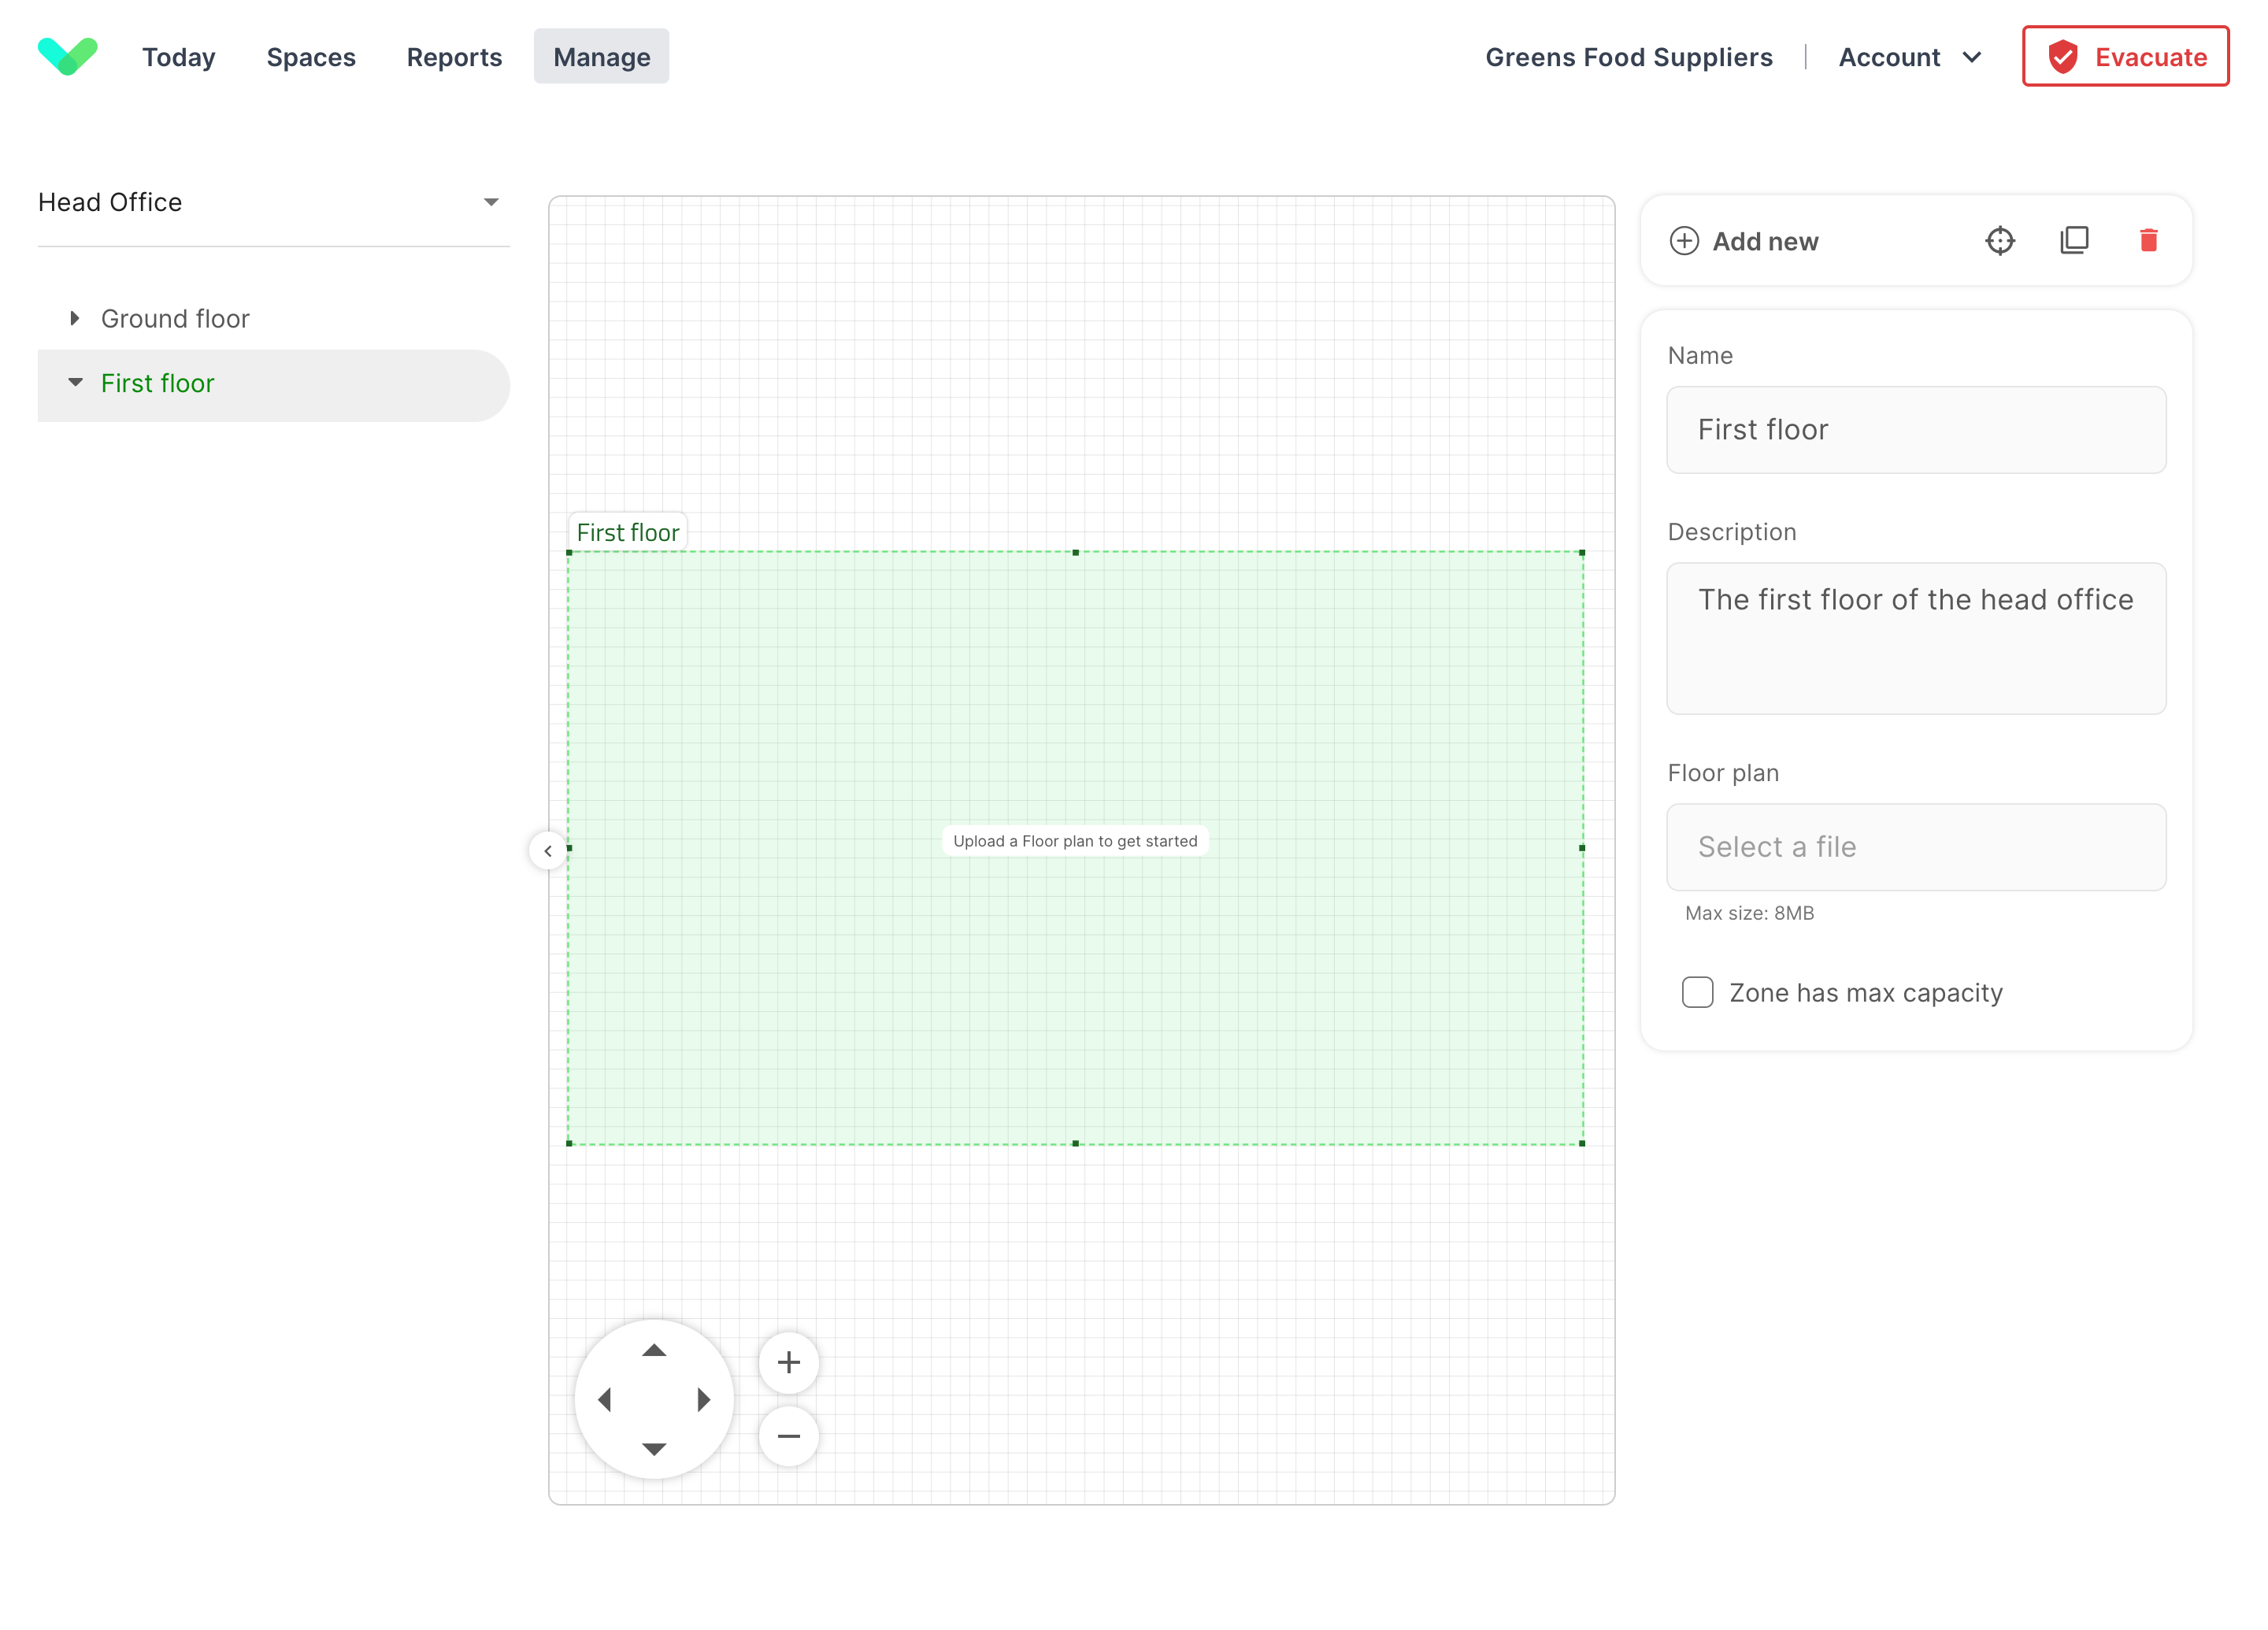
Click Select file under 'Floor plan' to and then select the floor plan you'd like to add to the Spaces designer.
Important
Add a floor plan supports JPG and PNG, please ensure your floor plan is in one of these formats.
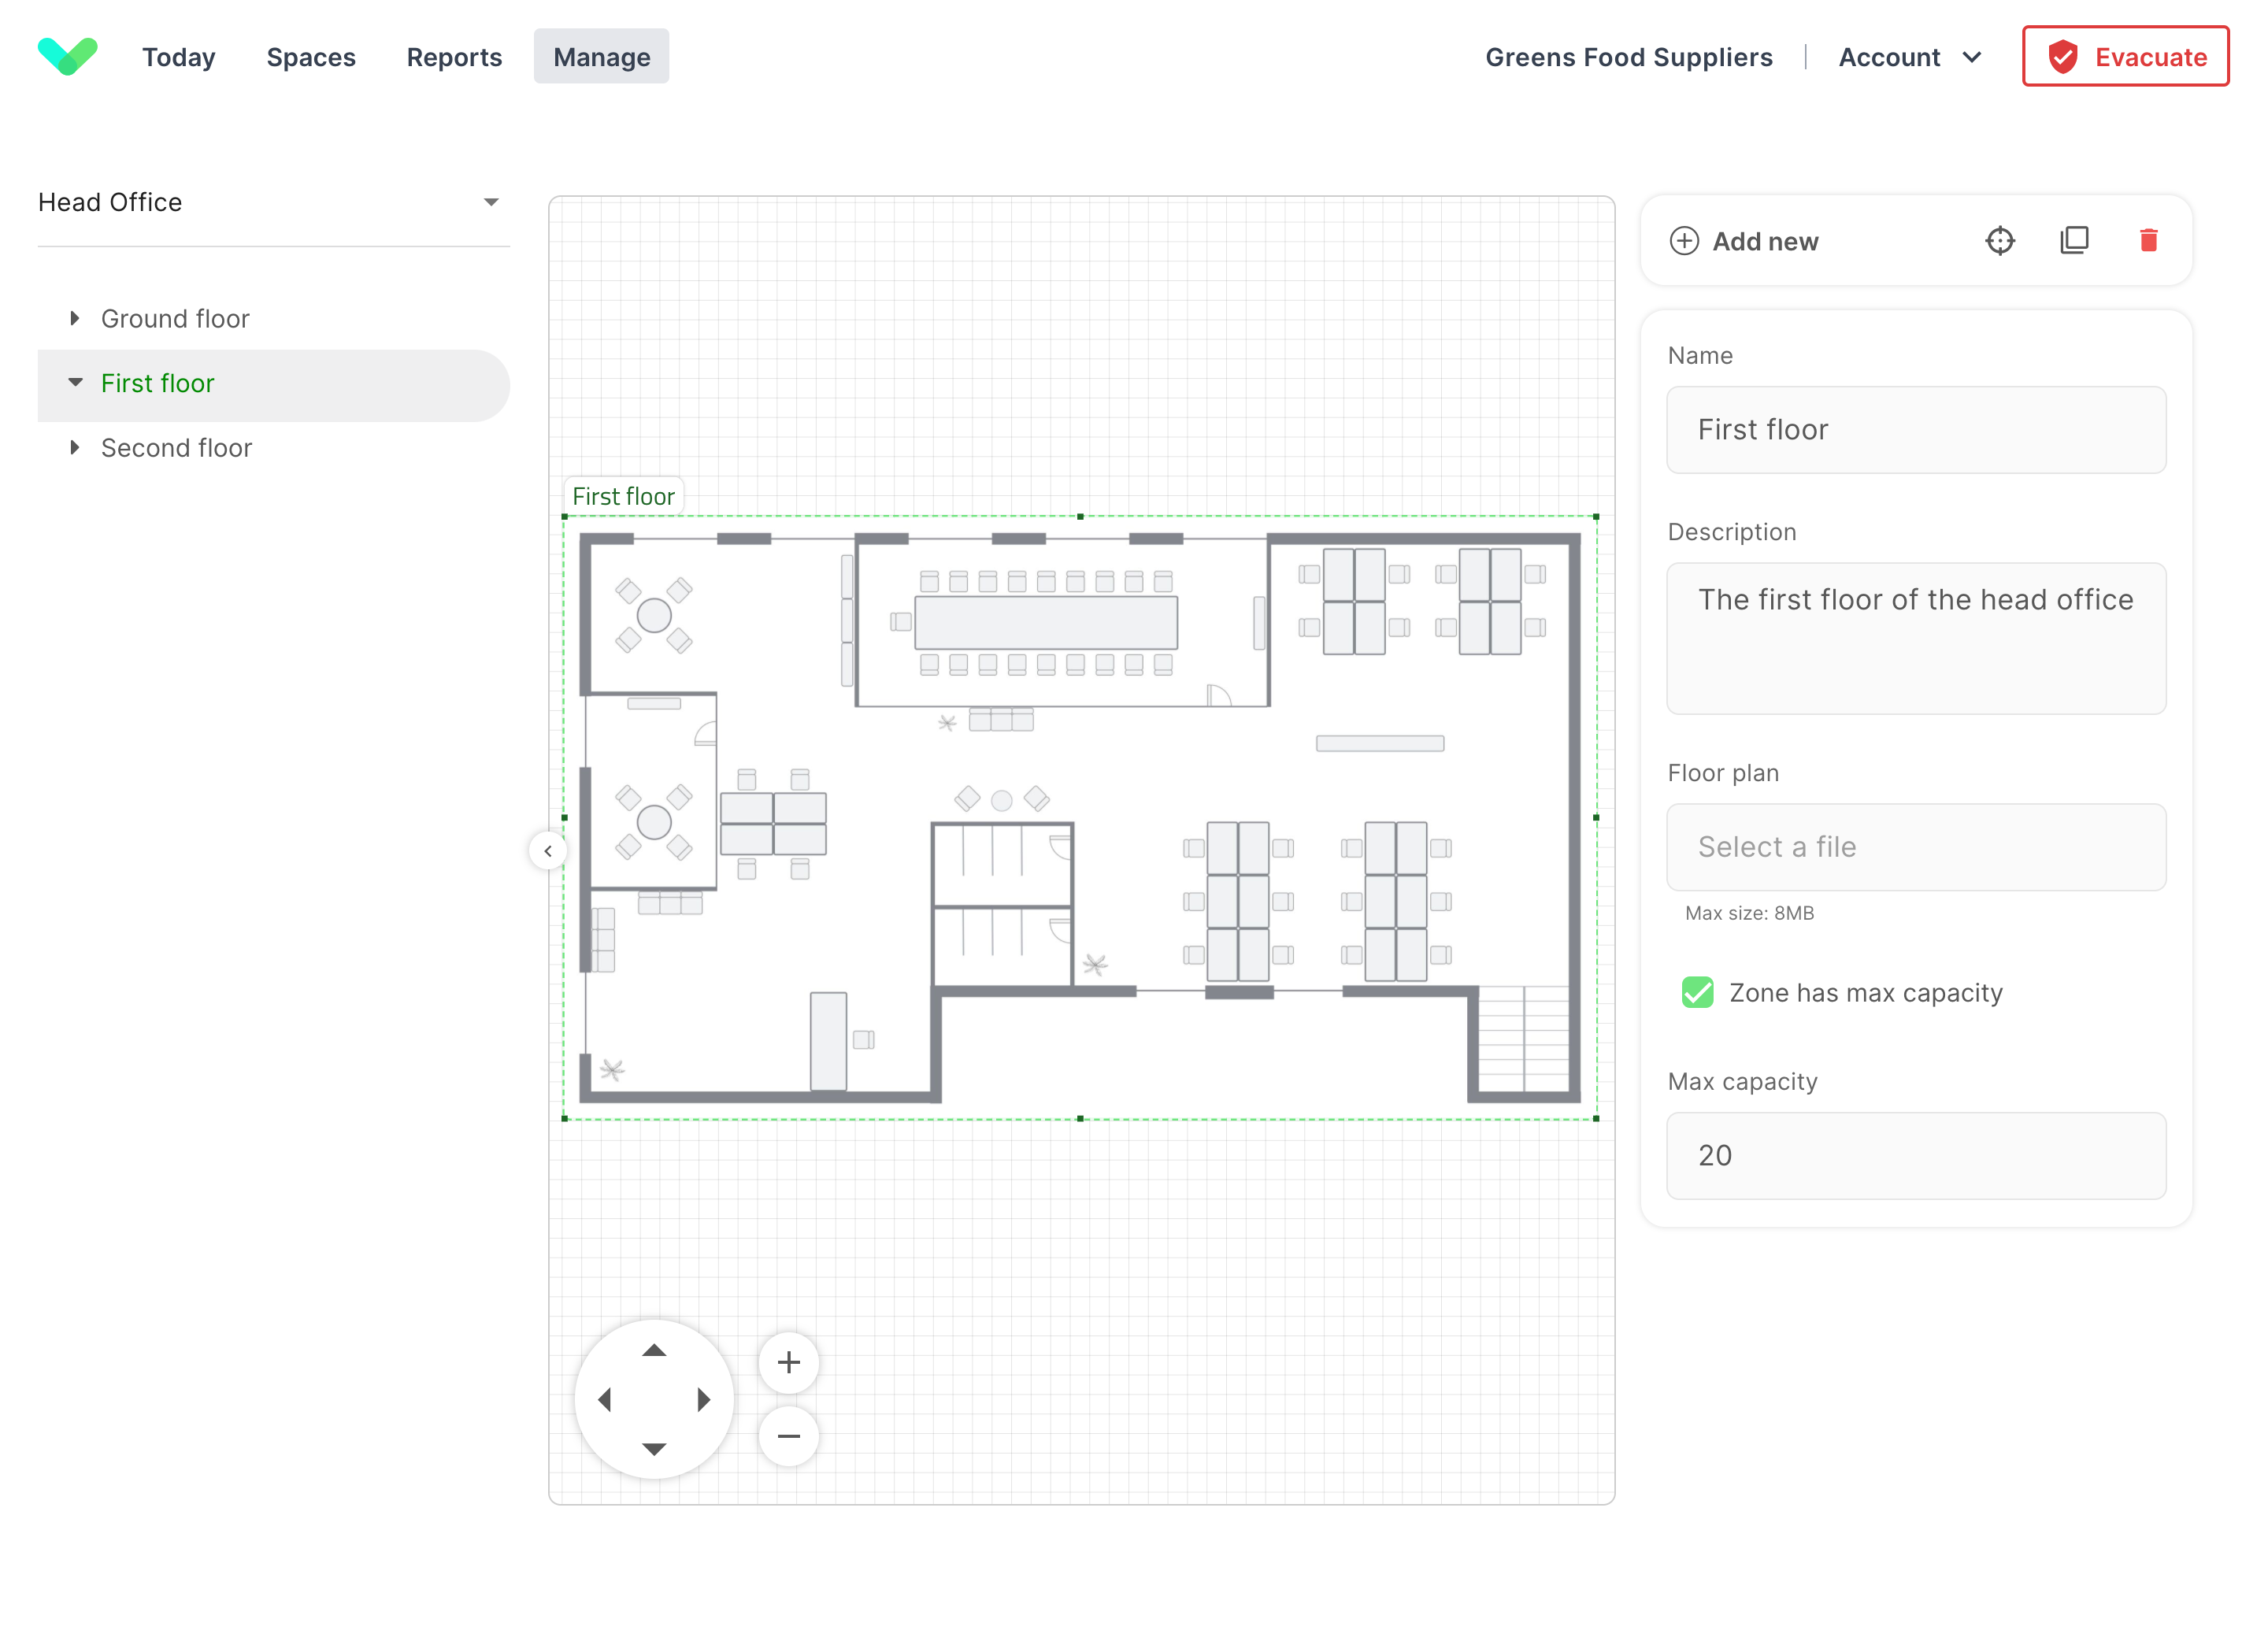
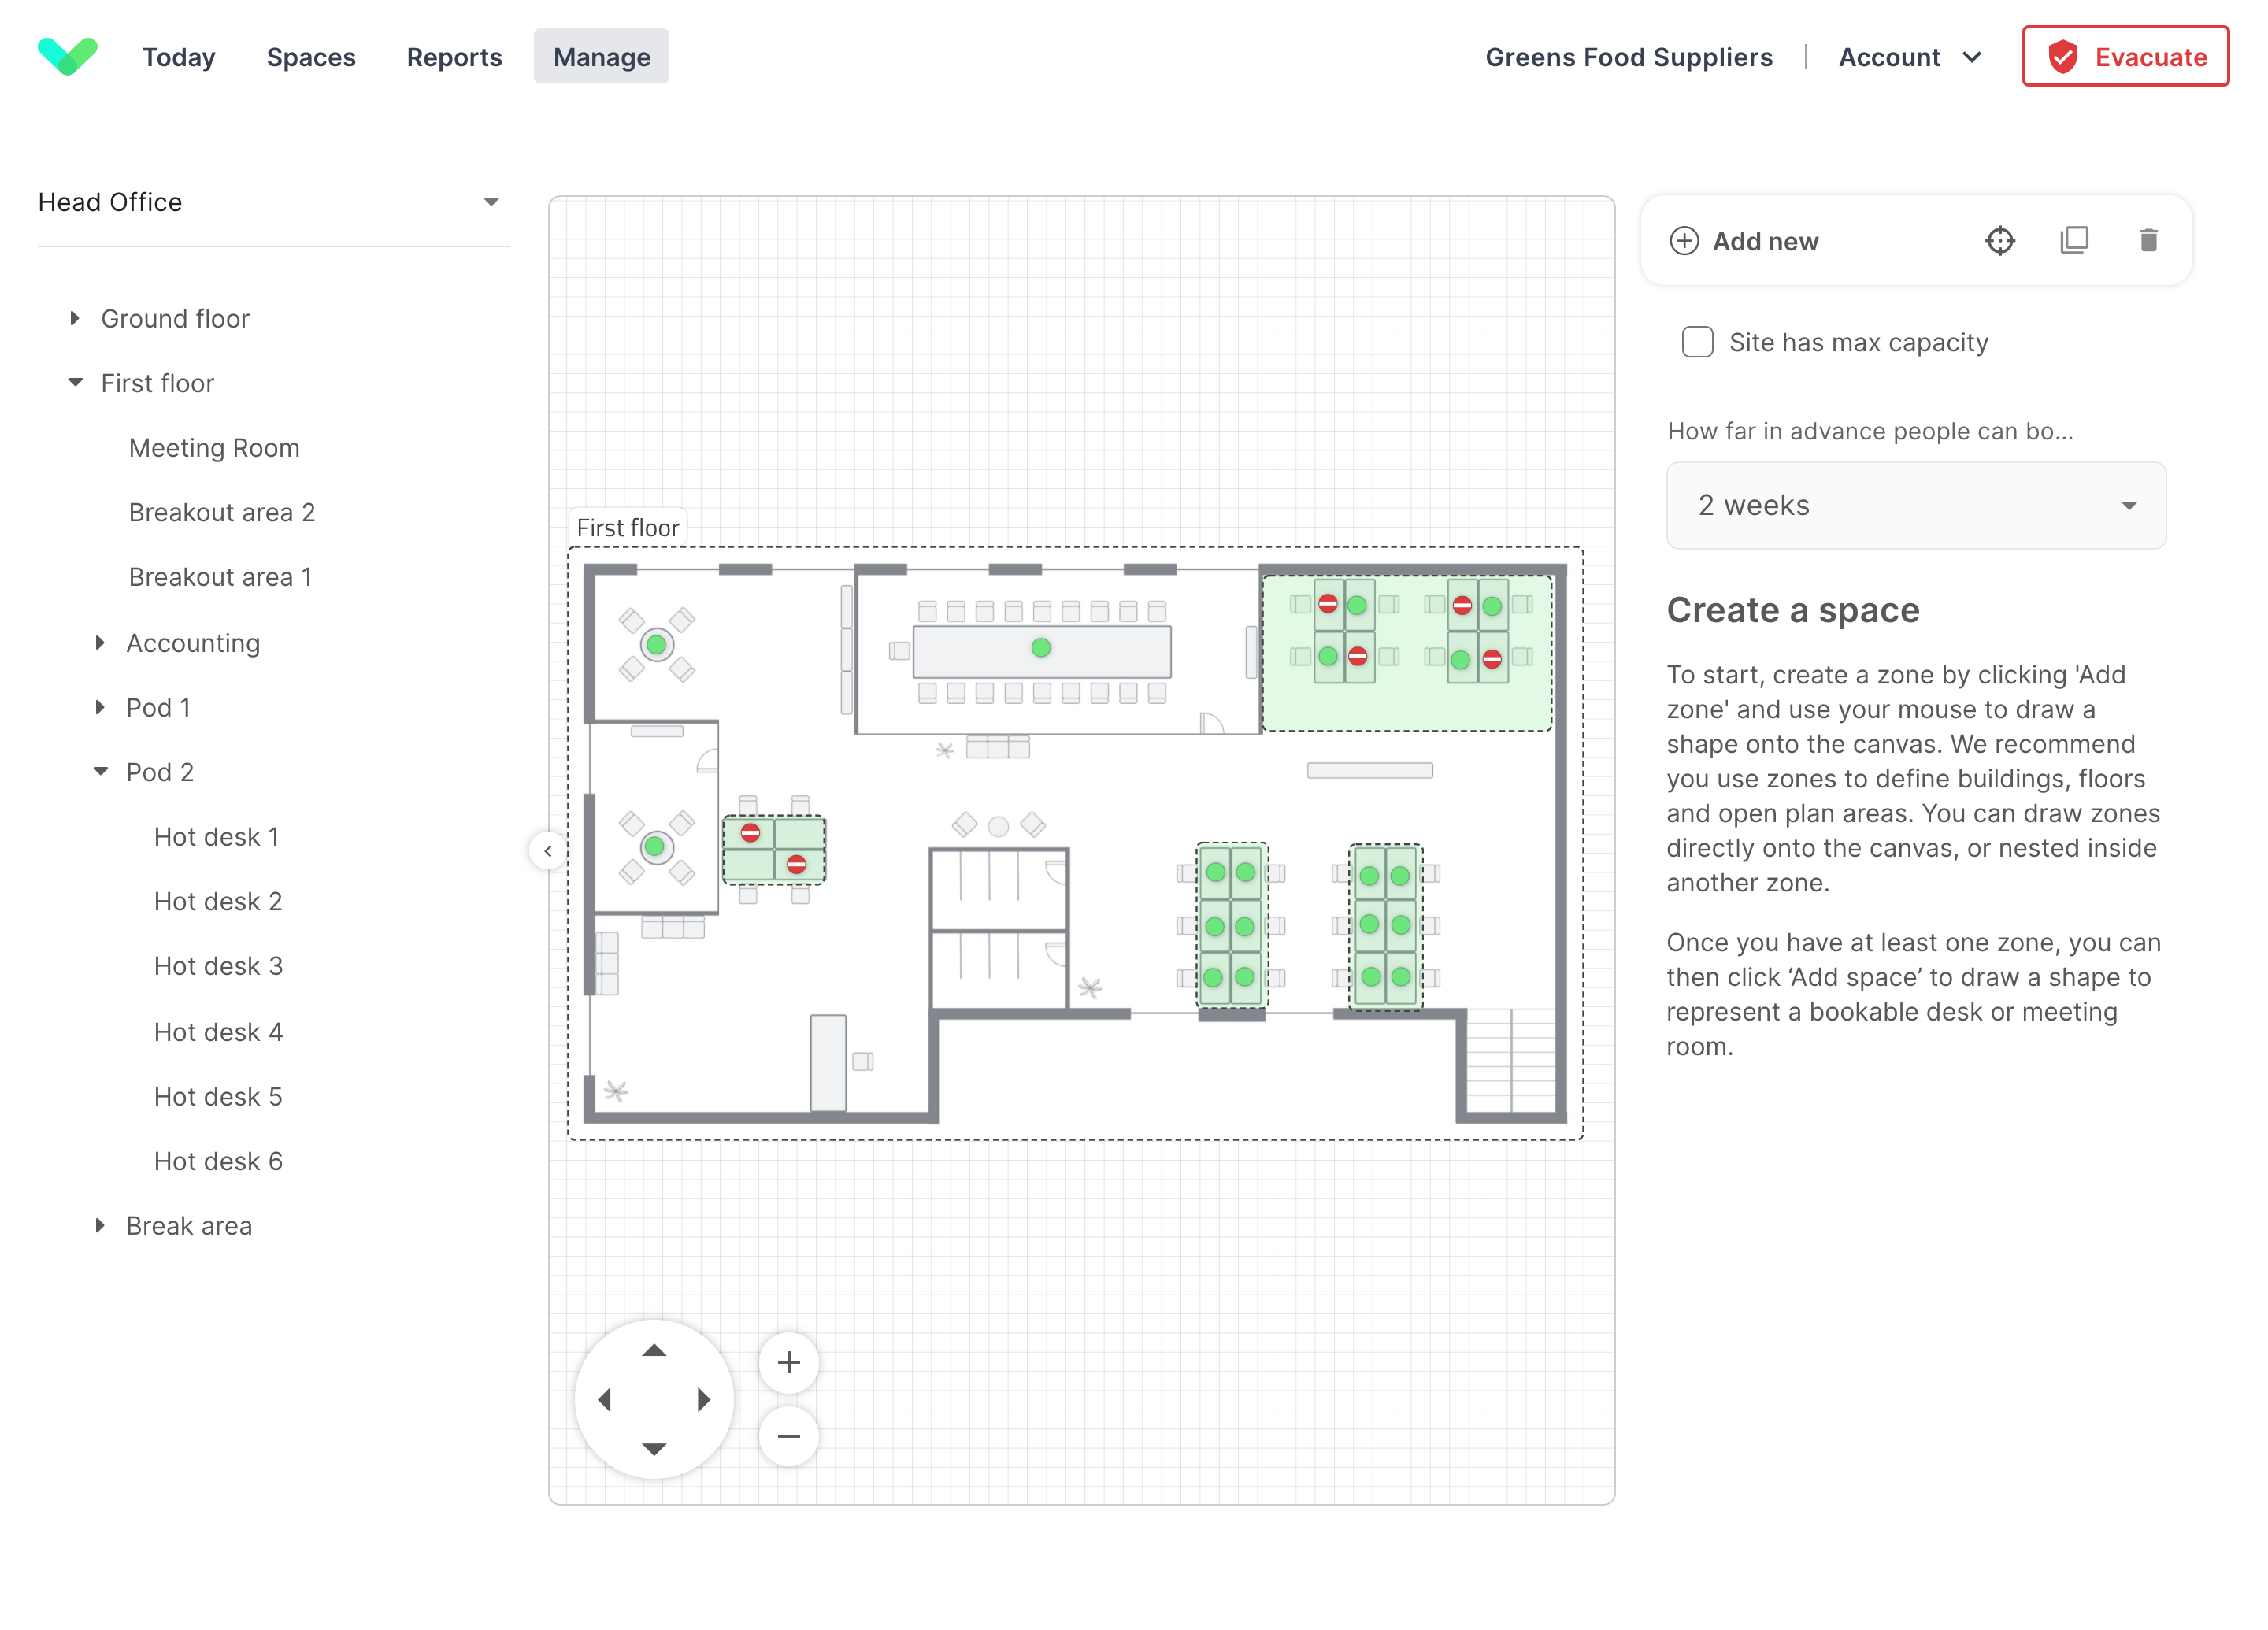
Now we have uploaded the floor plan we can start creating the spaces and zones. For spaces this process is slightly different, but the same principles apply. Click +Add new and select Space and instead of clicking and dragging the area of the desk, meeting room or space, you can now pin a space onto your floor plan. For spaces the same features are available including max capacity, descriptions, images, and disabling spaces. Zones work just the same as without the floor plan, click +Add new and select Zone, click and drag the area to create a Zone. You can see below an example of how this might look on a floor plan.
Book a space
While we recommend using Sign In App Companion for staff to book Spaces, it is possible to book a space using the online management portal. Portal users can book spaces for themselves and other staff members by selecting the repeat visitor the booking is for. To book a space, select the Spaces tab and click Book a space. From here, add the date of the booking, if it’s for the whole day or a specific time, select the capacity required, and then click Search. Find the space you’d like to book from the spaces that match your search criteria and then click Book space. The next screen shows the booking summary, select the repeat visitor the booking is for and click Book now.

Tip
During the booking process you can search the results if you're looking for a specific space to book.
Add notes
You can add notes to a booking, allowing you to make important bits of information visible. This could include the name of the meeting when booking a meeting room, recording the client you’re meeting or if refreshments are required. You can add more notes when editing a booking.
Send email confirmation
When booking a space you can choose to Send email confirmation. This will send an email to the repeat visitor the space is booked for. The repeat visitor must have a valid email as a personal field in the Sign In App portal.
Viewing bookings in the portal
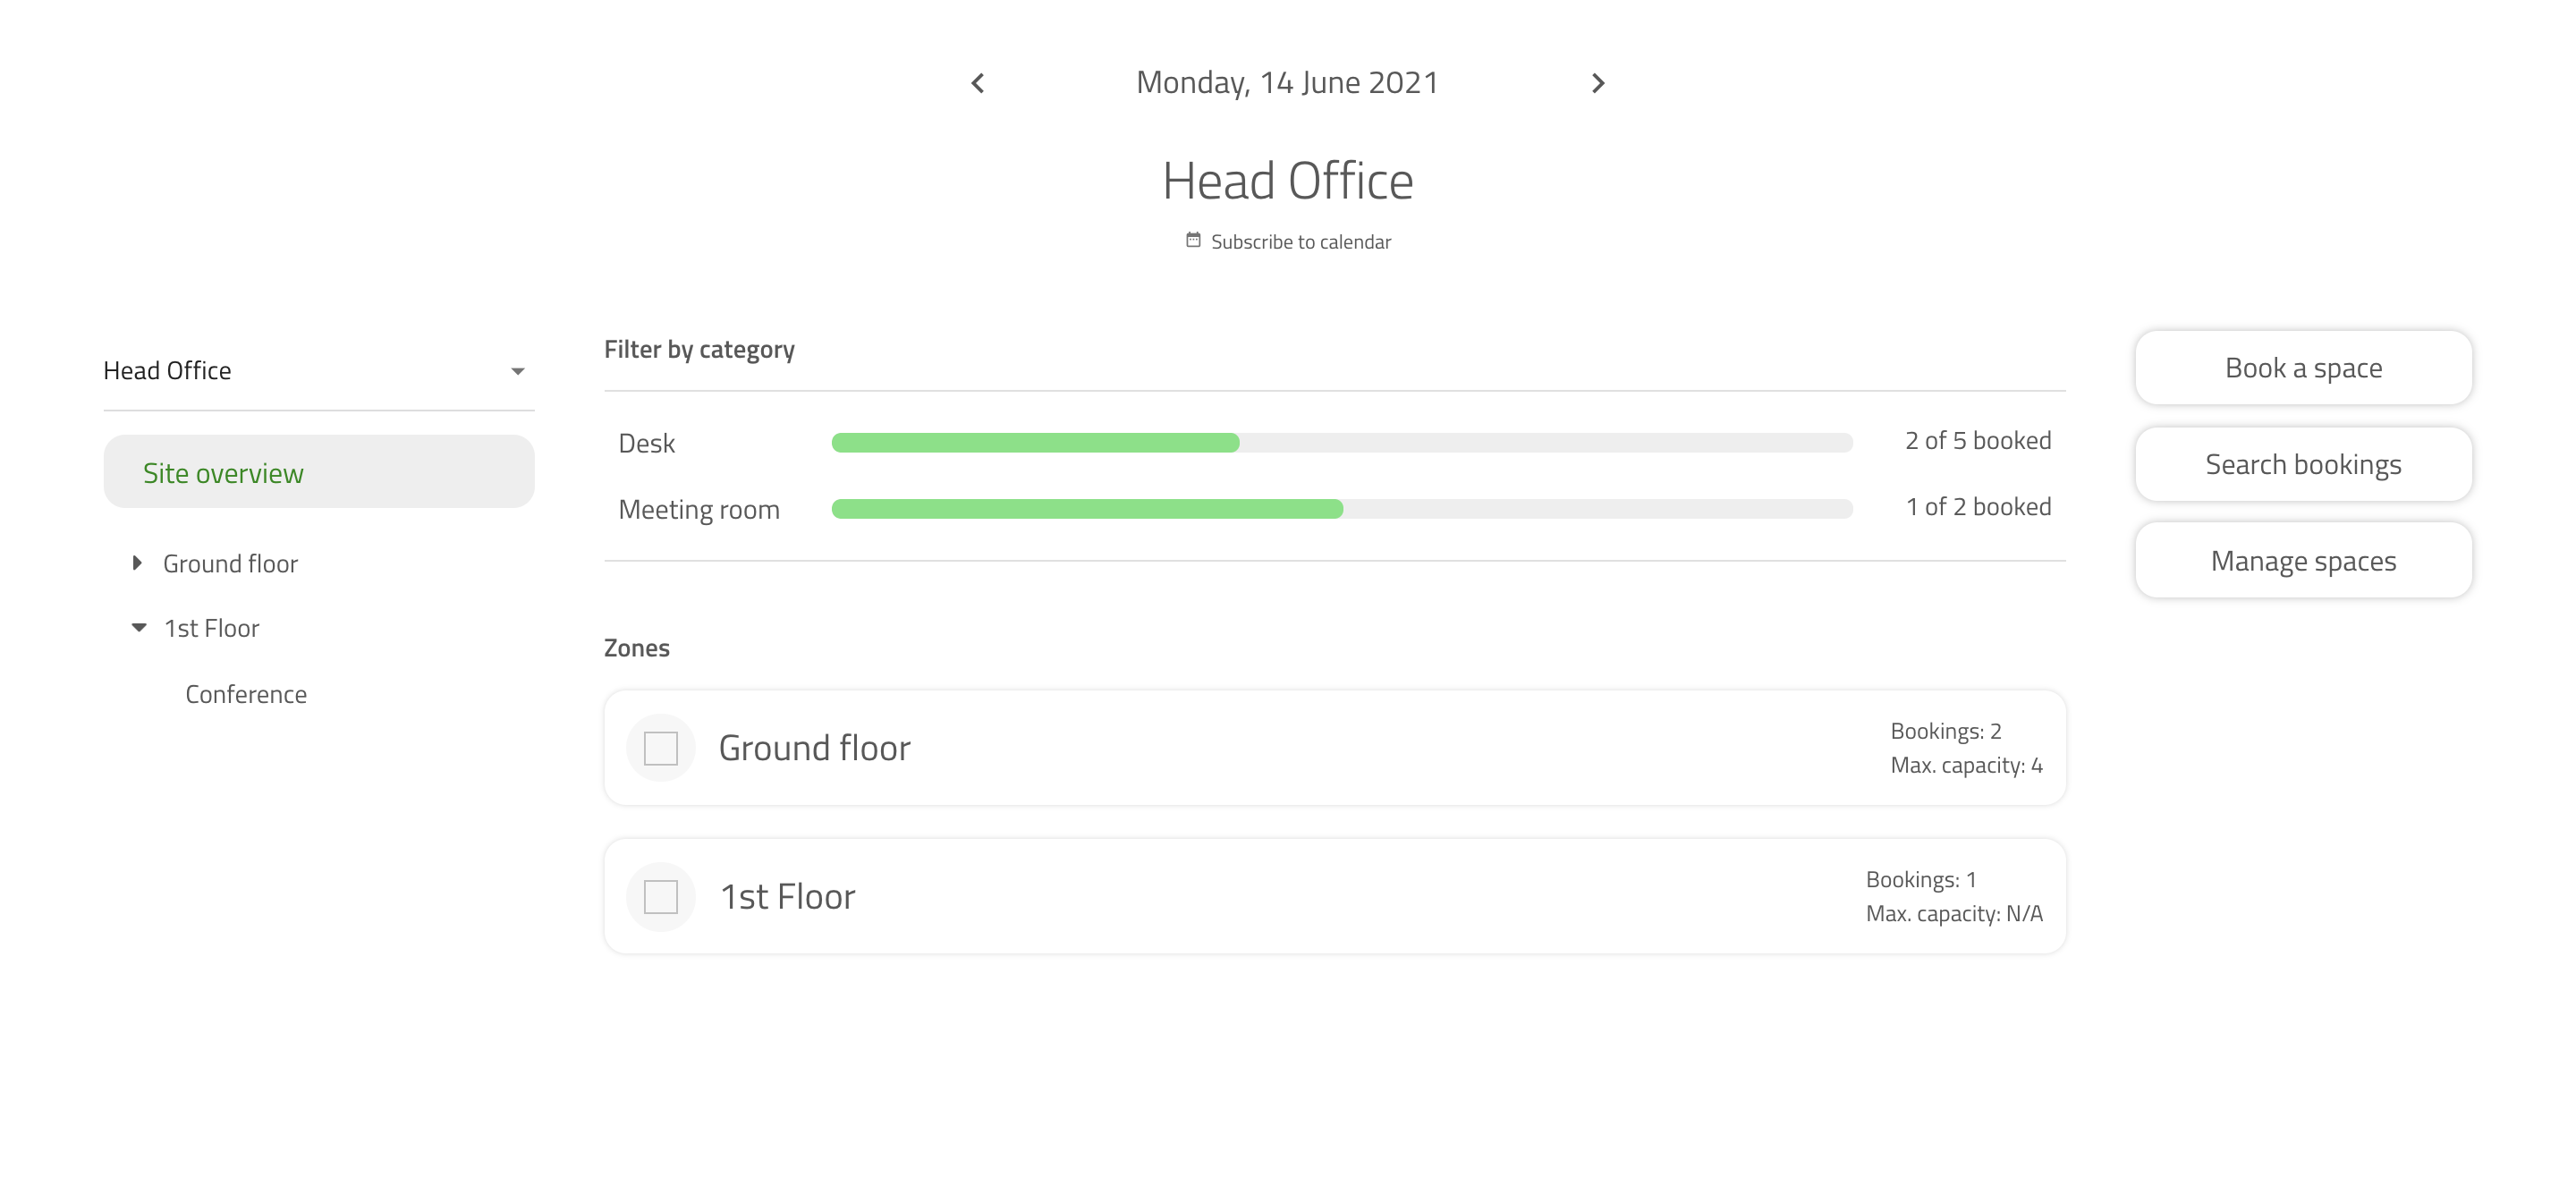
From the Sign In App online management portal, you can view all bookings. Go to the Spaces tab in the main menu and the first page you see shows an overview of the spaces that have been booked for the day selected. The green bars show how many spaces of each type have at least one booking.
Edit a booking
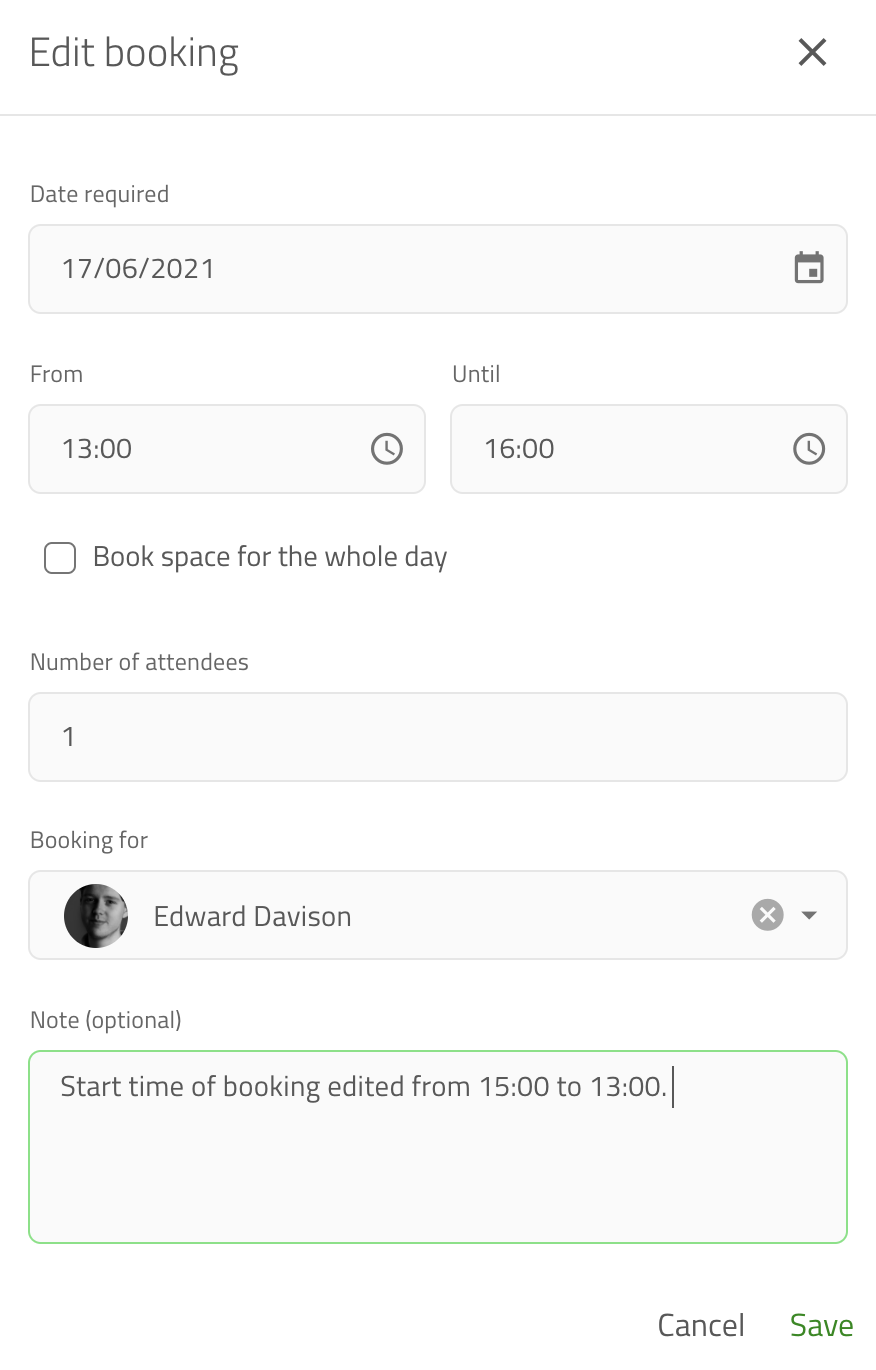
You can edit spaces bookings that are in the future or have started but not finished. This allows you to change the start and end times, change who the booking is for and add further notes to the booking. To edit a booking, go to the Spaces tab in the portal, select the zone and click the booking you need to edit. There is a pencil icon next to the delete button that allows you to edit the booking.
Add to calendar
You can subscribe to all bookings made for a site, zone, space or for a repeat visitor, allowing you to track of your bookings in your favourite calendar application. You can click the Subscribe to calendar button when you have a site, zone, or space selected under the Spaces tab to access the calendar link.
For repeat visitors the calendar subscription link is included in their welcome email. You can send this again by going to Manage > Groups > Select group > Members and search for the member, click edit and then under Details scroll down and tick Send welcome email and then click Save and send. You can read the full how-to-guide on Spaces calendar links here.
Important
The spaces calendar is configured to update every 15 minutes, however please be aware some calendar services and applications may take longer to show changes and new bookings (up to 24 hours). In some cases the frequency it refreshes can be managed within the calendar application itself, so please check with your calendar provider to see if this is a customisable option.
Companion app
While it’s possible to book a space through the online management portal, most staff, contractors or other repeat visitors won’t have access to your portal. This is where Sign In App Companion becomes an important part of using Spaces effectively. If you’re not familiar with our companion app for smartphones, it might be worth having a read through the user guide here or jump to the Companion app section for Spaces.

