Central Record
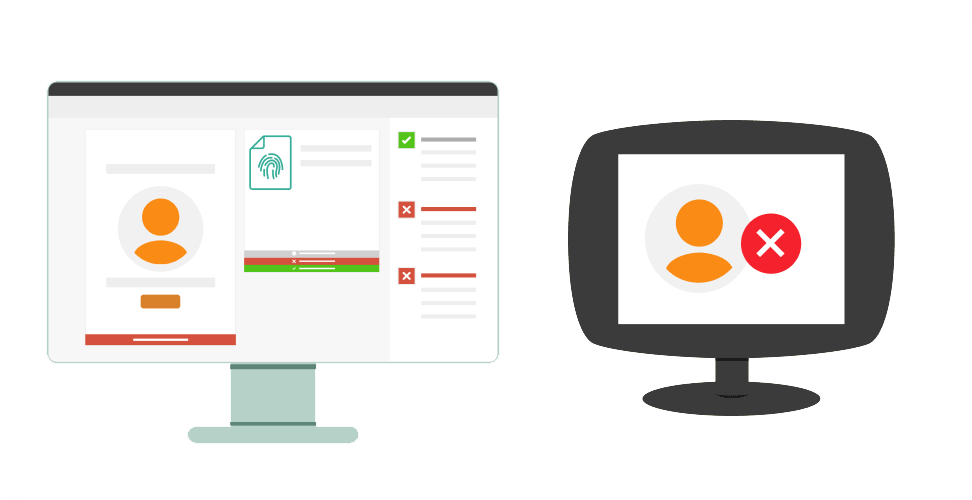
The Sign In App - Central Record integration enables the syncing of employee data from Sign In App (SIA) to Central Record (CR), the relevant checks are then completed in CR and this information bubbles back to SIA. This means key information about who should be allowed on site can be viewed at a glance in SIA. The integration also allows you to block sign ins depending on the status of the person in CR.
Creating a Central Record account
If you don’t have an CR account the team will set up your account and contact you with a link to log in.
Setting up the integration
Following your purchase, our team will be in touch to organise the integration of your CR and SIA accounts. If you already have both SIA and CR, please email support@signinapp.com and we’d be happy to integrate your accounts free of charge.
Using the SIA/CR integration
As part of your purchase of CR you will be offered an onboarding session to get you started with the system. Below are some details on what to expect from the SIA/CR integration.
Linking your organisation
Once the integration is set up, there is one more step. From your Sign In App account head to Manage > Groups > Select Staff group > Integrations and from the dropdown select your organisation. You can link any repeat visitor group with your CR account from here. If you’re a school trust you may see multiple organisations here, select the one relevant to the group in Sign In App.
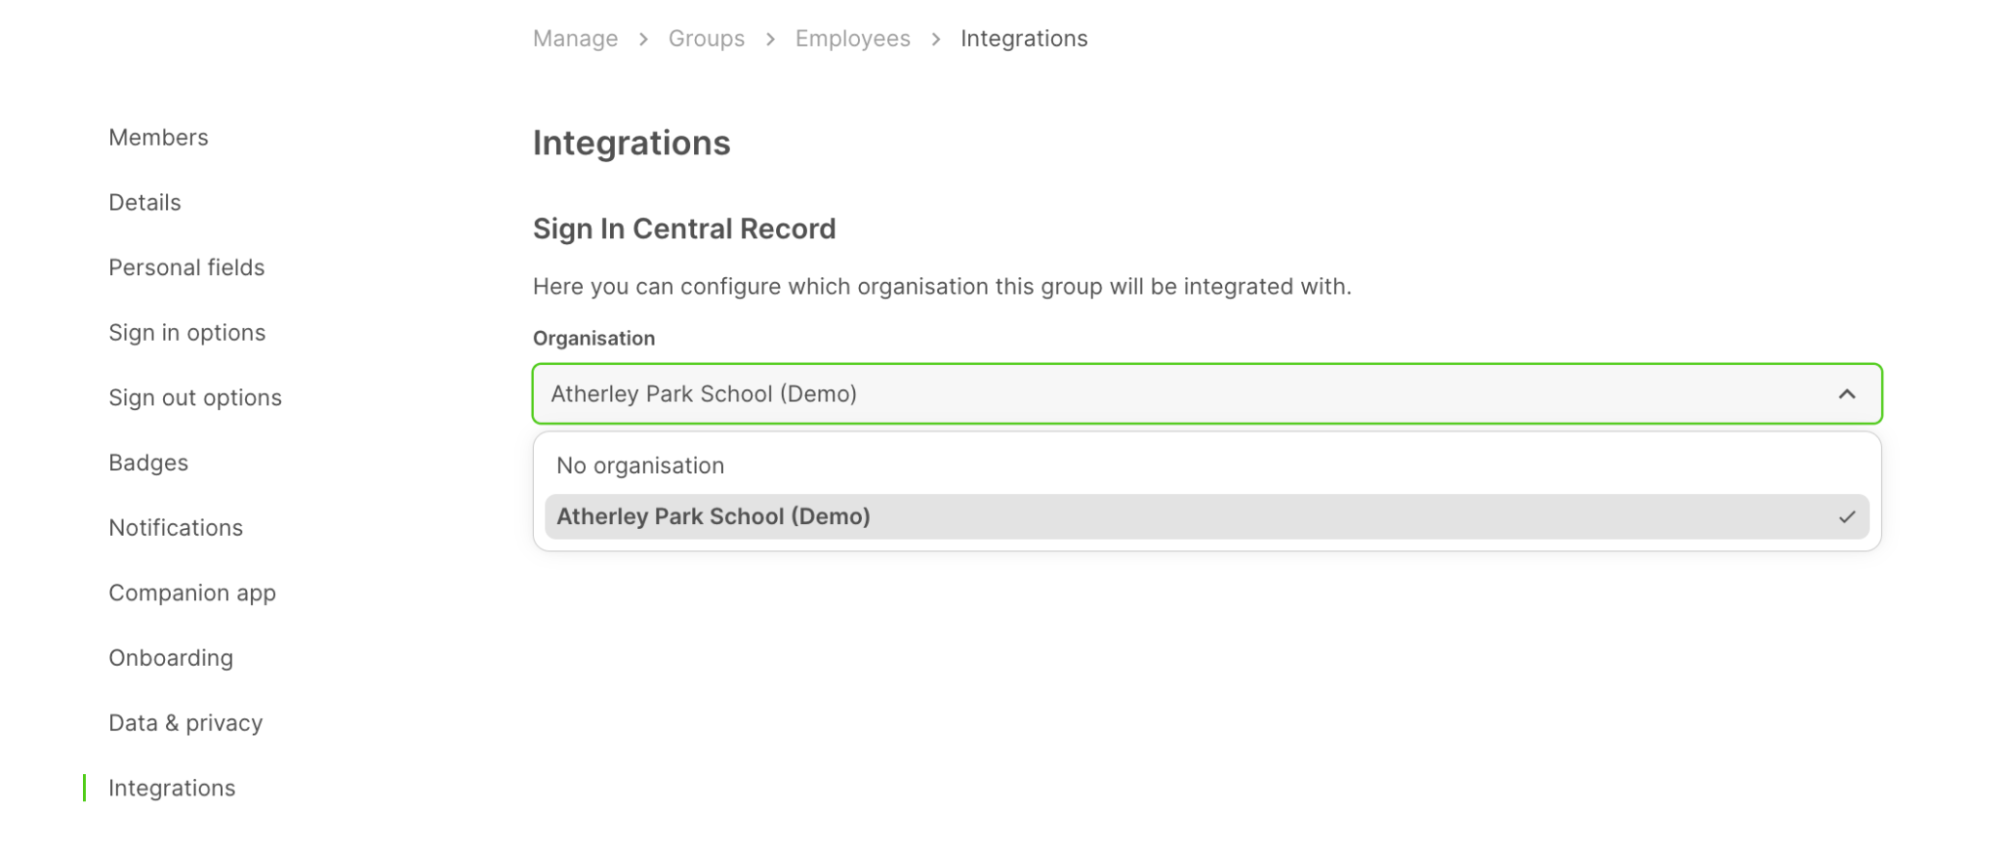
Once you’ve selected the organisation and clicked Import in CR this will be pull the members from SIA across to CR. Only do this when you’re ready.
Important
The default behaviour for a Sign In App group is that members are able to create themselves from the iPad app. With this setting enabled and the SIA/CR integration set up, when a member is created from the iPad they'll be added to your CR account. This can result in profiles being created in your CR account that shouldn't be.
If you don't want this to happen, you can turn this setting off by going to Manage > Groups > Select group > Details and toggling Allow new group members to be added via the iPad app OFF.
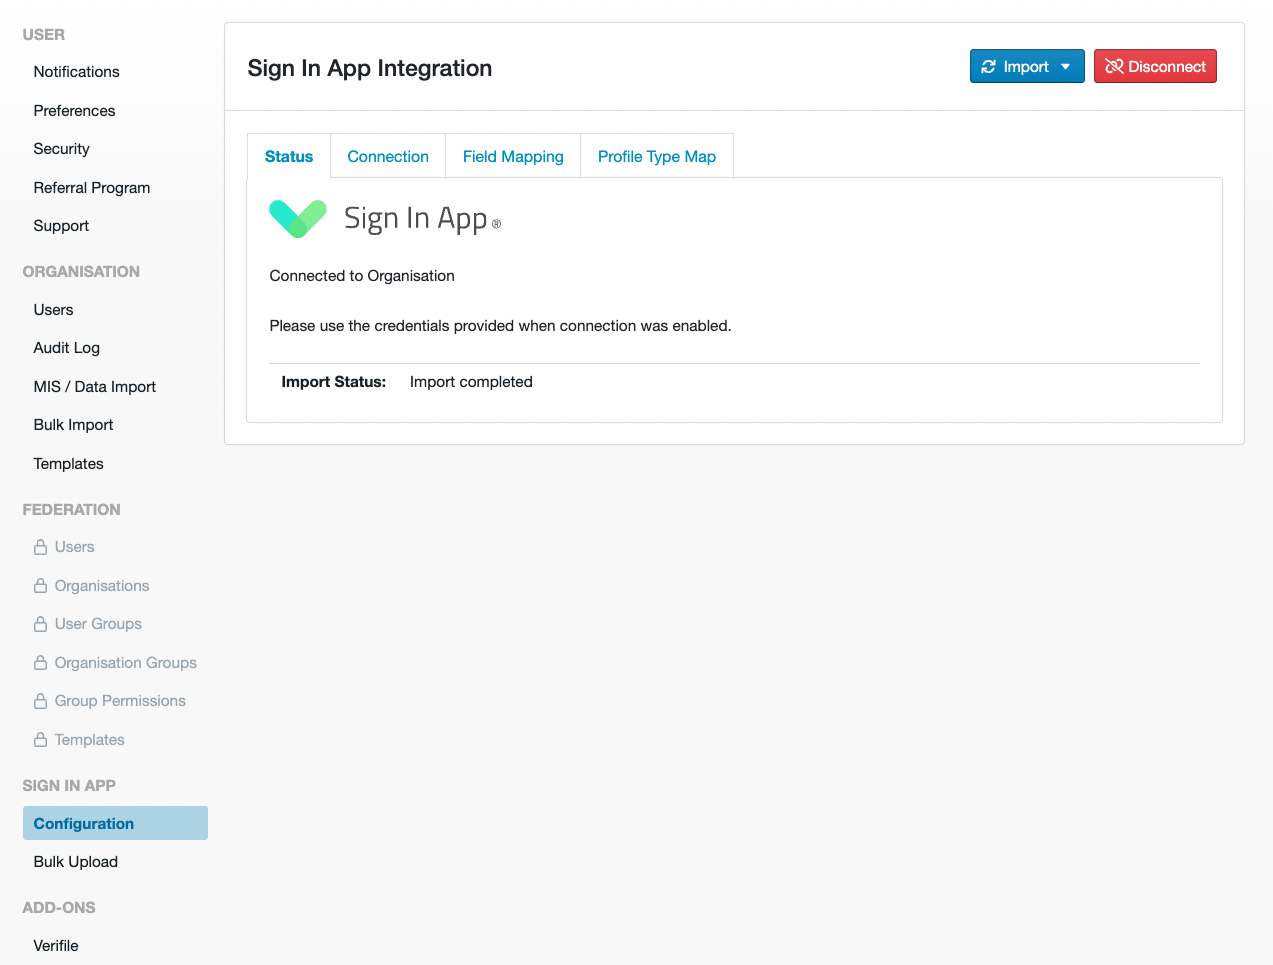
Once you’ve done that, head to your CR portal and go to Settings > Sign In App and click the Import button. Now your SIA members will sync across to CR, by default members in SIA will map across to Teaching Staff in CR. If you’re already using your CR account, this will create duplicates in CR that can be merged together. If you don't already have your CR configured you can skip the step below.
Merging duplicates
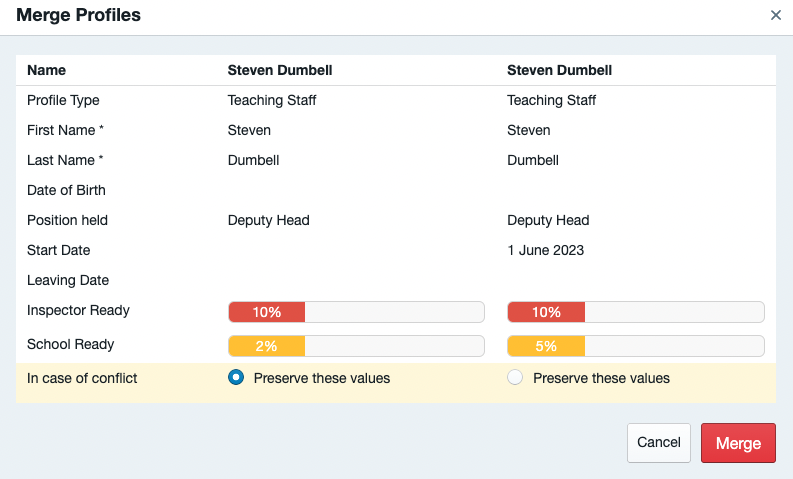
To merge duplicates, click Profiles in your CR portal and then click Advanced Editor in the top right corner. Find two duplicates and left-click the first row for the person you’d like to keep, then while holding the Shift key (command key on Mac), left-click the row of the person you’d like to merge - this will then select both rows. Right-click either of the rows and click Merge 2 profiles. Ensure that the profile that is selected with Preserve these values is the person you’d like to merge the other profile into. You can read more about merging duplicate profiles here.
Wonde Sync
If you’re using the MIS integration in SIA you can use the same link to pull across additional information to CR. To set this up, from the CR portal, head to Settings > Sign In App > Configuration > Connection and toggle Use SIA Wonde Connection (if available) on. Click Import > Discovery mode and then refresh the page, you should then see a new tab called Wonde Scopes.
This includes a list of the permissions that can be used with the CR integration. If these permissions haven’t been approved for Sign In App you can approve them in your Wonde portal. Once done you should see a message saying All required fields granted.

Now, if you click Field Mapping you can automatically pull additional fields from your MIS across to CR. This guide explains how to manage Field Mapping in more detail.
Syncing other Profile Types
Your members in Sign In App will automatically pull across to your Teaching Staff in CR, but for other profile types we need to map a Profile type in CR to a group in SIA.
To do this, head to CR and then go to Settings > Sign In App > Configuration > Profile Type Map. In this example we’ll set up the Contractors profile type, to get started with this click the Edit button next to the Contractors profile type.

This will pop up a panel on the right side of the screen, we want to select Sign In App - Group ID from the first dropdown and then set the second to is equal to and finally select the group in Sign In App you’d like to map across to, in this case Contractors. This will then map across all members of the Contractors group in Sign In App to the Contractors profile type in CR.
Important
If you don’t see the group you’re looking for under Sign In App - Group ID it’s likely that you haven’t set up the integration in SIA for that group. From SIA head to Manage > Groups > Select group > Integrations and select your organisation. Then go back to CR and refresh the page, you should now see the group you’re looking for.
Next, from your CR portal go to Settings > Sign In App > Configuration and click the Import button, this will pull through the profiles from SIA based on the new Profile type mapping. This will create the new profiles as duplicates in CR, follow the same steps for merging profiles as you’ve done for Teaching staff.
Bulk Upload
If you already have Central Record configured you can push the members through to Sign In App and automatically populate the relevant groups. To get started, go to your CR account and head to Settings > Sign In App > Bulk Upload.
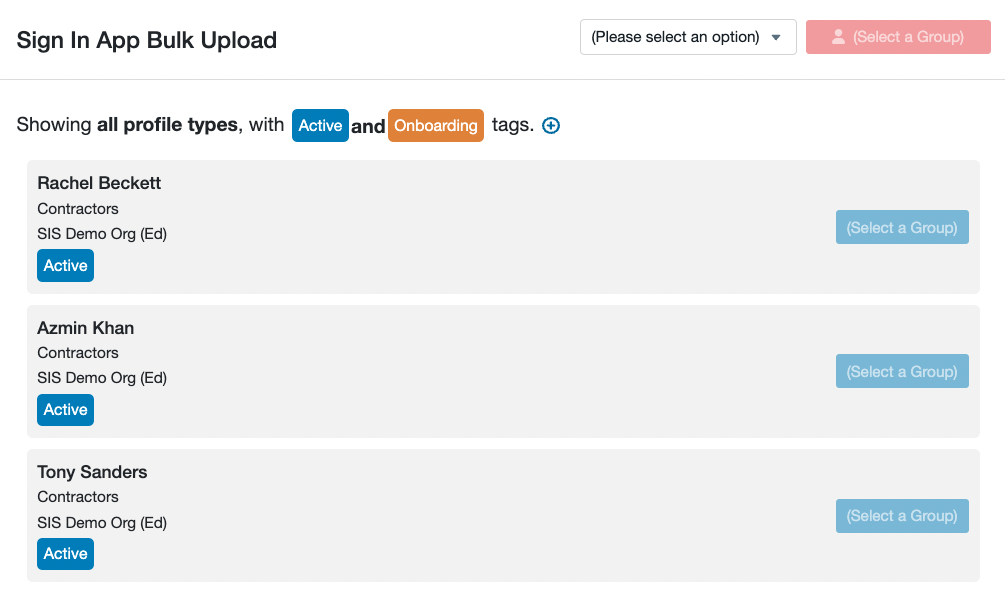
This will display a list of all of the profiles in CR that aren’t mapped with members in SIA. You will likely have a mix of profile types in this list. To filter this list, click the all profile types button and then select the profile type you want to import to SIA first.

Next, click the Please select an option button at the top and select the SIA group you’d like to push these profiles to. Then, click the Push All to button to send these profiles to SIA.
You can then repeat this process for each of the profile types you need to push across to SIA.
Viewing CR data in SIA
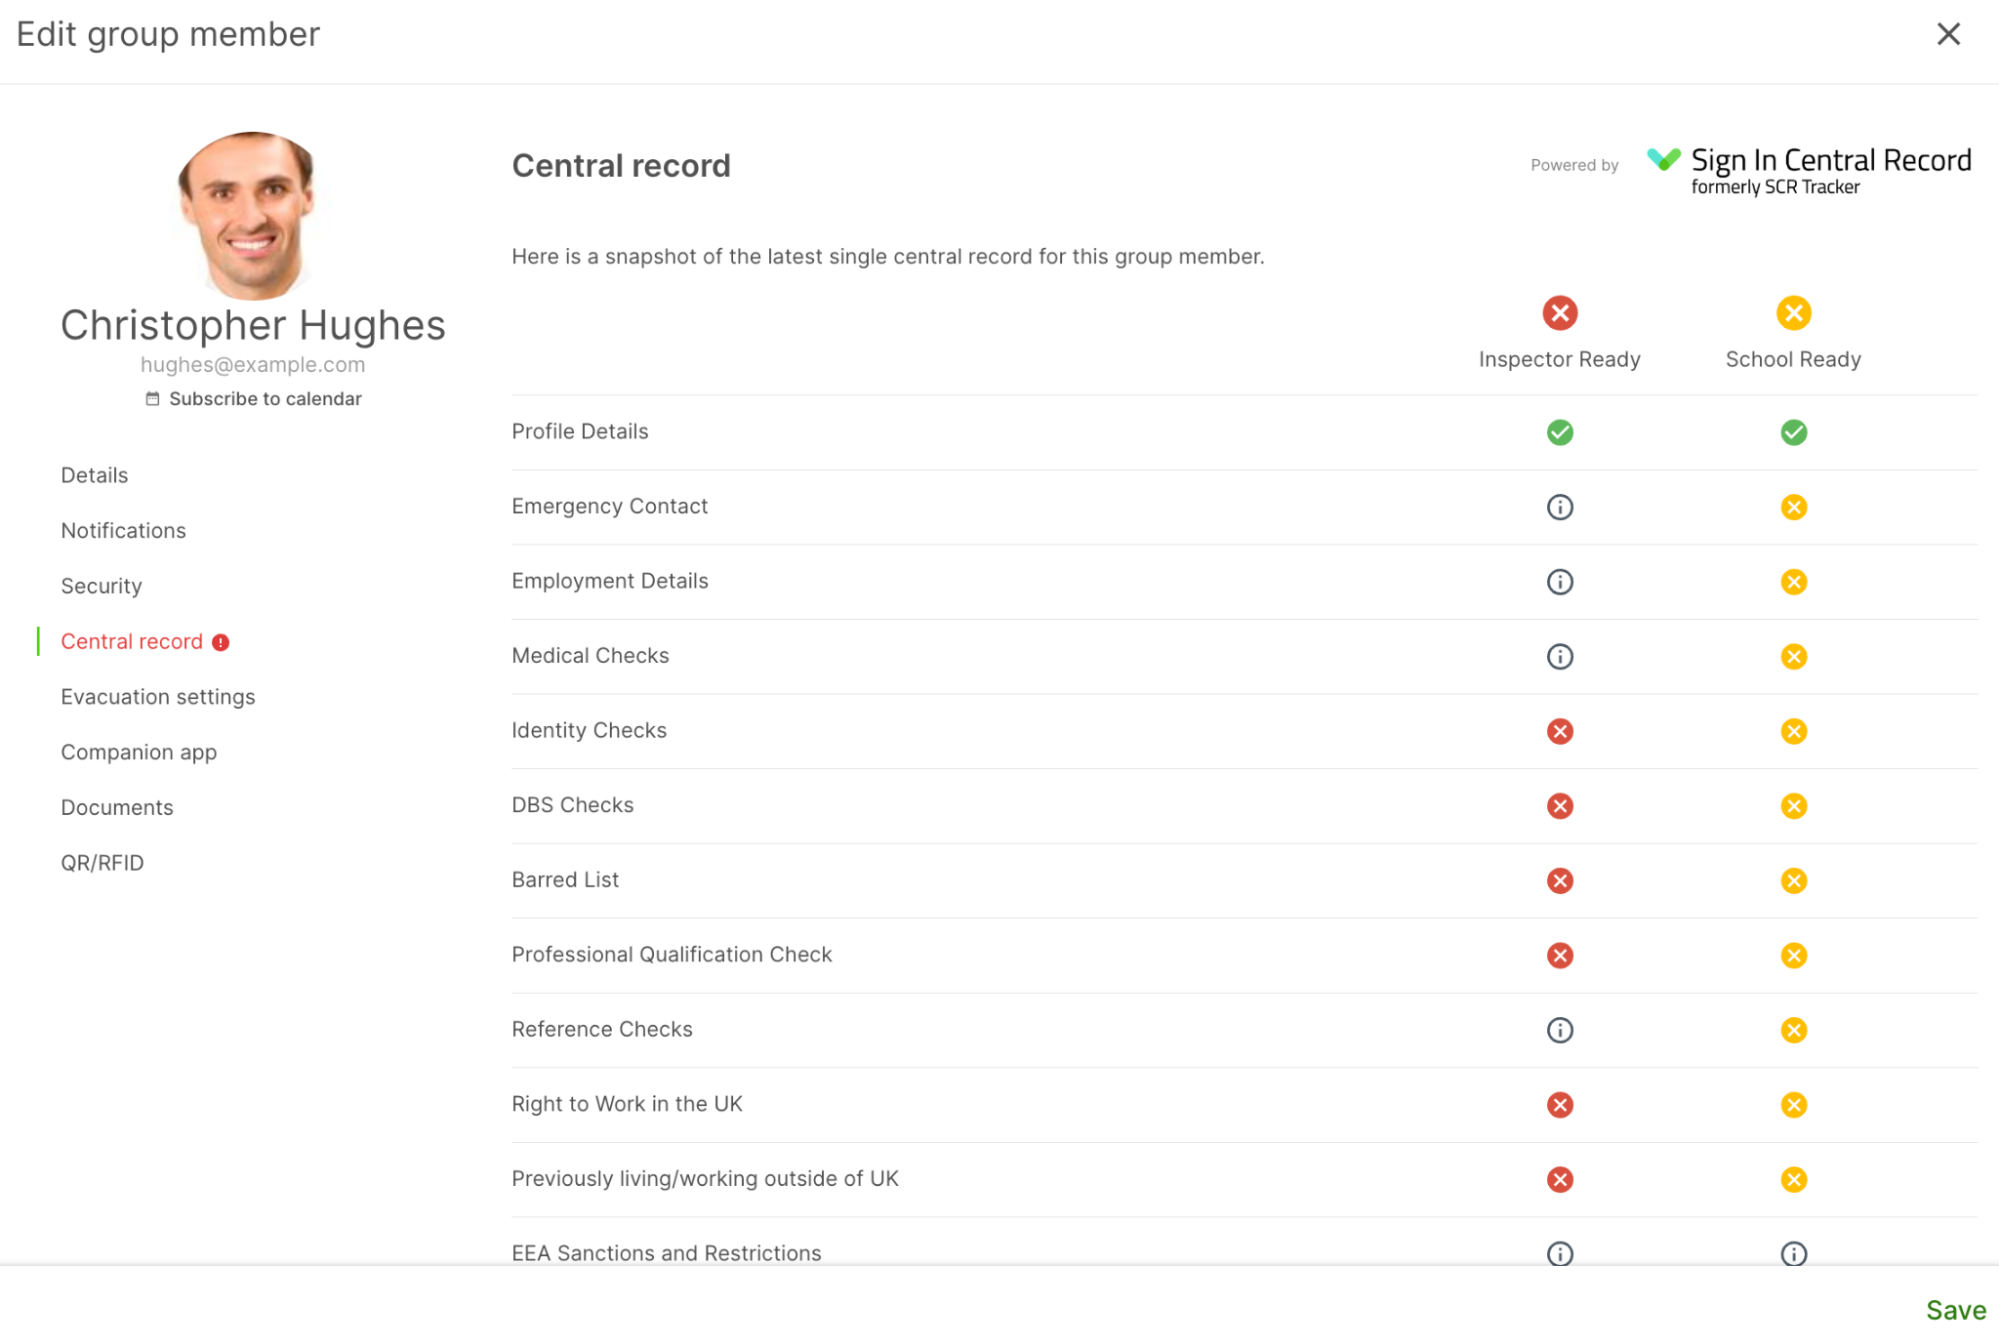
The CR data will appear in a number of places across your SIA system including the Today screen and Members section. The data pulled across from CR is grouped into Inspector and School ready, if you’re already using CR then you will be familiar with this, but if not here is a brief outline of what these terms mean.
Inspector ready - These are the checks that are statutory as per KCSiE and required by OFSTED and the ISI. To be Inspector ready all of these checks have been completed for that member.
School ready - These are the checks that are non statutory, but considered best practice as per KCSiE. To be School ready all of the non statutory checks have been completed for that member.
Members
From Sign In App if you head to Manage > Groups > Select group > Members you can see key information about each member which has been pulled through from CR.
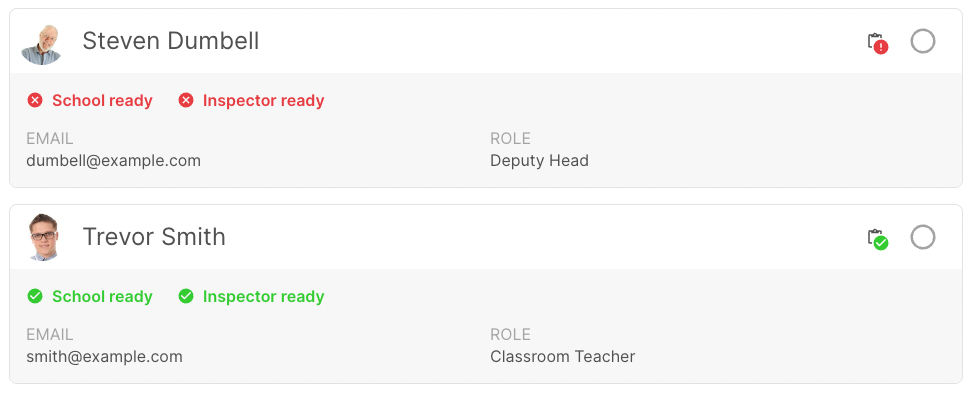
Hovering over a member and clicking Edit allows you to view more information about their CR status.
Today screen
If you click Today in the SIA portal you will see an overview of who is signed in and out across your SIA sites. With safety check set to Allow sign in when entry criteria not met you will see details of the member’s CR status next to their sign in record.
If there is a red shield next to a member's sign in record it means they’re not Inspector and School ready.

If there is a green shield next to a member's sign in record it means they’re both Inspector and School ready.

Safety check
SIA Safety check allows you to configure if the members signing in to your site that don’t meet the CR criteria should be allowed to sign in or have their sign in rejected. To set this up go to your SIA portal and head to Manage > Manage Features > Safety Check > Central Record and toggle the option on.

Now you can pick which groups you want to be included in the CR Safety Check. Go to Manage > Groups > Select group > Sign in options and under Safety check you should see a dropdown list with 3 options.

Don’t check
By default, Safety check is set to Don’t check meaning CR criteria are not checked for people signing in to this group.
Reject sign in when entry criteria is not met
This option allows you to reject anyone from signing in who does not meet the CR criteria. A message will be displayed on-screen so the person signing in is aware they have not met the criteria for entry to the site. You can read more about rejected sign ins here.
Allow sign in when entry criteria is not met
This option allows the person signing in to complete their sign in, no message is presented on screen, the person signing in will not be aware they haven’t met the criteria for entry to the site.
Notifications
You can set up notification rules to ensure that when a sign in doesn’t meet the CR safety check criteria the correct people are notified. To get started, from the SIA portal head to Manage and under Manage features click Notifications.
If you’re using Allow sign in when entry criteria is not met then you need to make sure the Trigger is set to Safety check failed. This means that if someone signs in and isn’t School and Inspector ready then a notification will be triggered.

If you’re using Reject sign in when entry criteria is not met then you need to make sure the Trigger is set to Rejected sign in. This means that if someone signs in and isn’t School and Inspector ready their sign in will be rejected and a notification will be triggered.

You can read more about setting up notifications here.
The Sign In App / Sign In Central Record integration is in beta at the moment so we’re keen to hear about your experience. Please direct any feedback, questions, bugs or suggestions to beta@signinapp.com.

