Evacuate
Sign In App Companion is the quickest way to access your site's live evacuation list, ready for any eventuality.
Important
To access the evacuation list, Can access the evacuation list permission must be ticked against the staff member in the online portal.
My evacuation point
If you're signed in to a site and have an evacuation point assigned, a map will be displayed with your current location and where your evacuation point is. Tapping Walking directions will open maps and show directions to your evacuation point. You can also view the evacuation point photo by tapping Show photo. You don't need the 'Can access the evacuation list' permission enabled to do this.
Tip
To read more about setting up evacuation points click here.
Shared evacuation report
With Safety+ shared evacuation report you can join evacuations with colleagues and account for everyone on site in real-time across multiple devices, ensuring no one is left behind. When an evacuation is completed reports are synced with the cloud, giving you access to historic reports from any device at any time.
Tip
To enable Safety+ evacuation go to Manage and scroll down to Sign In App+. Clicking Shared evacuation reports will enable the feature for your account.
Starting an evacuation
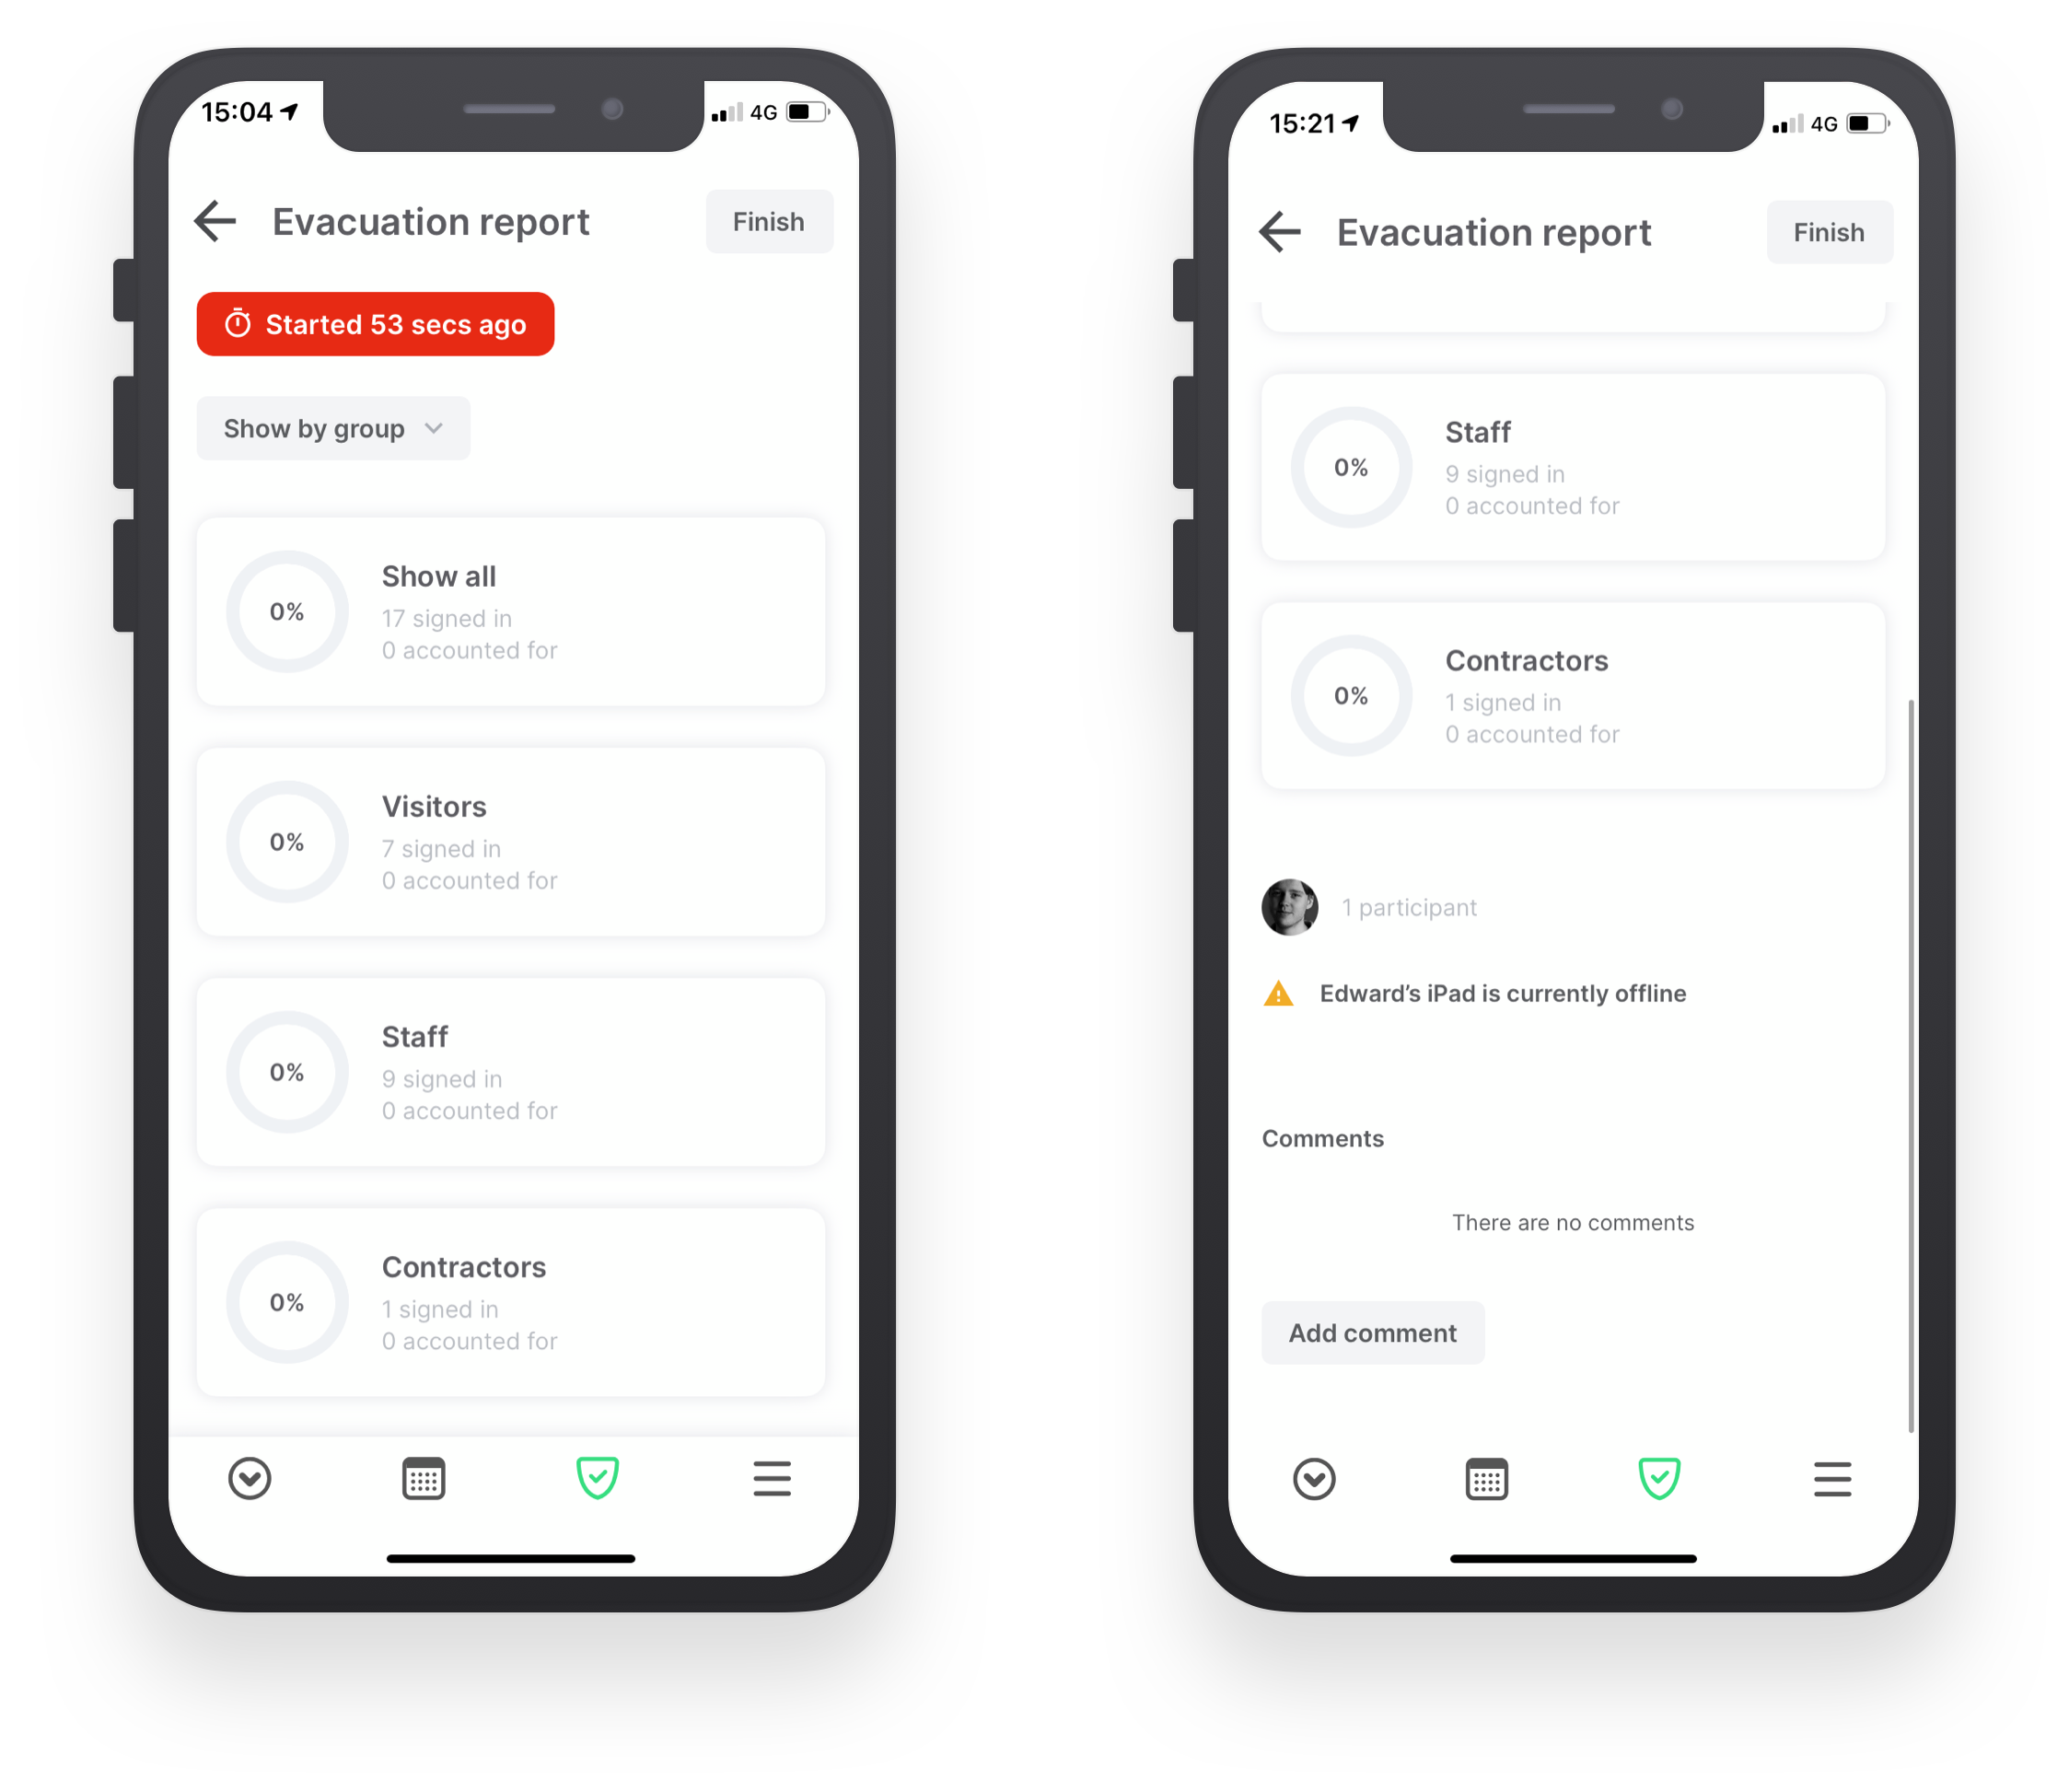
From Sign In App Companion, tap the evacuation icon at the bottom, make sure the correct Site is selected and tap Start an evacuation. A timer will display how long the evacuation has been in progress. Below this there’s an overview of the shared report and you can toggle between sorting by groups or evacuation points.
Towards the bottom there’s a list of the participants who have joined the report (this can include users logged in to the portal, staff members on Companion, and the iPads connected to your site). You will also see any offline iPads, this is important because offline records won’t appear on the evacuation list. Finally, you can add comments, these are visible for everyone who has joined the report.
Accounting for evacuees
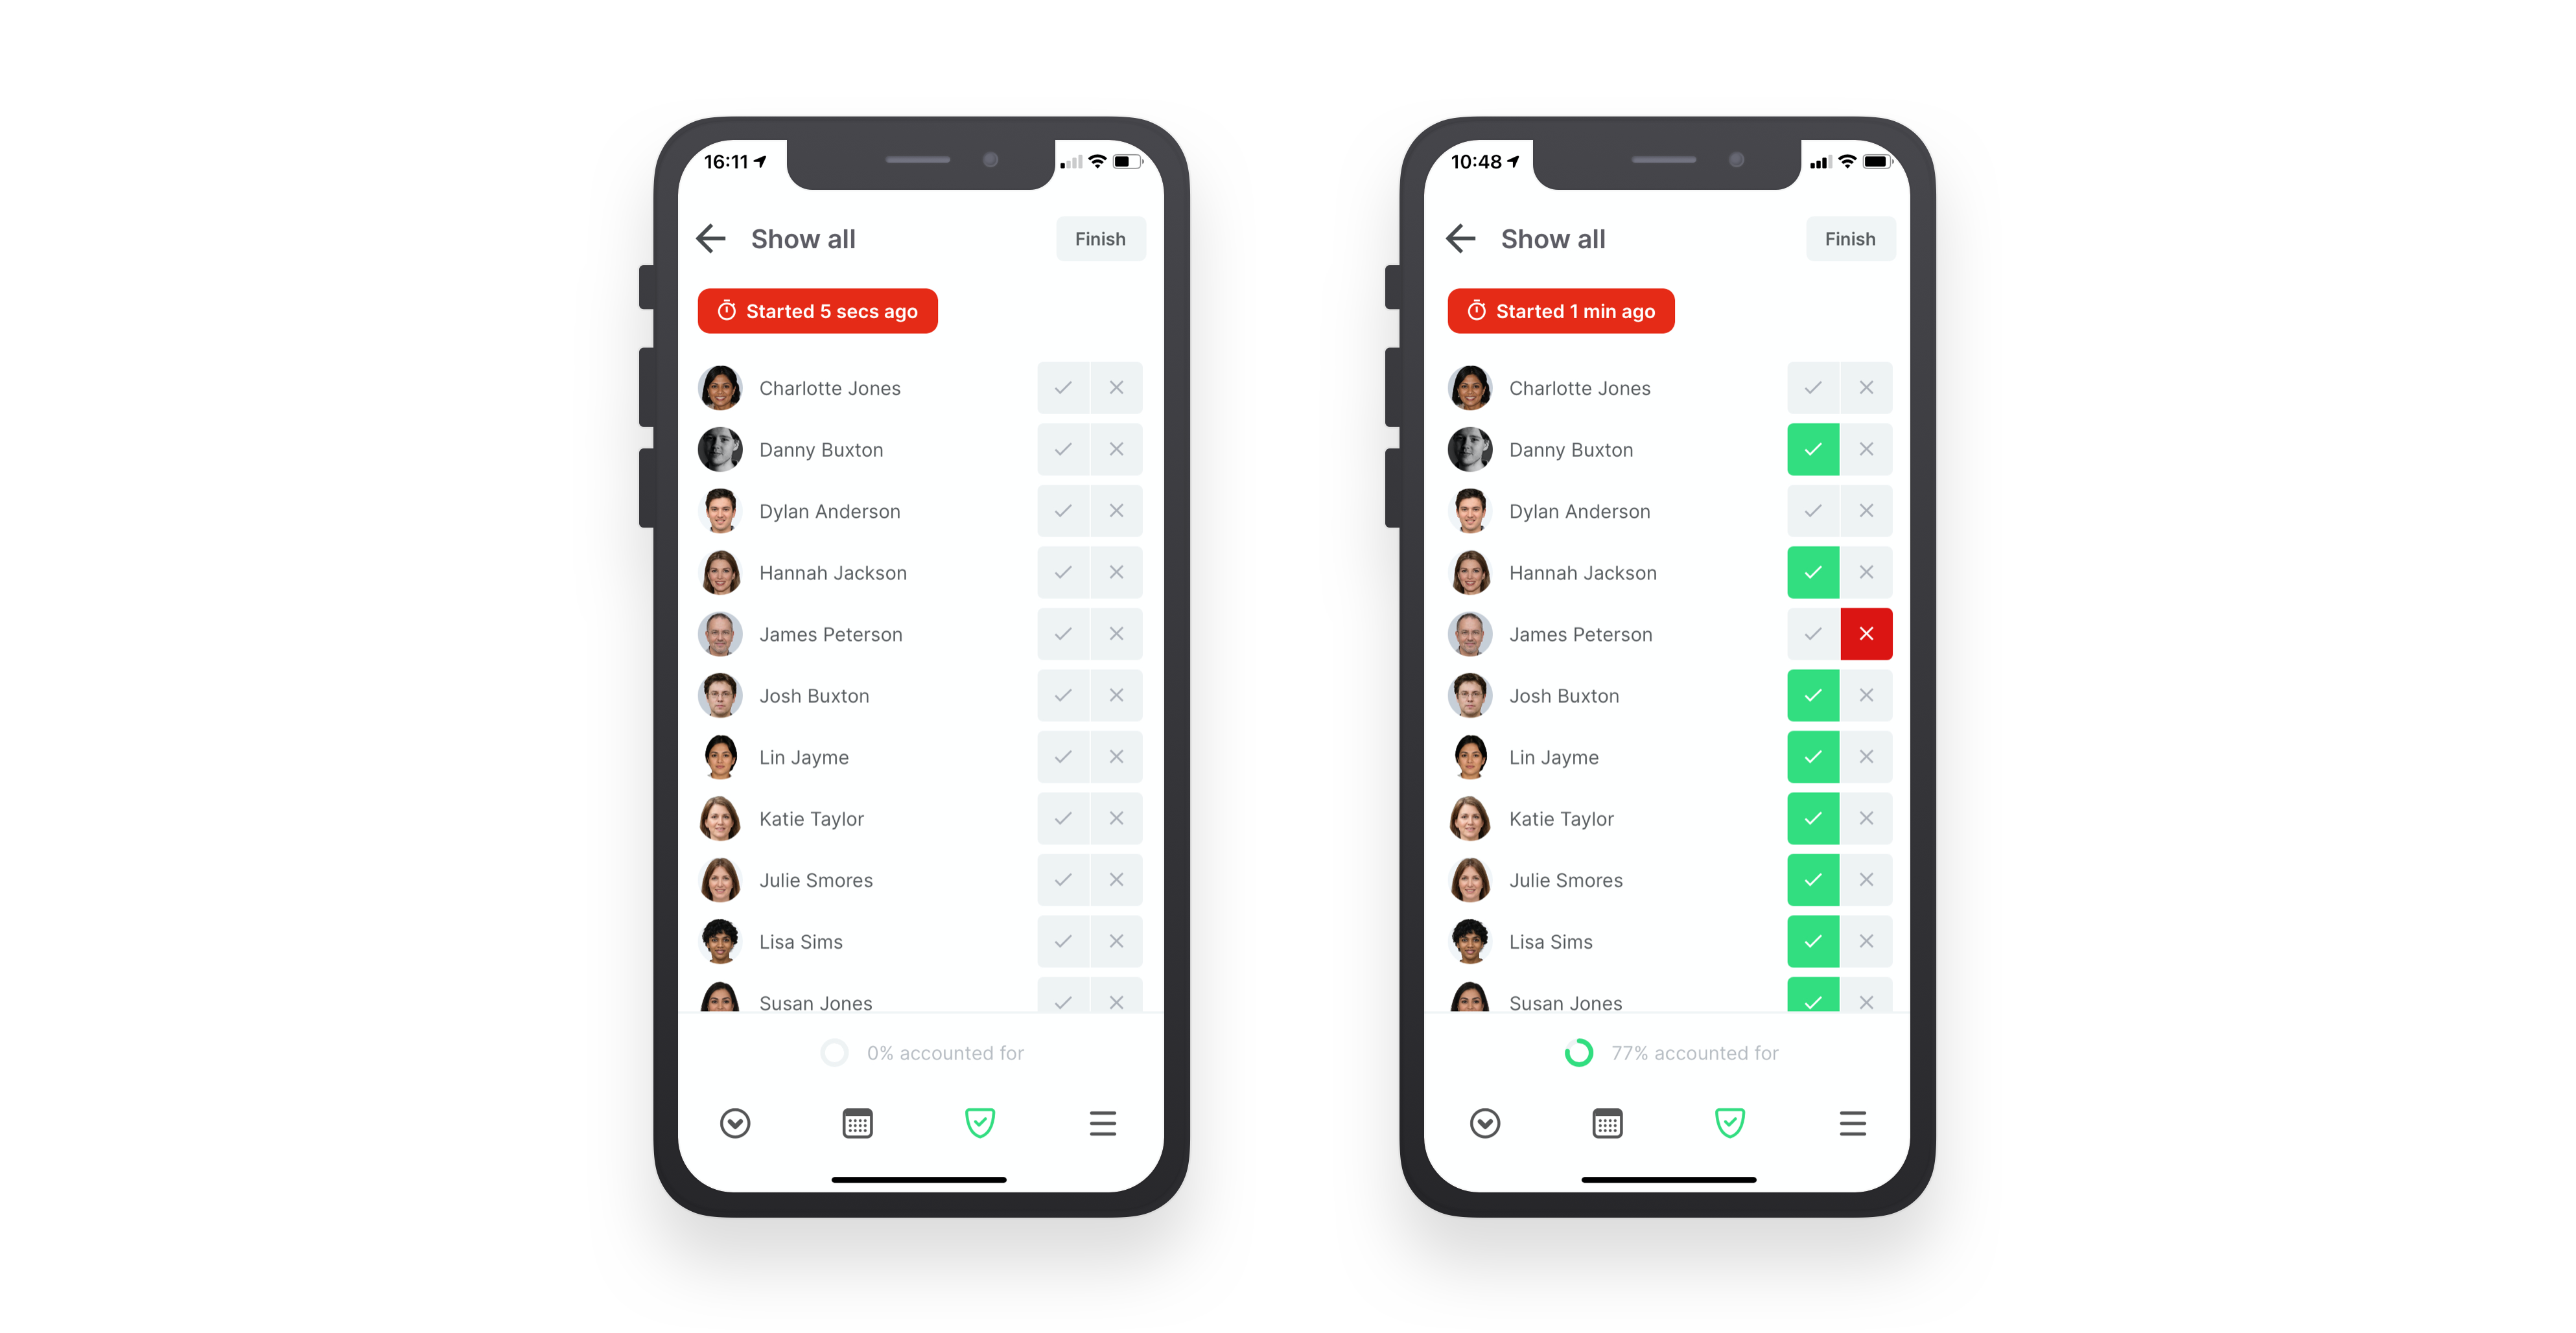
First, use the filter to switch between groups or evacuation points. Tap the group or evac point to see all the evacuees. By default, an evacuee is unaccounted for. Tap the tick to mark them as present, and the cross to mark them as missing. At the bottom of the screen you will see a progress circle with the percentage of evacuees accounted for.
Filter by personal field
When viewing a shared evacuation report you can tap the Apply Filter button to filter evacuees by personal fields. You need to select a repeat visitor group to be able to filter by personal field.
Joining the report
Now we’ve started the shared report on Sign In App Companion, we can join from another device. Once a report is in progress, selecting the evacuation option from any device will give you the option to join the shared report. You will see any evacuees already accounted for and start checking off people from your evacuation point or visitor group - all actions will be shared with the other devices that have joined the report.

Adding comments
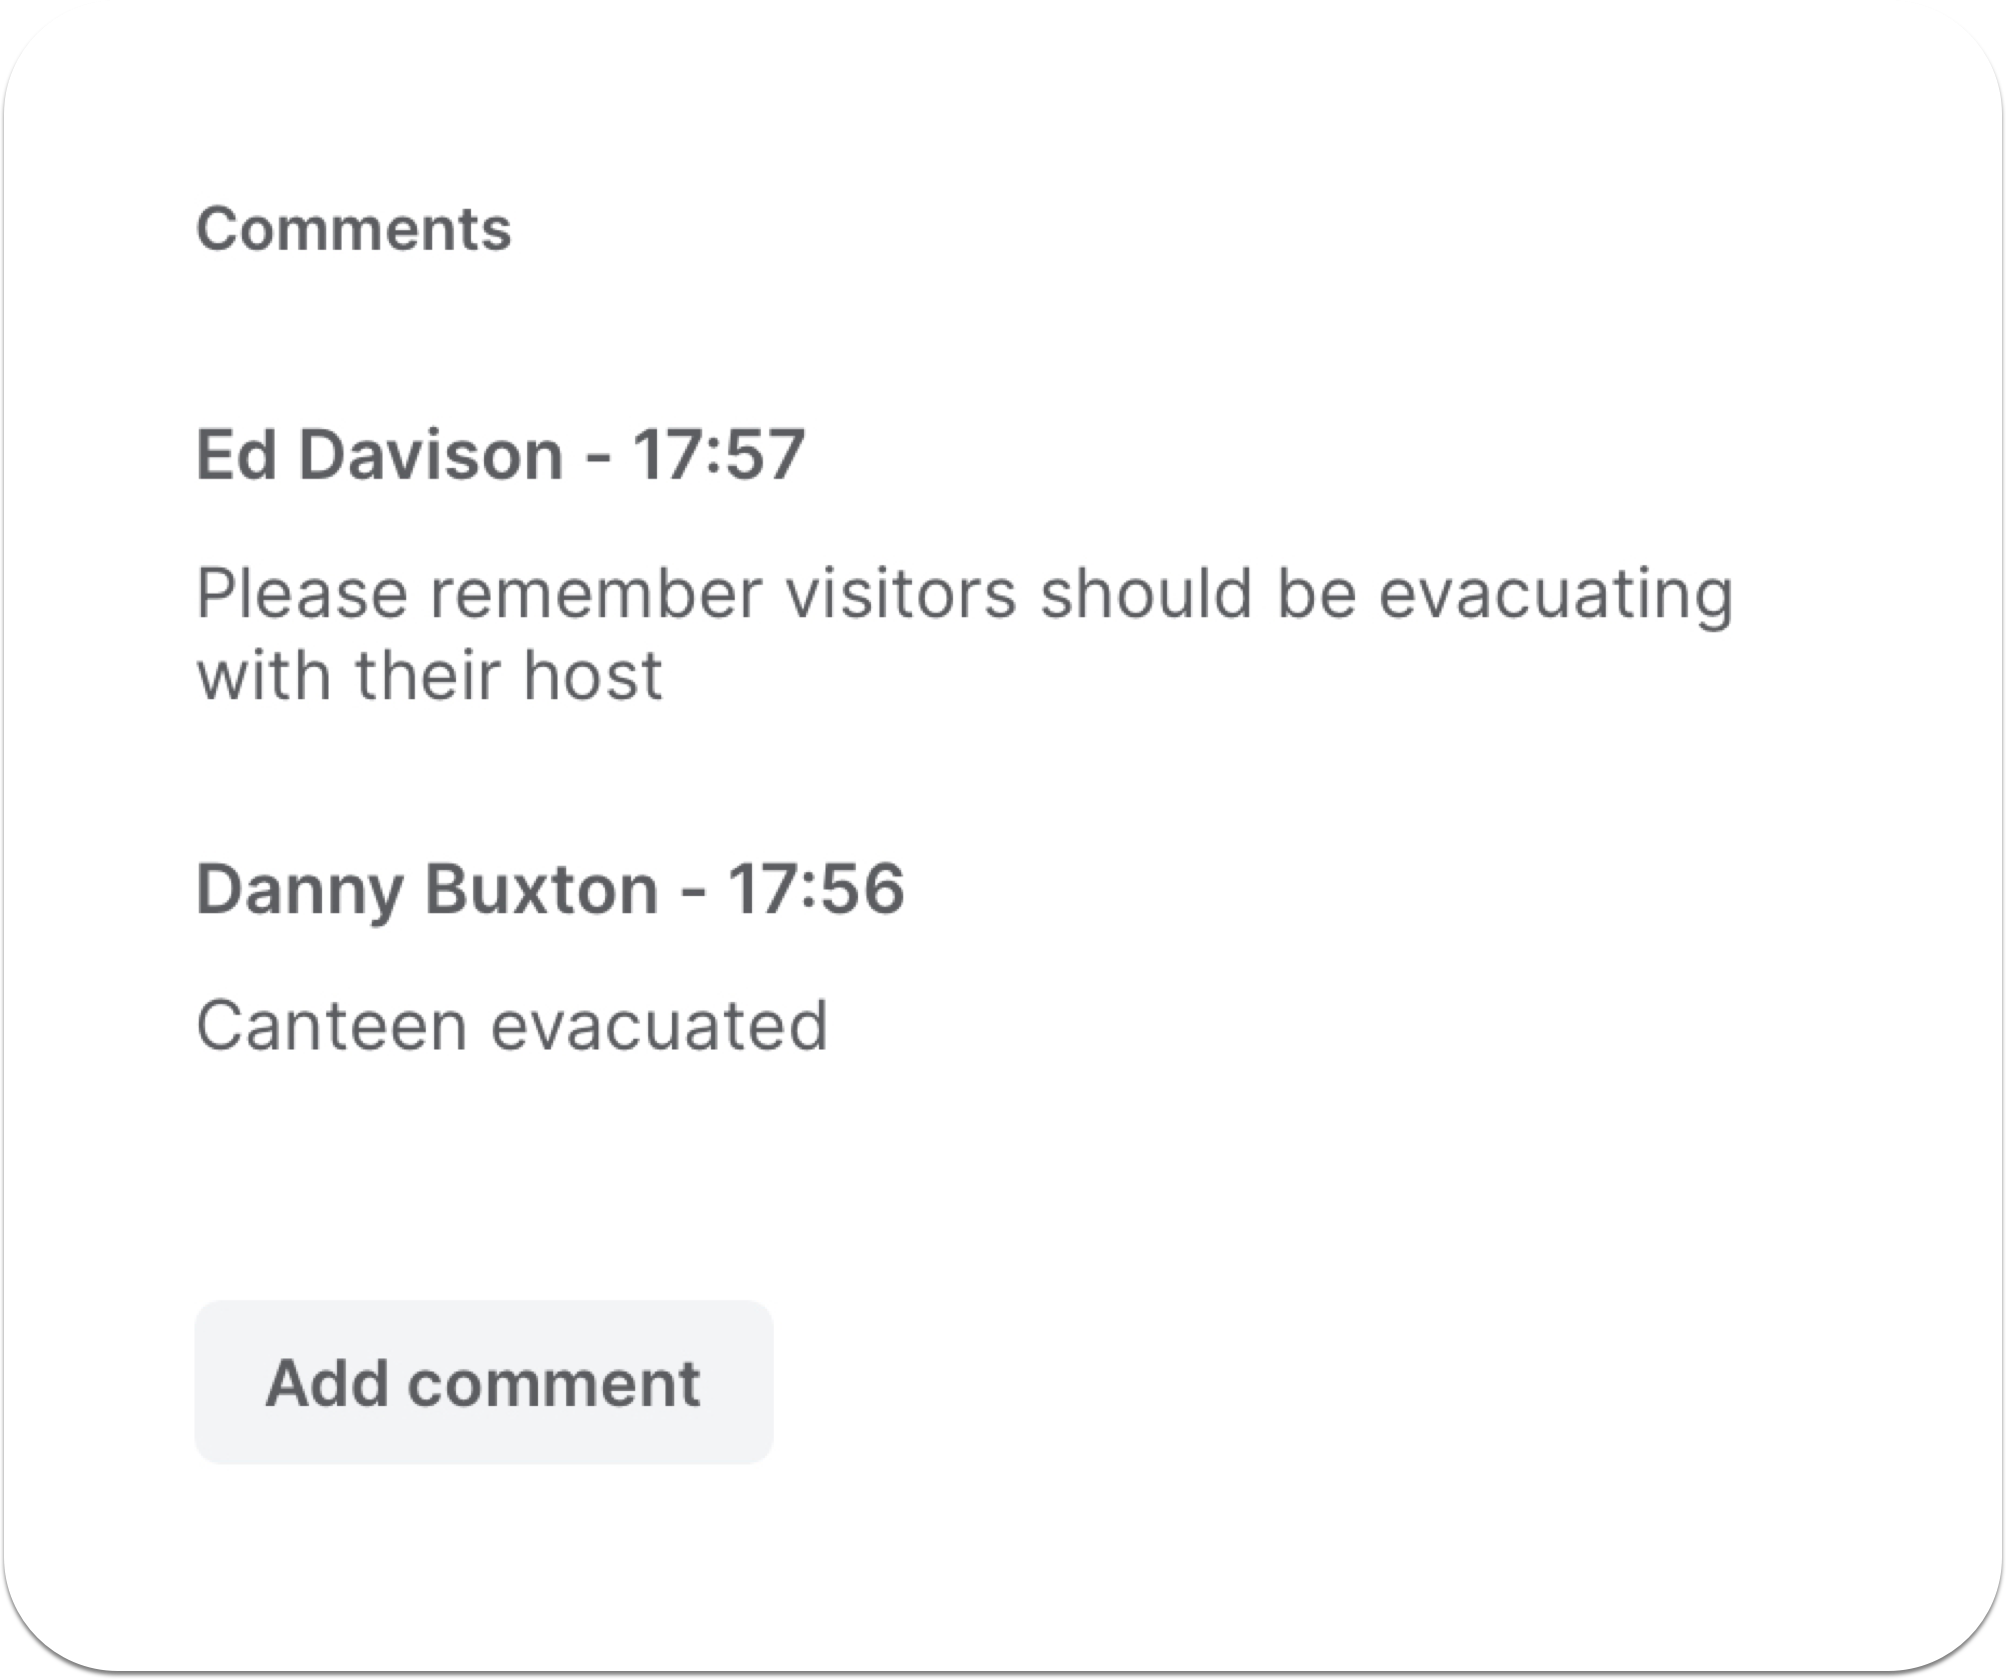
You can add comments to the evacuation report in real-time allowing you to share information across devices. Comments are also included in the completed report, so use these to record any issues or communicate during the evacuation.
Ending and leaving reports
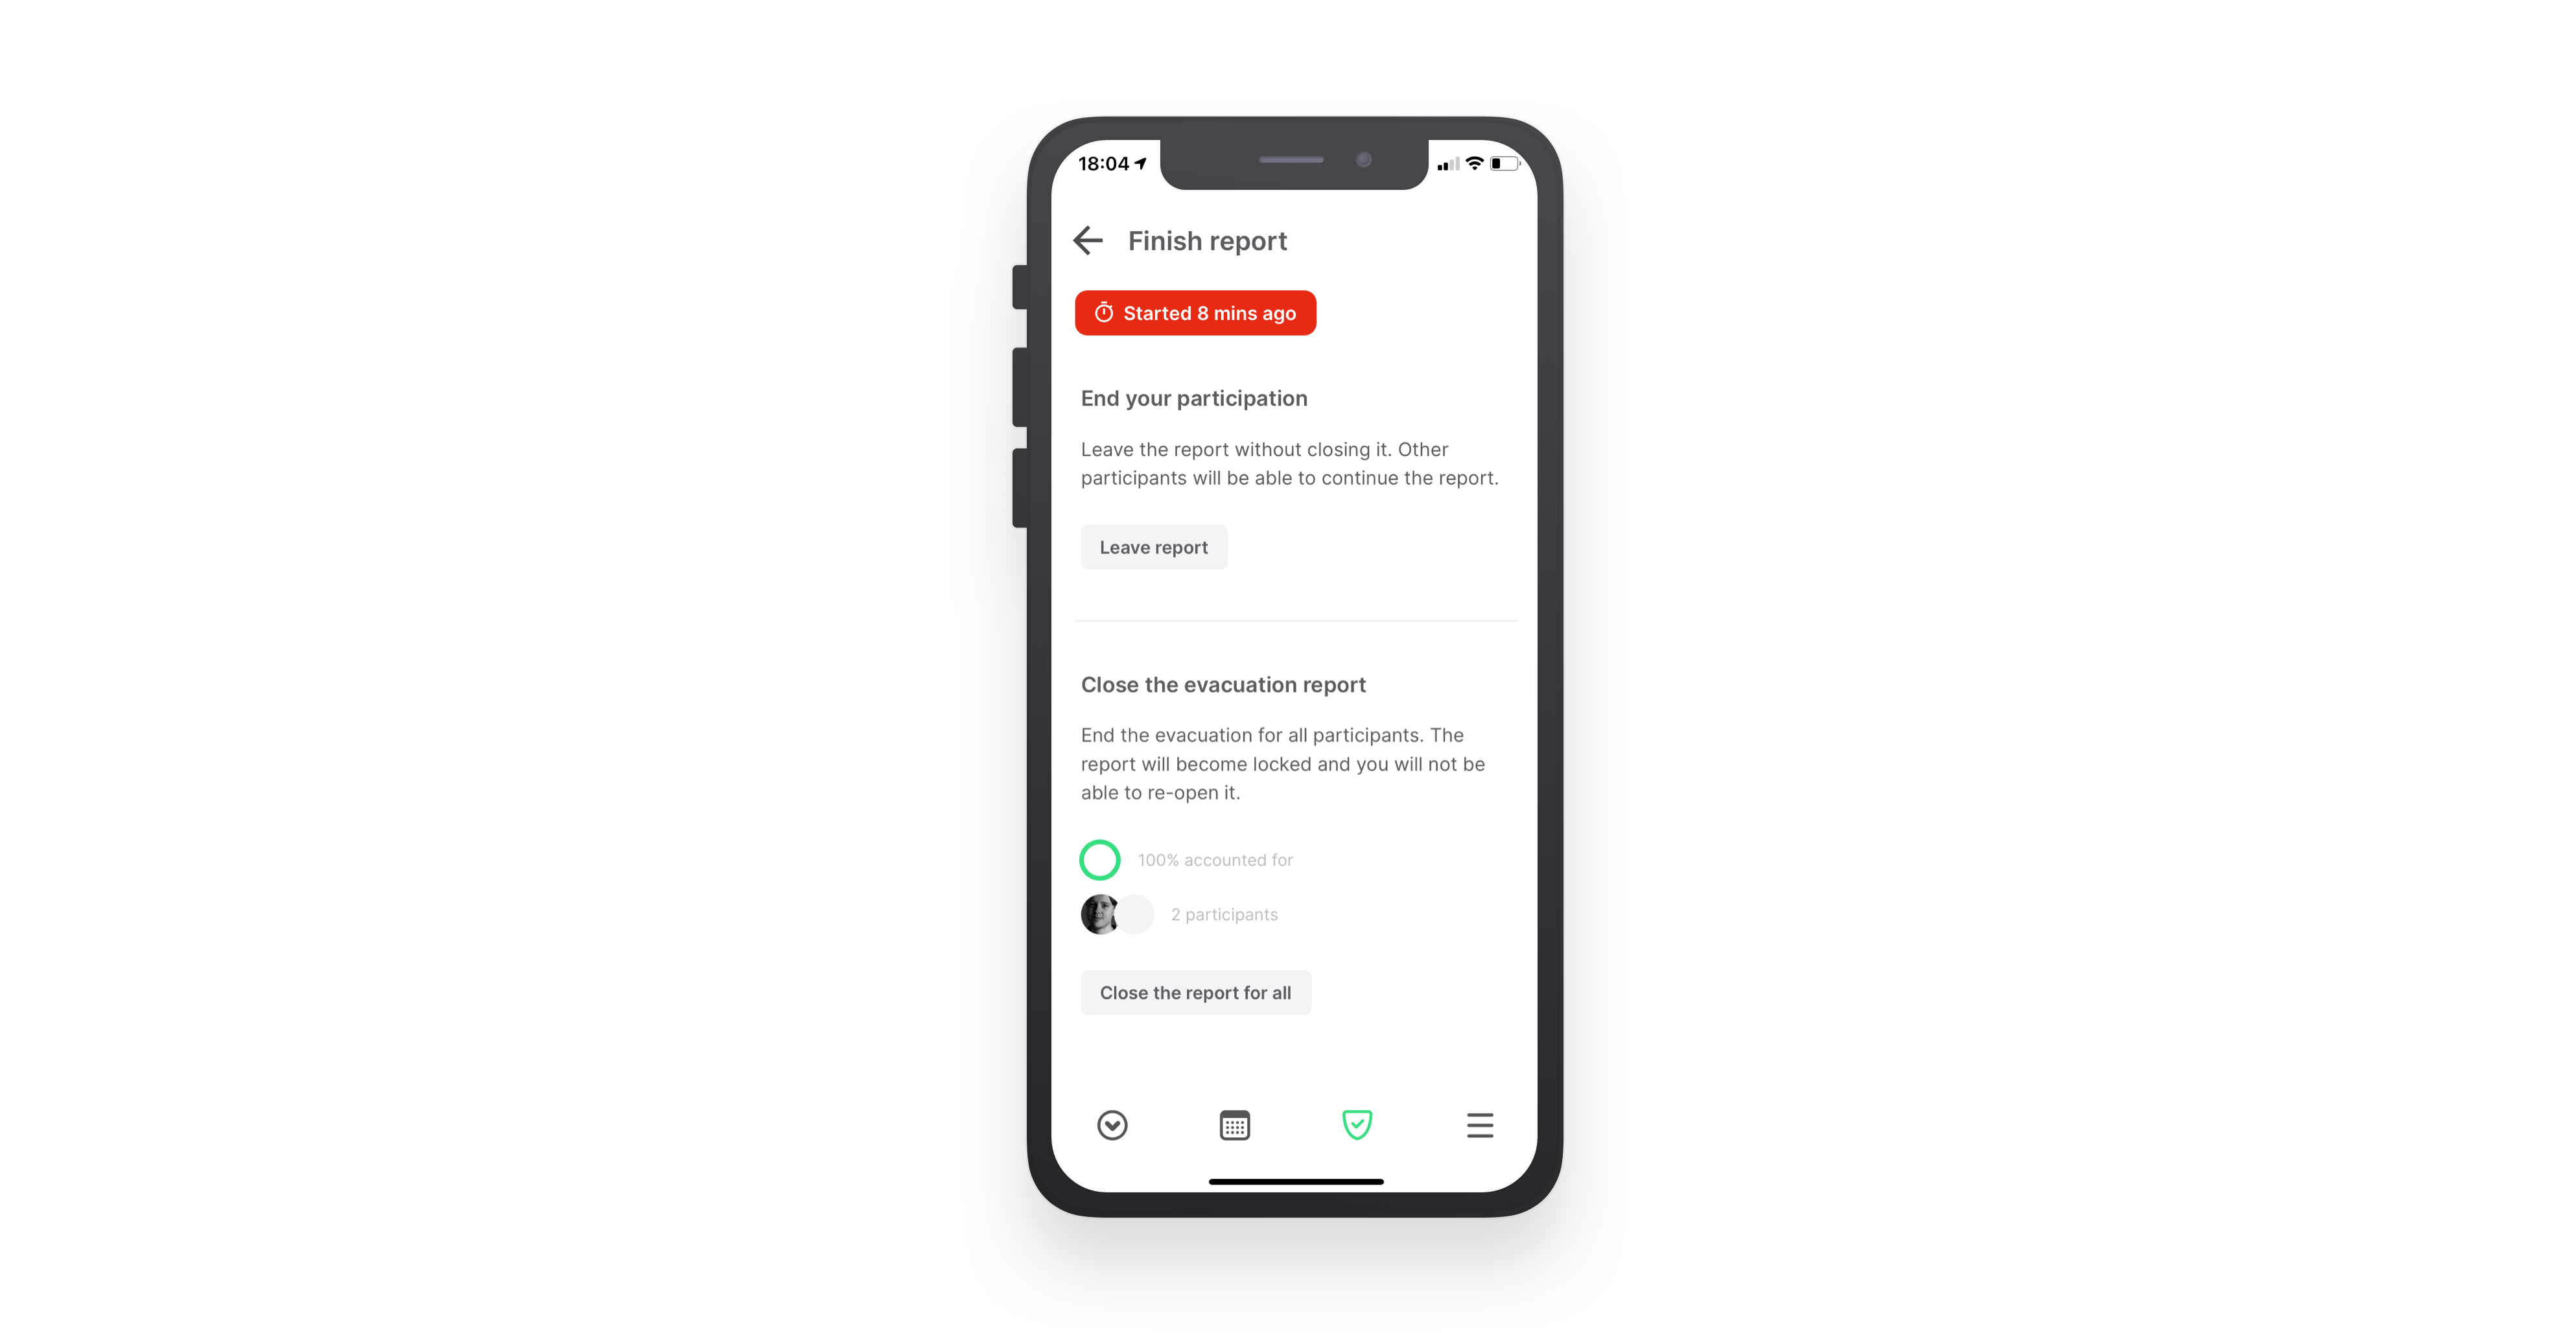
Once you’ve accounted for everyone on site it’s time to finish the evacuation report. Tapping Finish report will give you two options, Close the report for all and Leave report.
Tapping Close the report for all will end the report for all participants - only do this if you’re sure the evacuation has been completed, once confirmed this action cannot be undone.
Selecting Leave report will keep the evacuation running, but the device you’re using will leave the report, you can rejoin the report after doing this.
Tip
When the site evacuation has been completed we recommend ending the report straight away so the duration of the report is recorded accurately. After 4 hours of inactivity, the report will be automatically closed.
Viewing reports
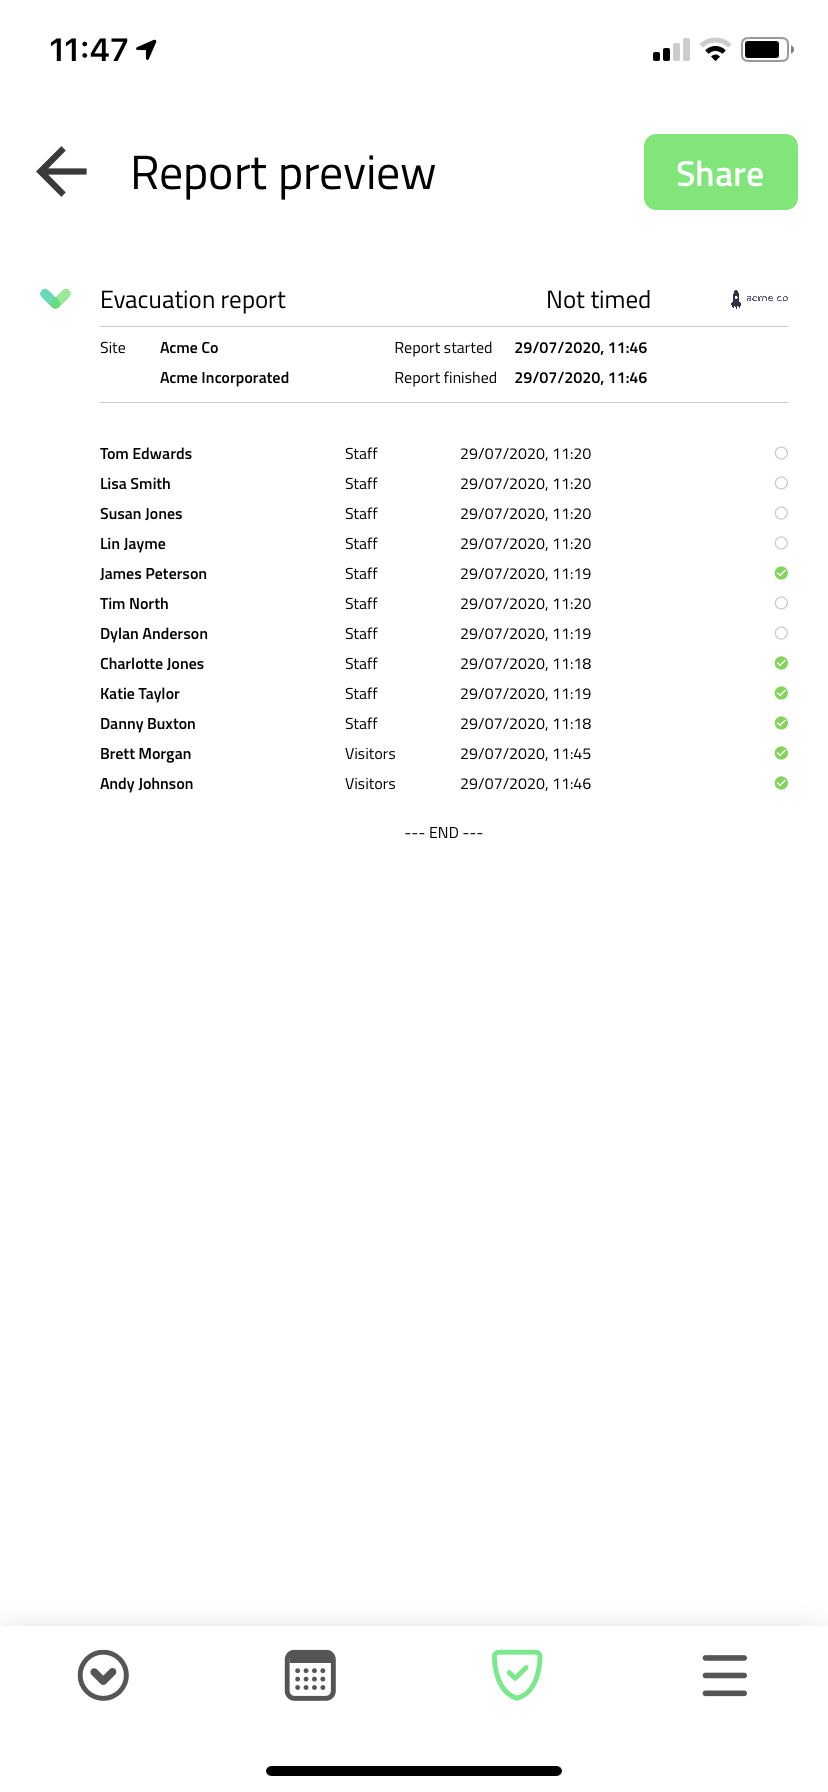
Once the evacuation report has been closed for all it can now be viewed from any device with access to the evacuation reports.
Companion app
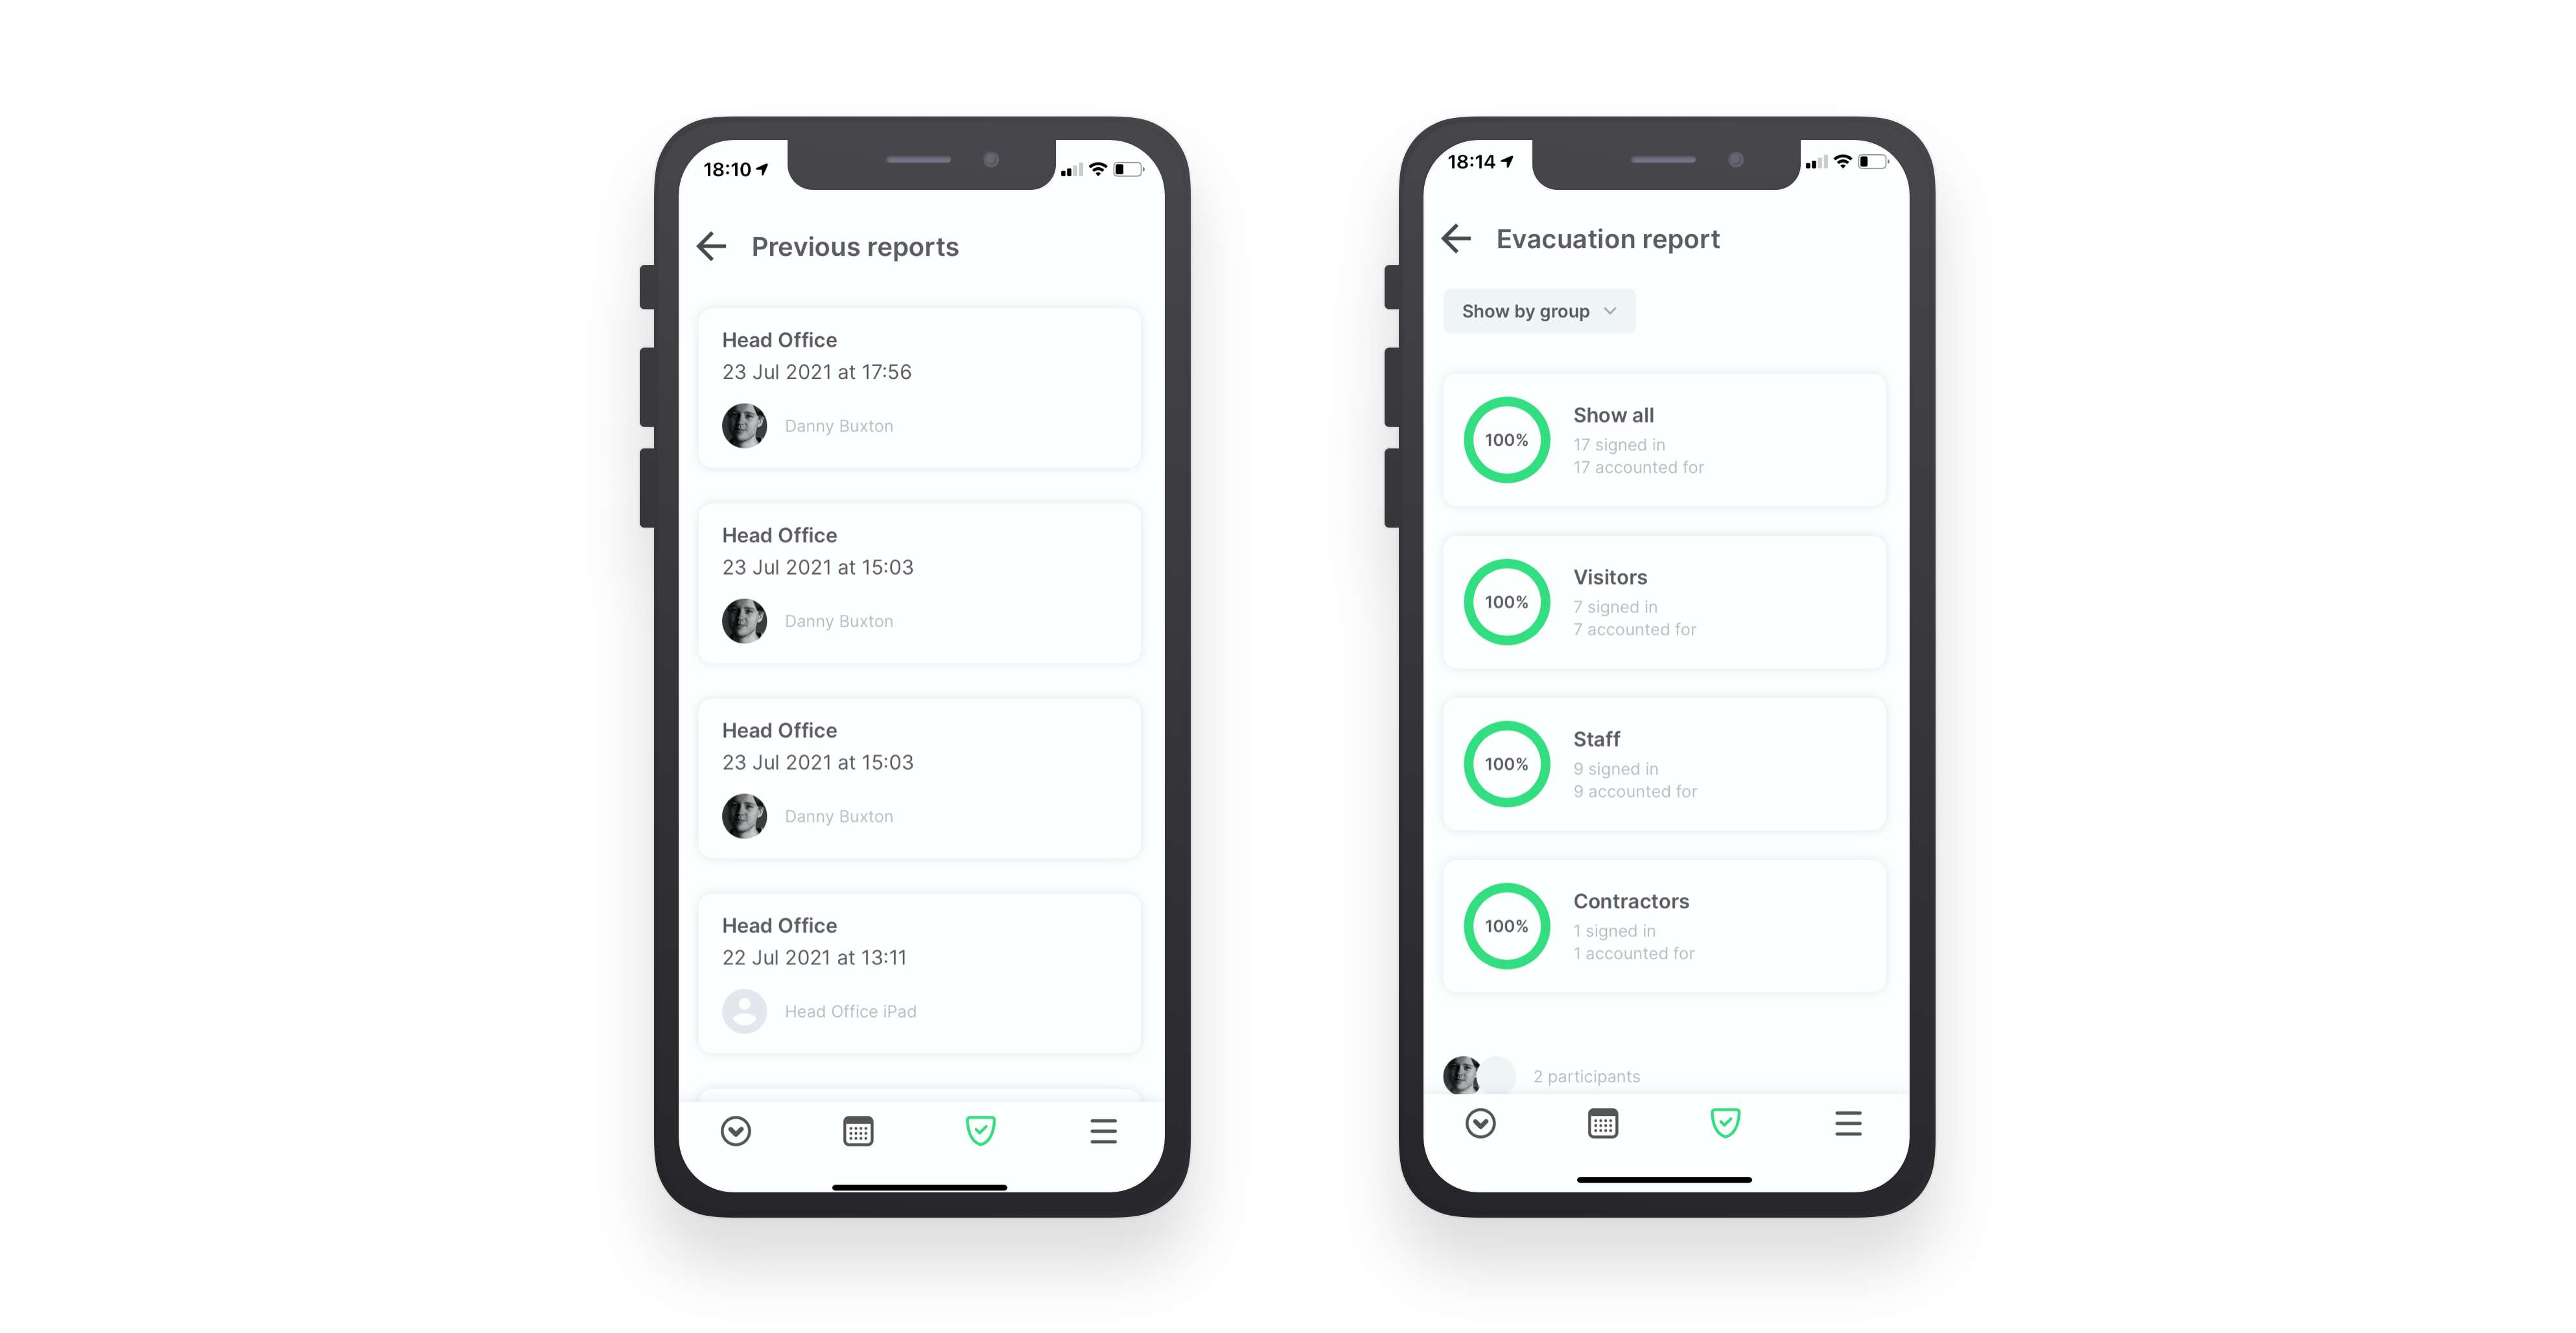
From Sign In App Companion, tap the evacuation icon and then select View previous reports. You will see a list of all the evacuation reports that have been carried out. Tap to view the full details of the report.
Portal
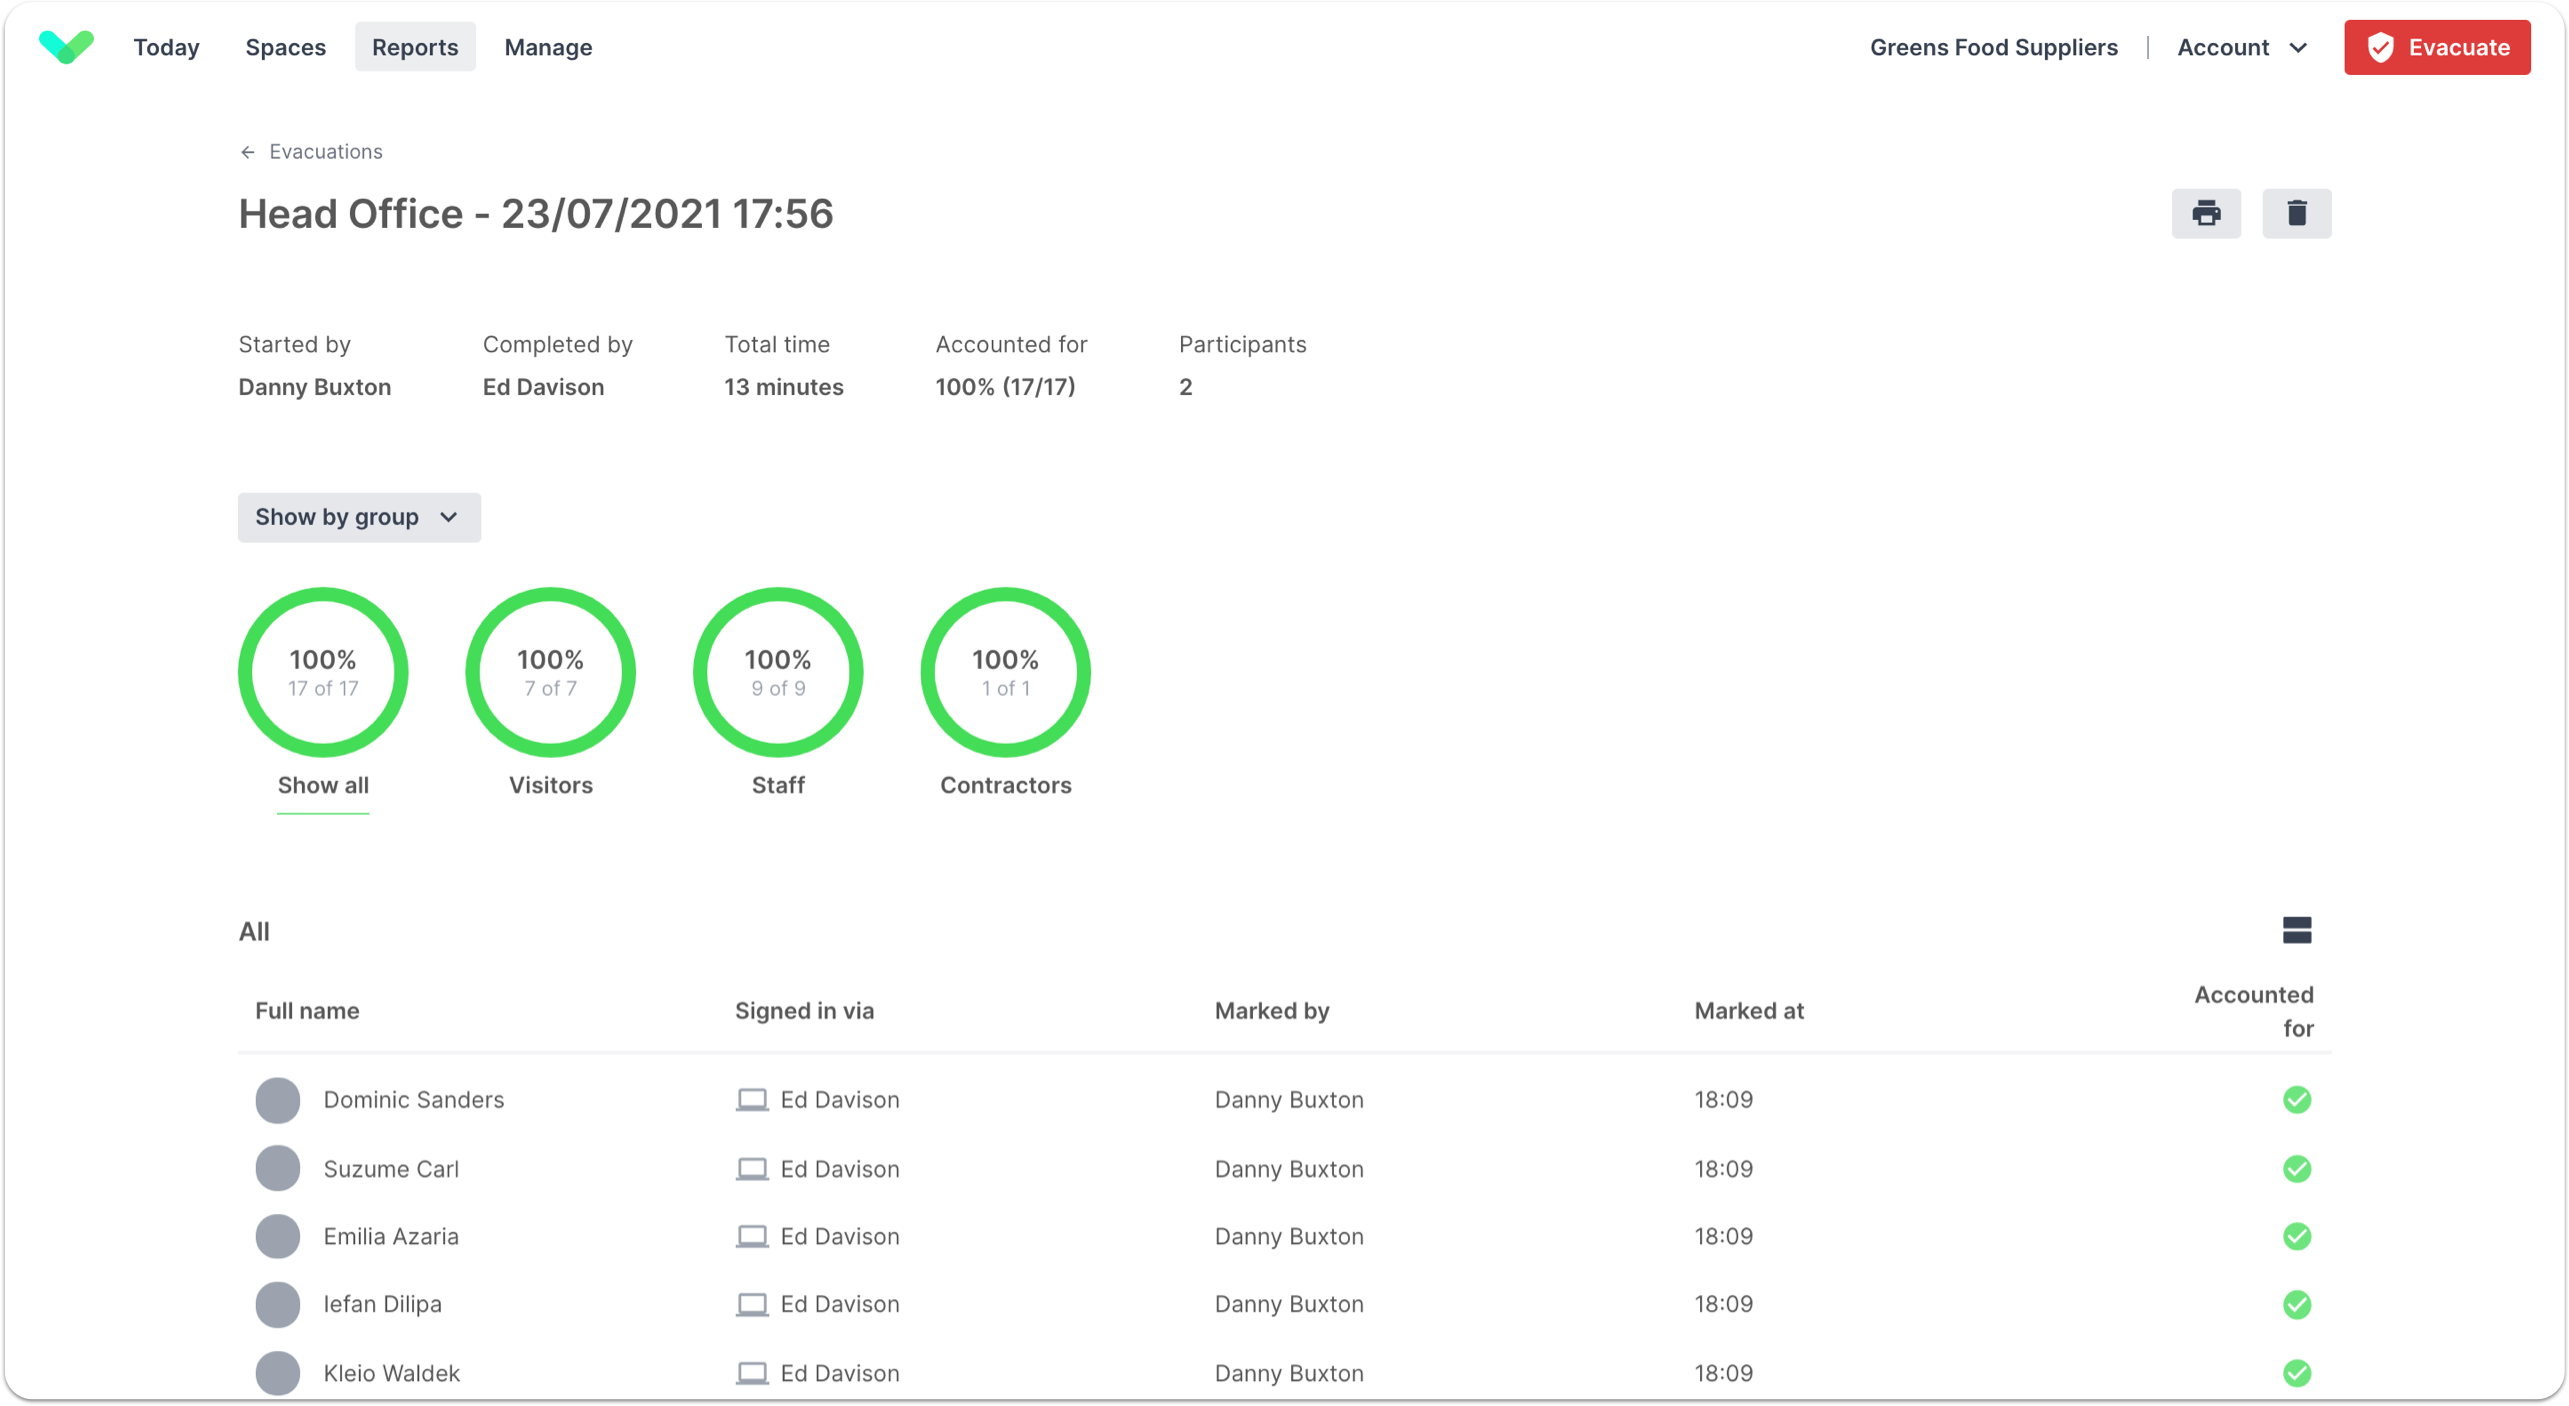
From the reports section Sign In App portal you can view, print, export and delete evacuation reports. You can navigate to your evacuation reports from the portal by going to Evacuate > View previous report or Reports > Evacuations, click on a report to view the report details. Clicking the printer icon will give you the option to print or download the report. Click the bin icon to delete the report (this action can’t be undone).
Local evacuation report
Accessing the evacuation list
Tap the evacuation list tab at the bottom of the screen and then tap Start a new report. If you have multiple sites you will then have the option to select the site you’d like to start the evacuation report for.
Report
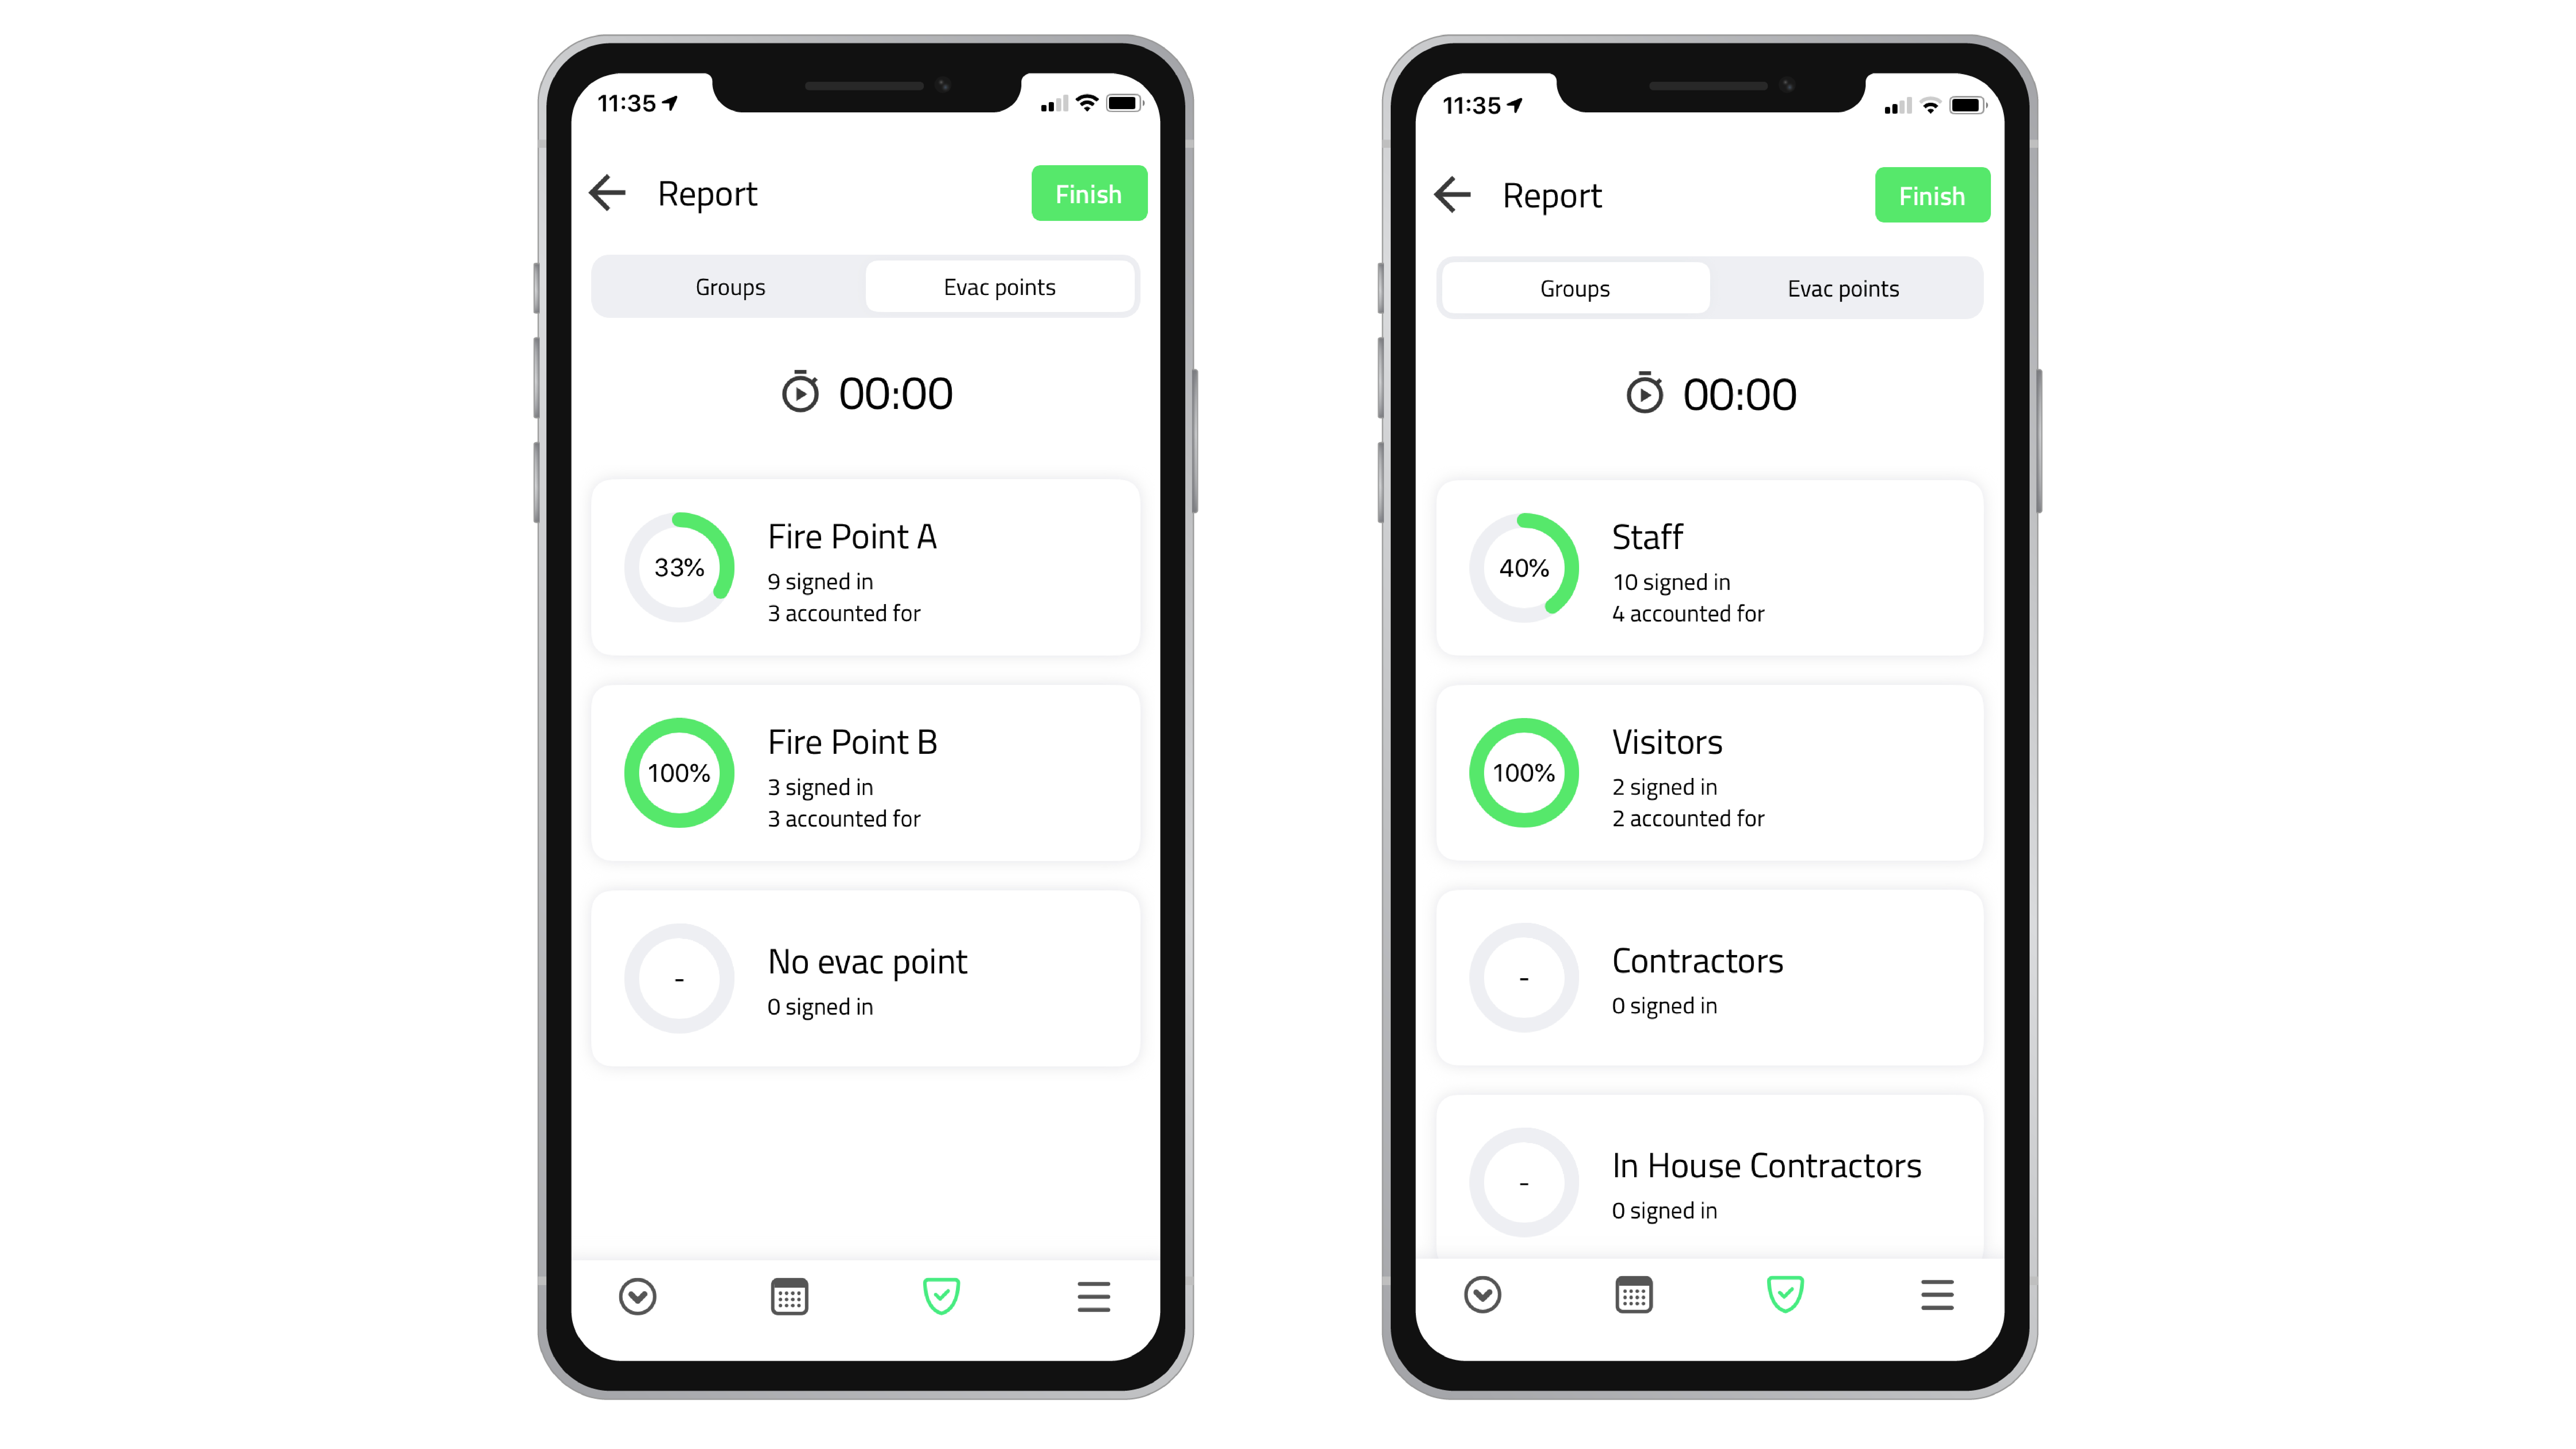
The report screen gives you an overview of how many people have been accounted for and gives a visual representation. When the green circle completes you know everyone has been ticked off. You can toggle between Groups and Evac points at the top of the screen, this will sort the members by their group or the evacuation point.
Visitor information
Tap a visitor's name or photo to see more information, including all custom fields entered as they signed in.
Roll call
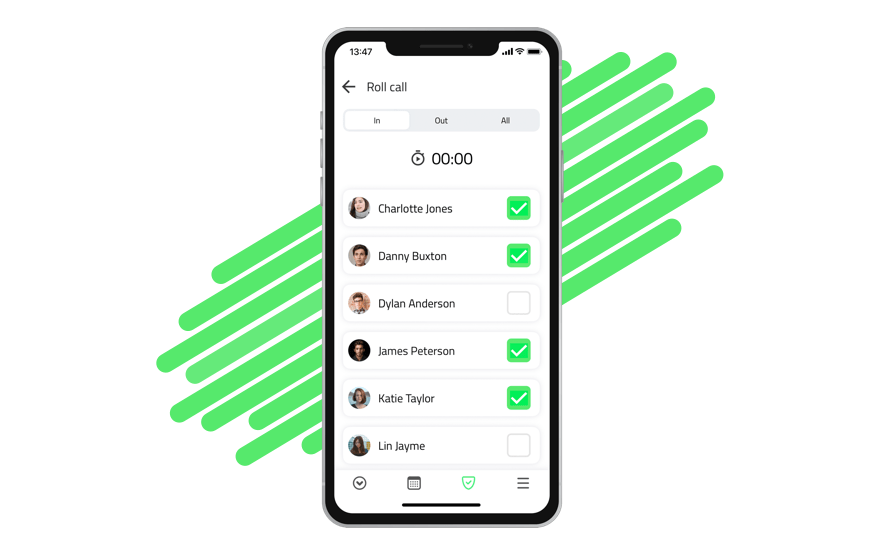
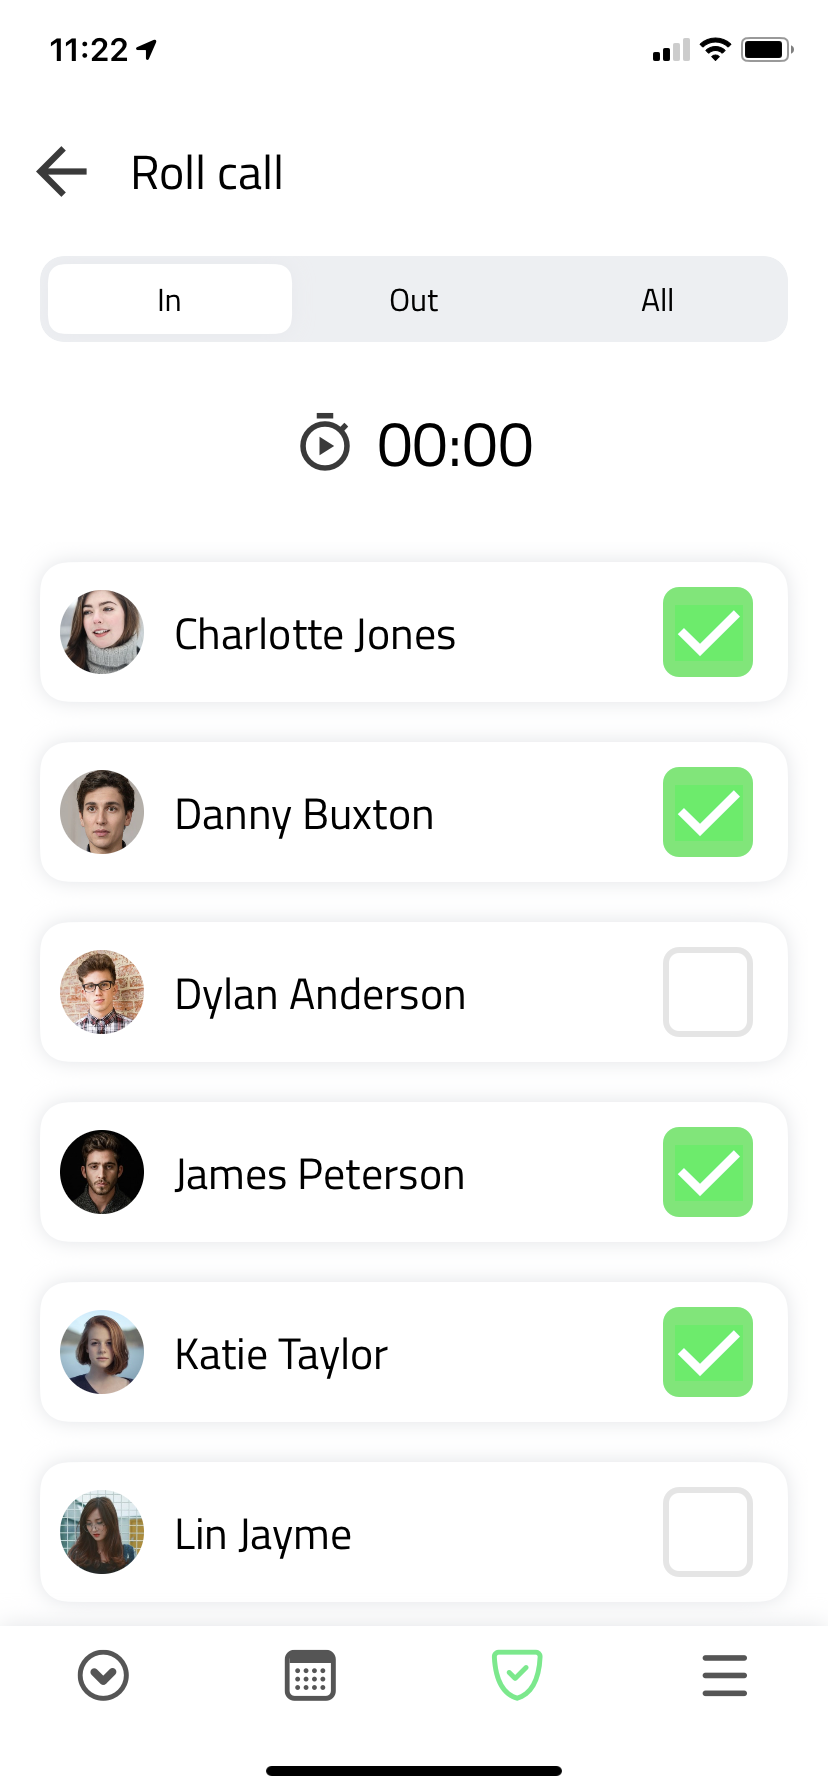
Tapping into a group or evacuation point will list all the people who are in that group or allocated to that evacuation point. Across the top, you can toggle between In, Out and All.
Timer
Tap the timer icon in the top screen once to start the timer. Do this as soon as the fire alarm sounds to accurately record the number of minutes and seconds the roll call takes to complete. You can pause the timer by tapping the icon again or tap it a third time to either reset or resume the timer.
Mark as present
Tick the box to the right of each visitor or staff member's name to mark them as present during the roll call.
Finish the report
Once you’ve accounted for everyone, tap the Finish button located at the top right of the Report screen. You can add a comment or continue to view the report preview. Tapping the Share button will give you the option to save, export and share the evacuation report as a PDF document.
