Top tip: Setting up advanced filters on notifications
If you read our previous top tip blog, you should be quite confident in creating questionnaires using custom fields. Now that you’ve made a start in enhancing your health and safety management process, how can you improve it further?
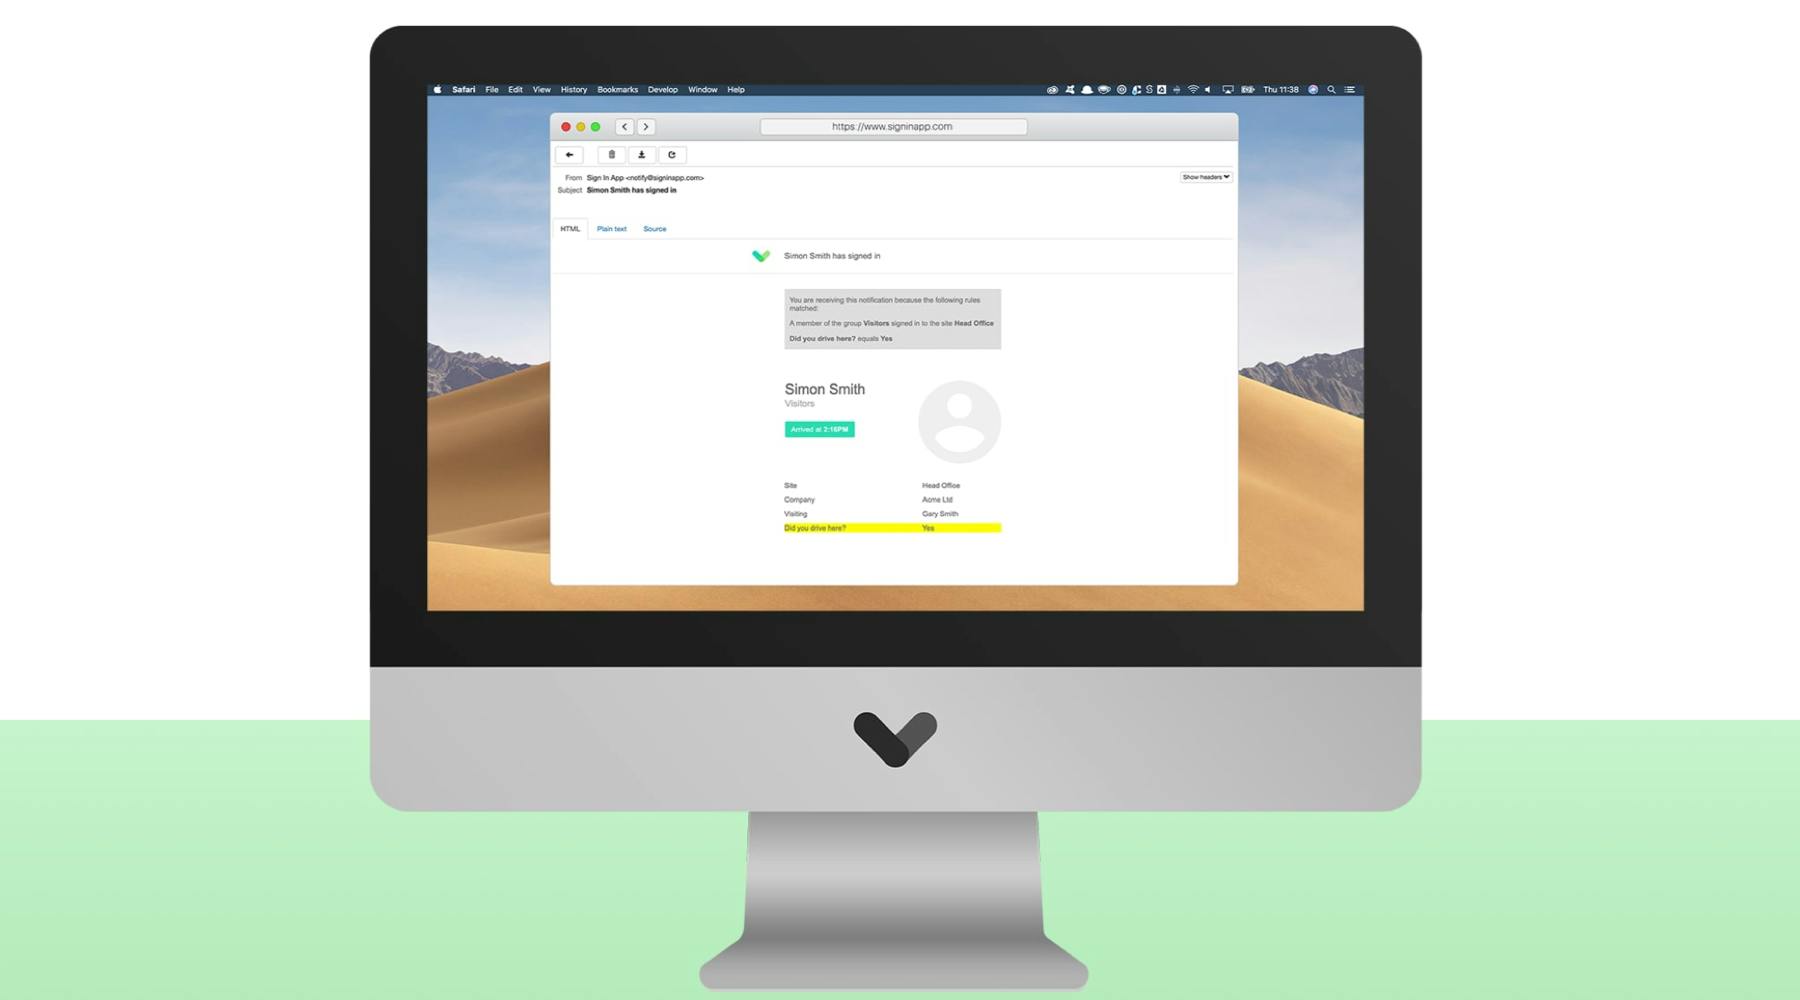
How beneficial would it be to your organisation if a relevant team member could be notified when a visitor responds in a specific way to a question you’ve set up using custom fields? E.g. being notified of a visitor’s specific status of health such as having the flu in the last 24 hours.
That’s where advanced filters on notifications come into play. Setting up advanced filters on notifications allows you to notify a team member via email, SMS, Slack or MS Teams when a visitor enters a specific value in response to a custom field. This is a great feature to use if you’re using health questionnaires or following mandatory regulations where visitors need to meet certain conditions.
So, how do you set up advanced filters on notifications?
Notifications
To set up advanced notifications, go to “Manage” on the online portal. Scroll to the bottom and then click “Notifications”. To add a notification, click “Add new” then “Advanced filters” and finally click “Add new” again.
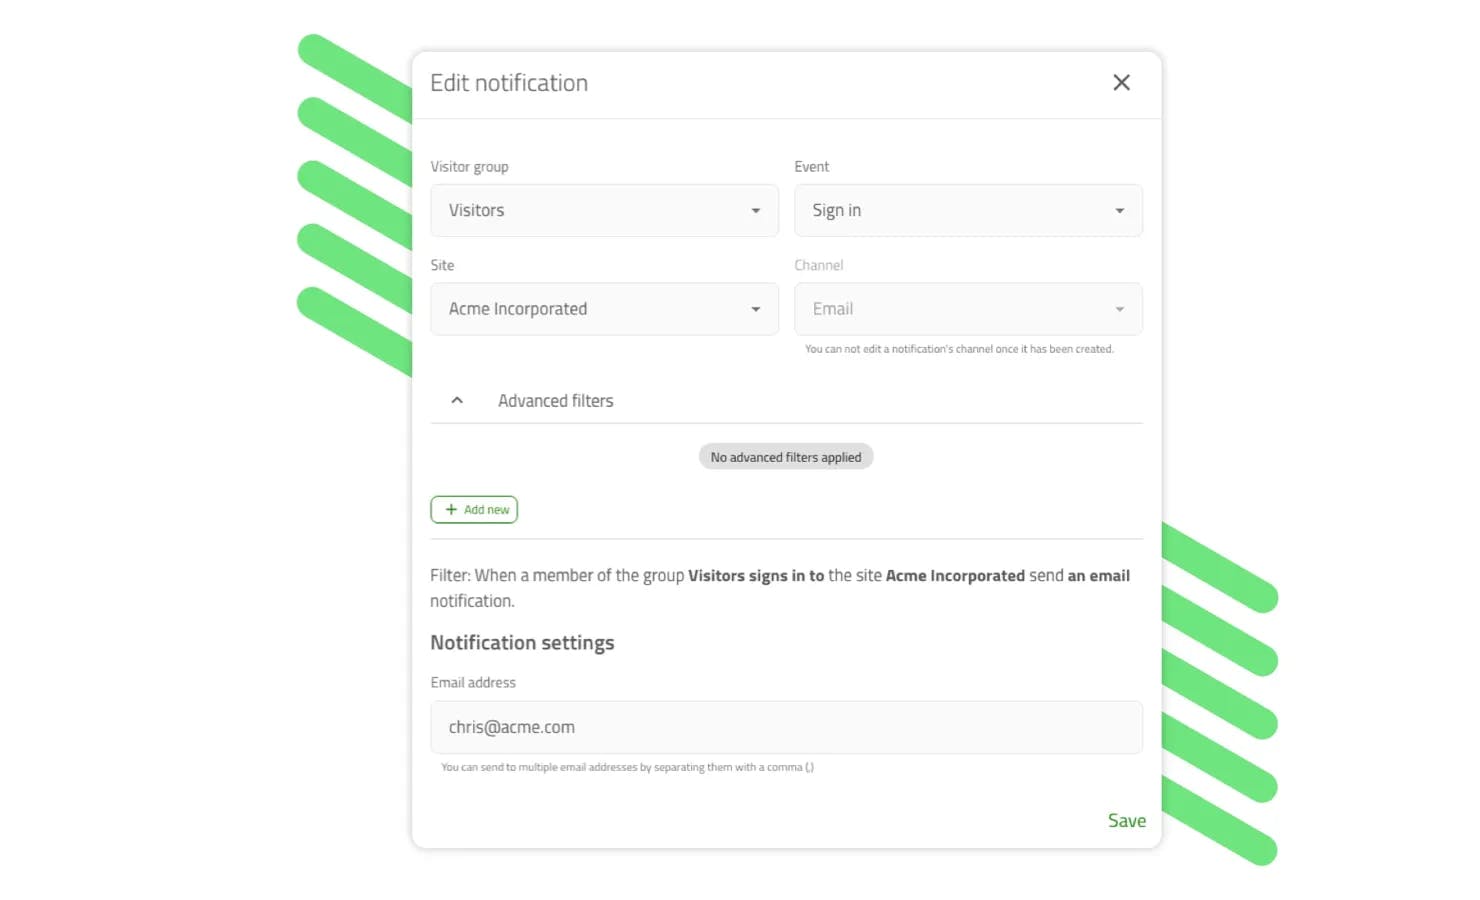
You’ll then be presented with a form to set up your advanced notification. Select the relevant group you want to set up the notification for using the “Visitor group” tab. Then using the “Event” tab, choose whether you’d like to add the notification when the visitor signs in or when they sign out. If you have more than one site, you can also select the site you’d like to add the notification for using the “Site” tab. The “Channel” tab allows you to choose how you’d like the notification to be delivered, whether that’s via email, Slack, Microsoft Teams or SMS. The notifications can be sent to one or multiple people within the organisation.
Filters
Now that you’ve set up the notification, it’s time to set up the advanced filter. First, choose whether you want your notification to be sent when “any” of the conditions you have set apply or when “all” of them apply. Then set up the conditions of your advanced notification using the “Field”, “Operator” and “Value” tabs.
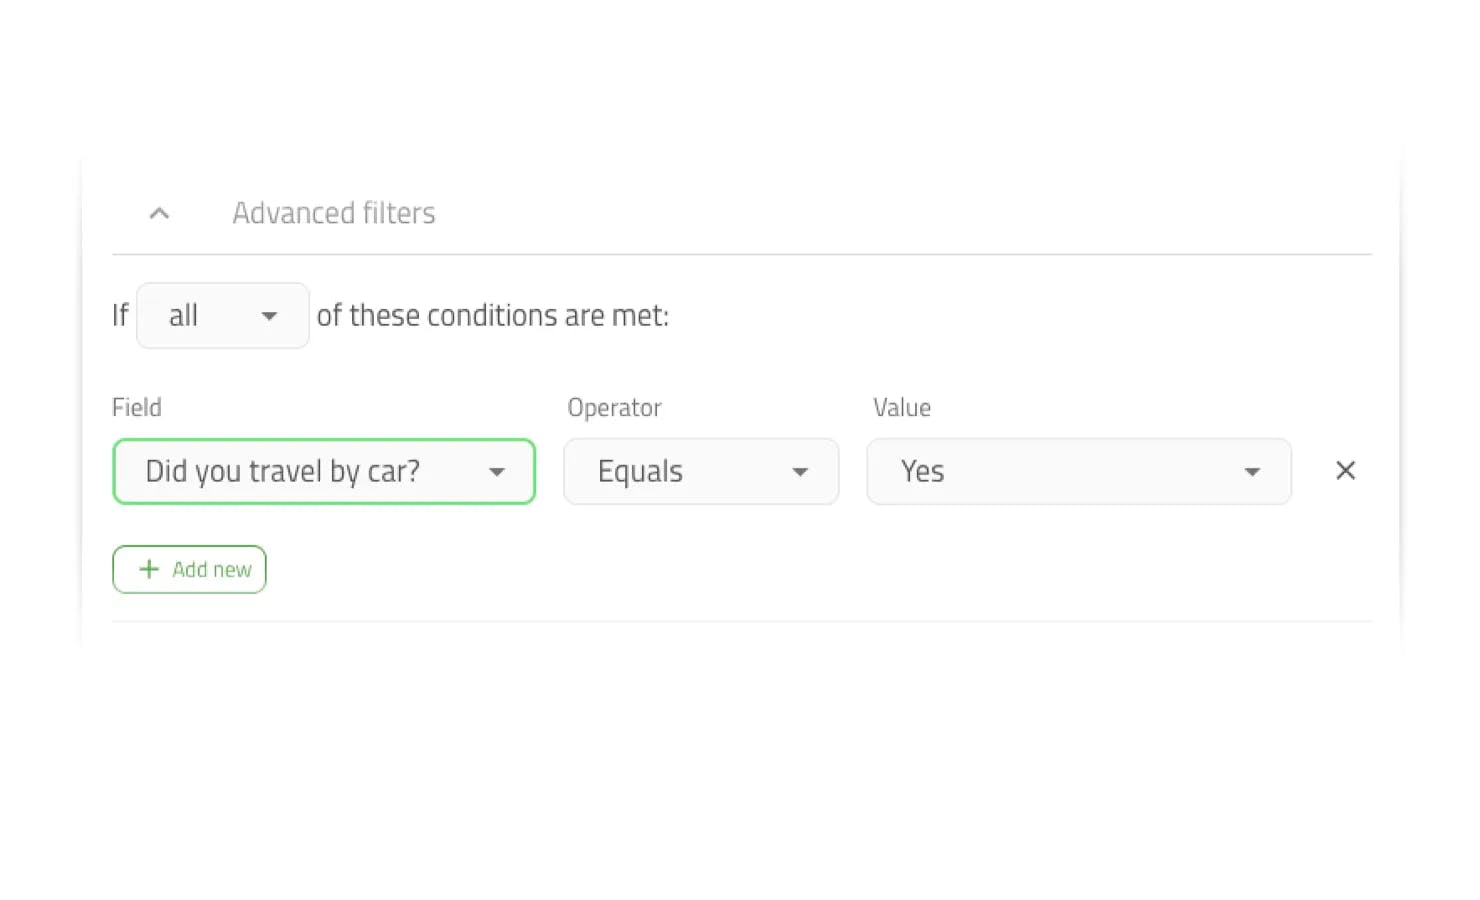
Field - this is the custom field you want to add an advanced notification for. It’s important to ensure you’ve chosen the correct group when setting up the notification.
Operator - “Equals” means the content of the visitor’s response is exactly equal to the value you set; this is useful for Yes/No questions where the answer is only one of two options.
“Contains” will notify you if the visitor’s response contains what you’ve put in the value; this is great for text responses where you’re looking for a keyword.
“Is Empty” or “Not Empty” is for when someone answers or doesn’t answer with any value. “Is Empty” is helpful if you have a host field and someone doesn’t select a host and “Not Empty” is helpful if you have an “Other” field and want to be alerted when someone uses it.
Value - this is the response the visitor inputs into the custom field when signing in/out that will prompt the system to send the notification. It’s important to ensure this is formatted correctly.
This is an example of what your filter may look like:
Filter: When a member of the group Visitors signs in to the site Acme Incorporated and the Have you travelled outside of the EU in the last 28 days? field is equal to 'Yes' send an email notification.
There you go - an enhanced health and safety management process in just a few steps! If you’ve got another question around advanced filters or anything else to do with Sign In App, contact us on info@signinapp.com or call 0333 016 3551 and a member of the team would be happy to help. Keep your eye open for more upcoming top tips coming soon.