Document expiry notifications
Document expiry notifications allow you to notify the relevant people if a repeat visitor signs in with an expired or nearly expired document. This helps to ensure people signing in to your site have the correct documents.
Adding documents
The first step to use the document expiry notifications is to upload the relevant documents to your repeat visitors. Head to Manage > Groups > Select group (Repeat) > Members, search for the member, hover over them and click Documents. From here you need to enter the Document title, when the document expires, and finally upload the document.

Once the document has been uploaded, you will see it in the Uploaded documents section. From here you can download and delete the documents.

Setting up the notification
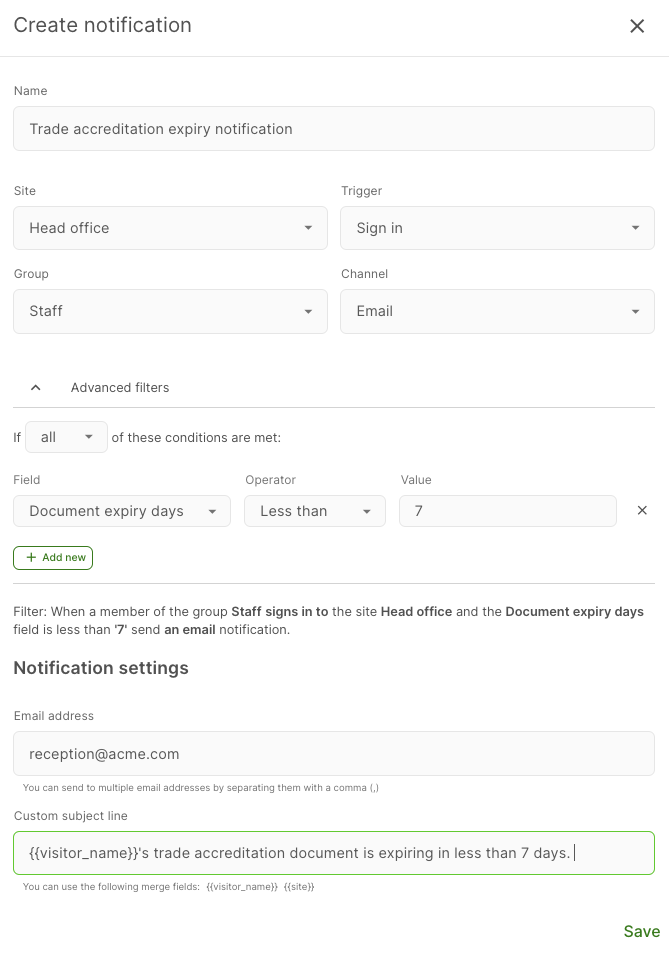
Document expiry notifications can be set up from the Notifications section in the the Sign In App Portal. Head to Manage, scroll down to the bottom of the page and click Notifications. From there you need to enter the Name of the notification, select if it’s for a specific site or not, set the trigger to Sign in, select the group that contains the members you’ve uploaded the documents for, select the channel and then set up the advanced filters. Select the option called Document expiry days, set the operator to Less than, Equals, or Greater than.
Tip
If you’re using the Email channel you can customise the email subject line, including the merge fields visitor name and site, just click the merge fields below the email subject to add them.

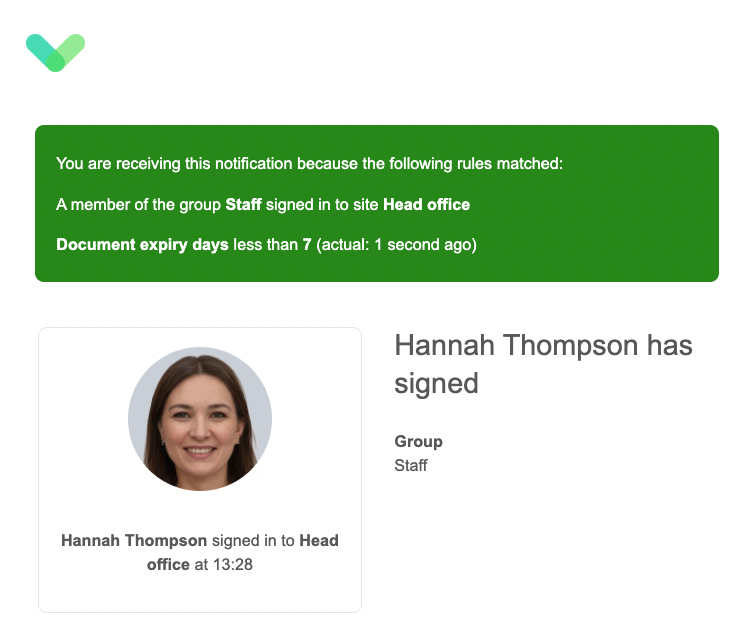
In the above example, reception@acme.com will be emailed if anyone signs in to the Staff group at Head office and they have a document that will expire in the next 7 days. The email below shows how the document expiry notification will be sent.

We hope you've found this guide useful but if you have any questions around Document expiry notifications or any Sign In App feature, please contact our support team at support@signinapp.com.

