Questionnaires
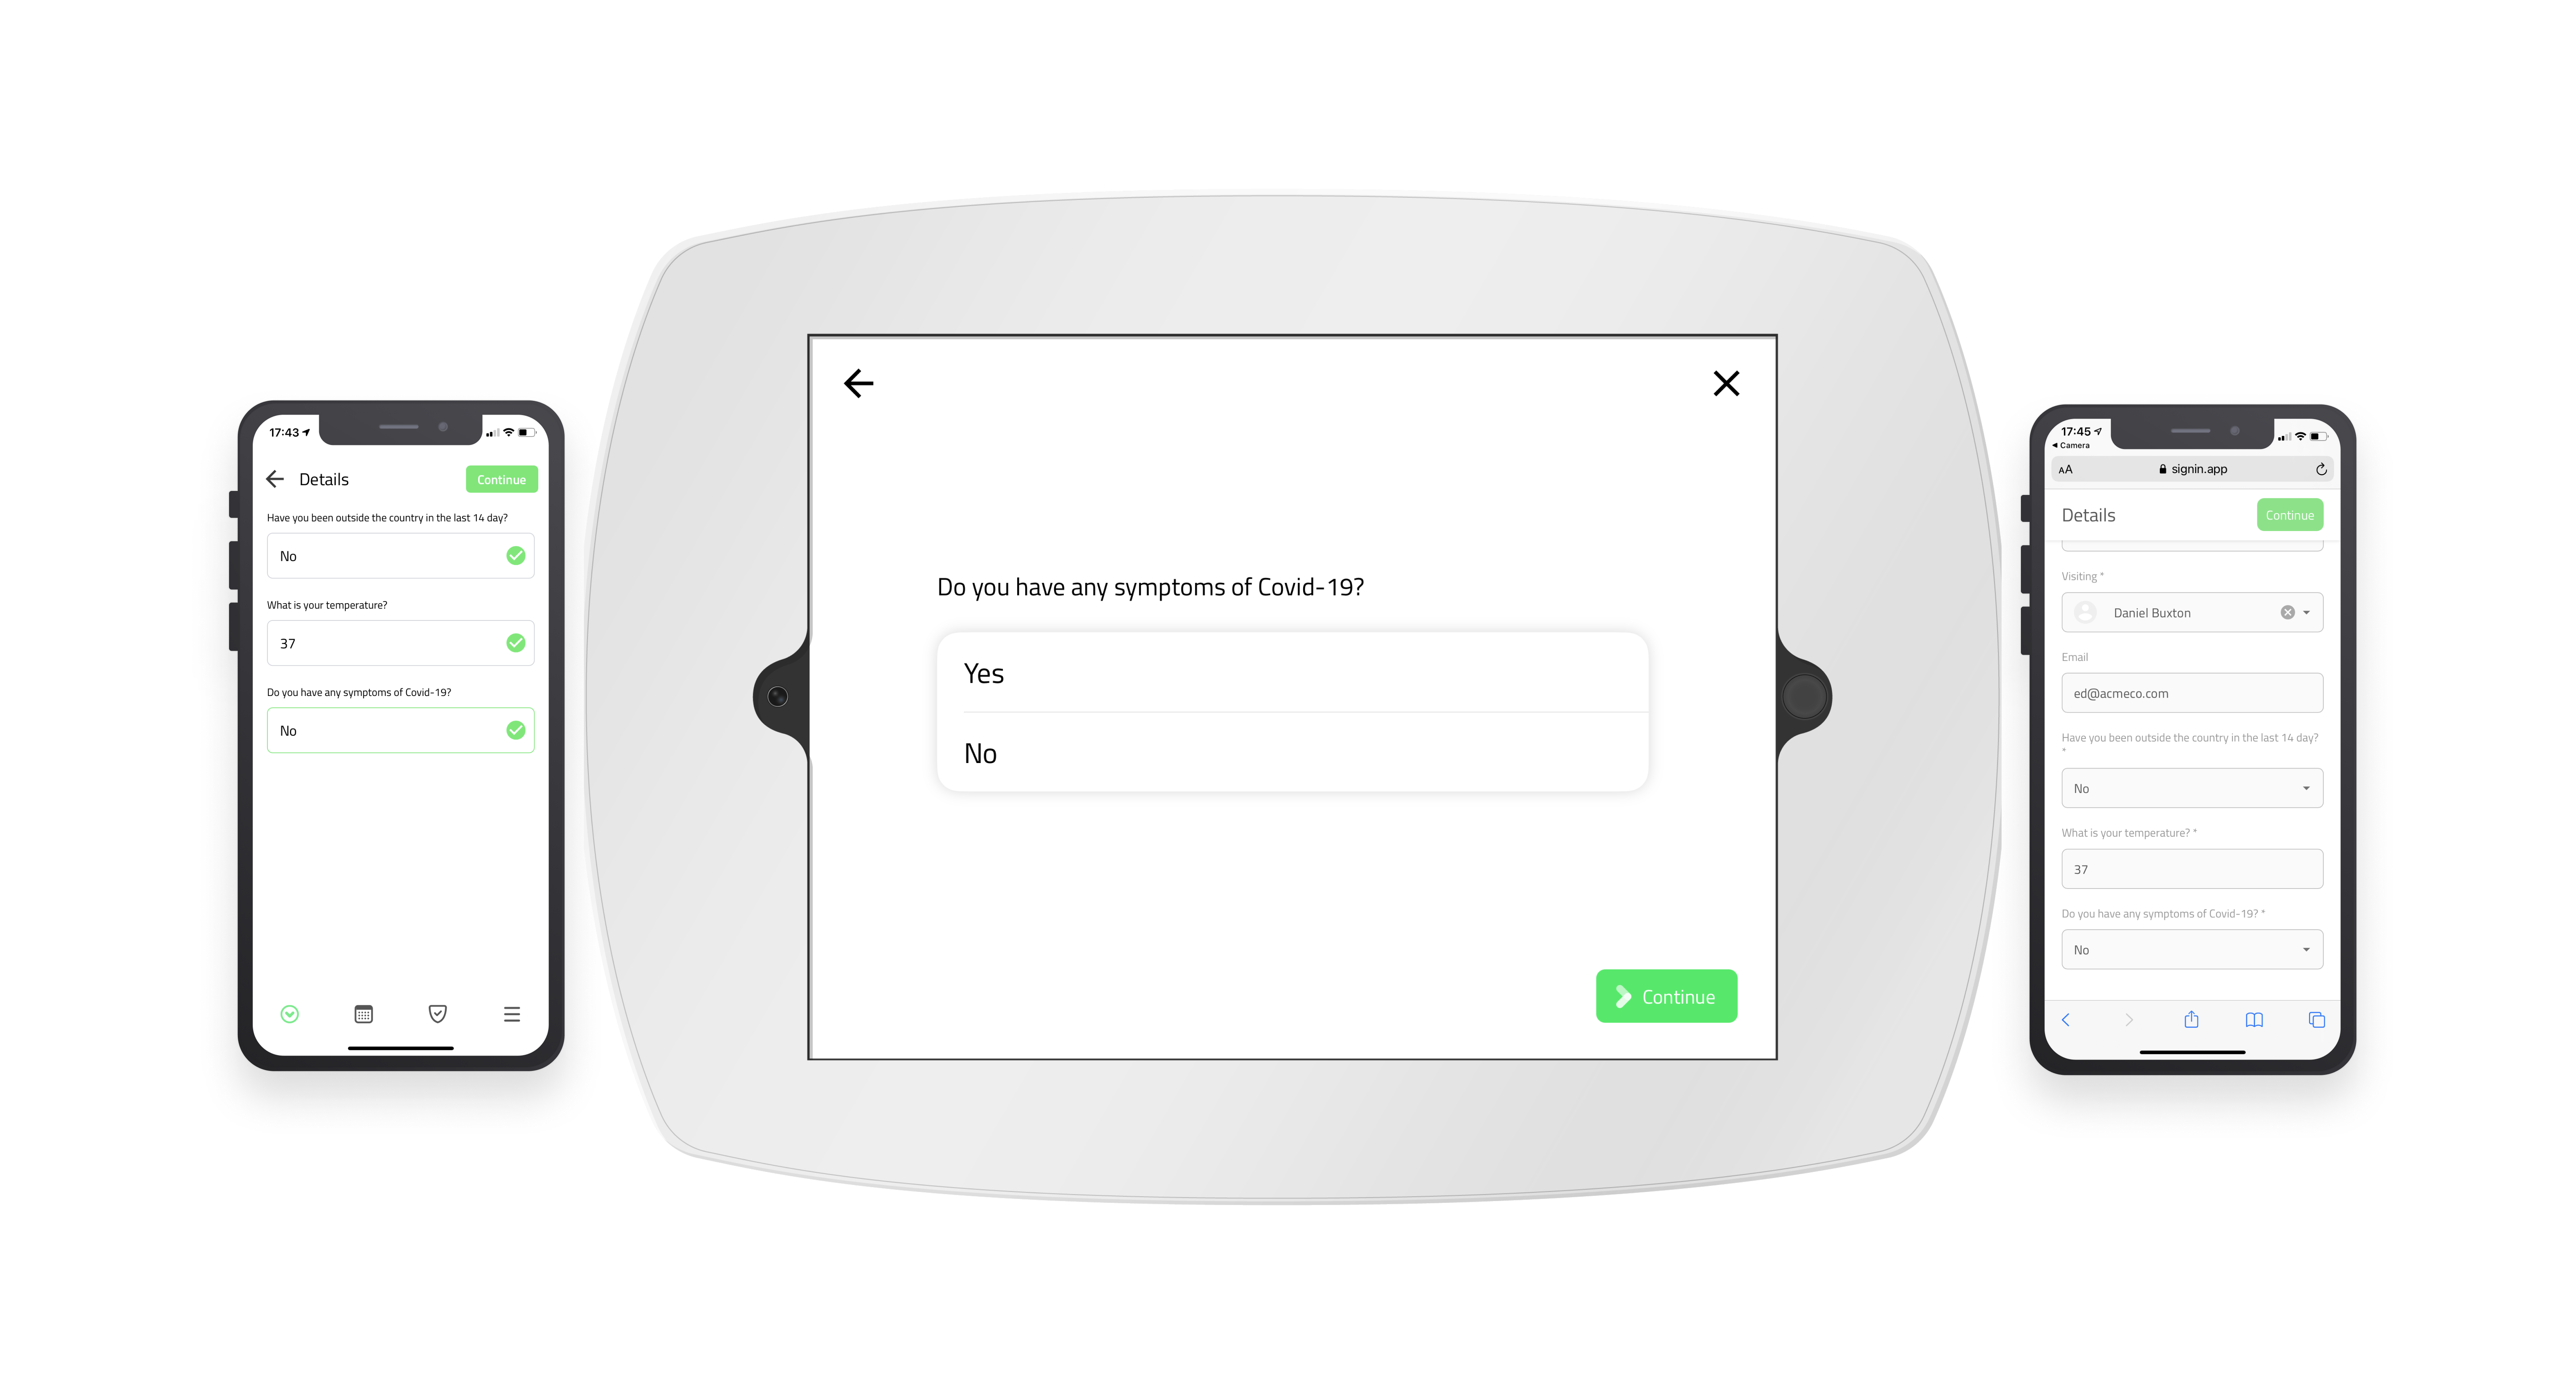
Sign In App helps you to collect the data you need and present questionnaires to your visitors, staff, and contractors when they arrive at your organisation. Questionnaires can be built using custom fields and can be presented to visitors and staff when signing in on the iPad or using their personal smartphone device through contactless sign in. Companion app also supports questionnaires for staff/contractors using this to sign in on site or remotely.
Add first custom field
To get started, go to Manage > Sites > Select site > Custom fields and click Add new, from here you can configure the first question in the questionnaire. First we need to add the field label, this is the question you are asking the visitor, contractor, or staff member. Next, select the appropriate field type.

Reject sign in
When using the ‘Yes or no question’ or ‘Dropdown’ you can reject a sign in depending on the visitor’s response to the question. In this case, if the visitor selects Yes then we will reject the sign in and present a message on screen to inform the visitor of the next steps. From the Sign In App portal, if you go to Manage and scroll down to Notifications you can set up a notification rule to ensure the correct person is aware when a sign in is rejected. Set the Event to ‘Rejected sign in’ and select the channel you'd like to be notified through. Click here to read the full how-to-guide on rejected sign ins.
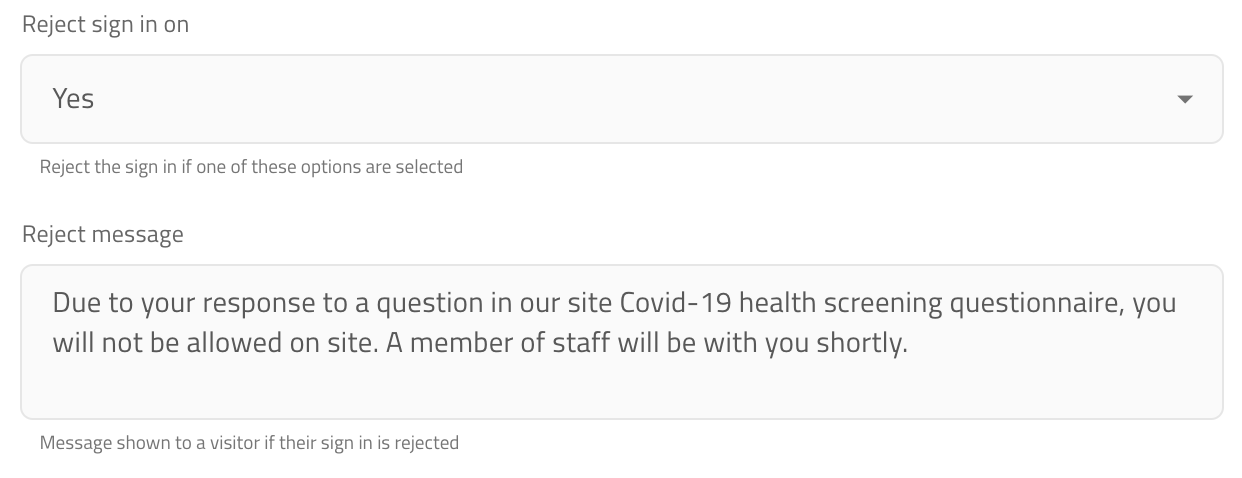
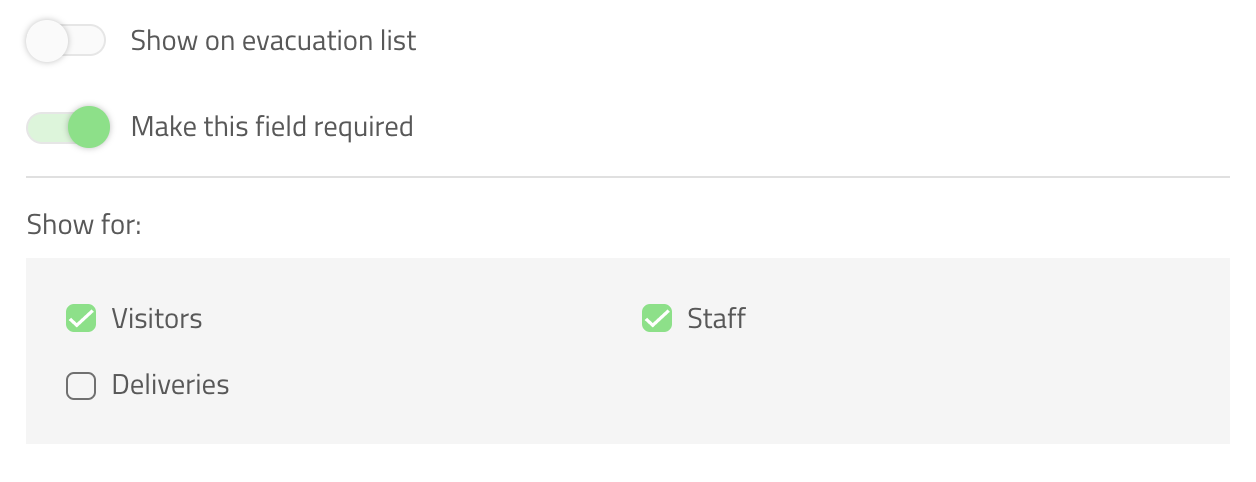
After configuring the rejected sign in there are a few more steps before saving the first section of the questionnaire. In this case we’ve left Show on evacuation list off as this data isn’t relevant to emergency evacuations. This question should be required so visitors aren’t able to sign in without providing an answer. This is a health screening question that needs to be asked each day so we’re going to show this question for our Staff and Visitors groups. Click save and the custom field will be added to the sign in process.
Build questionnaire
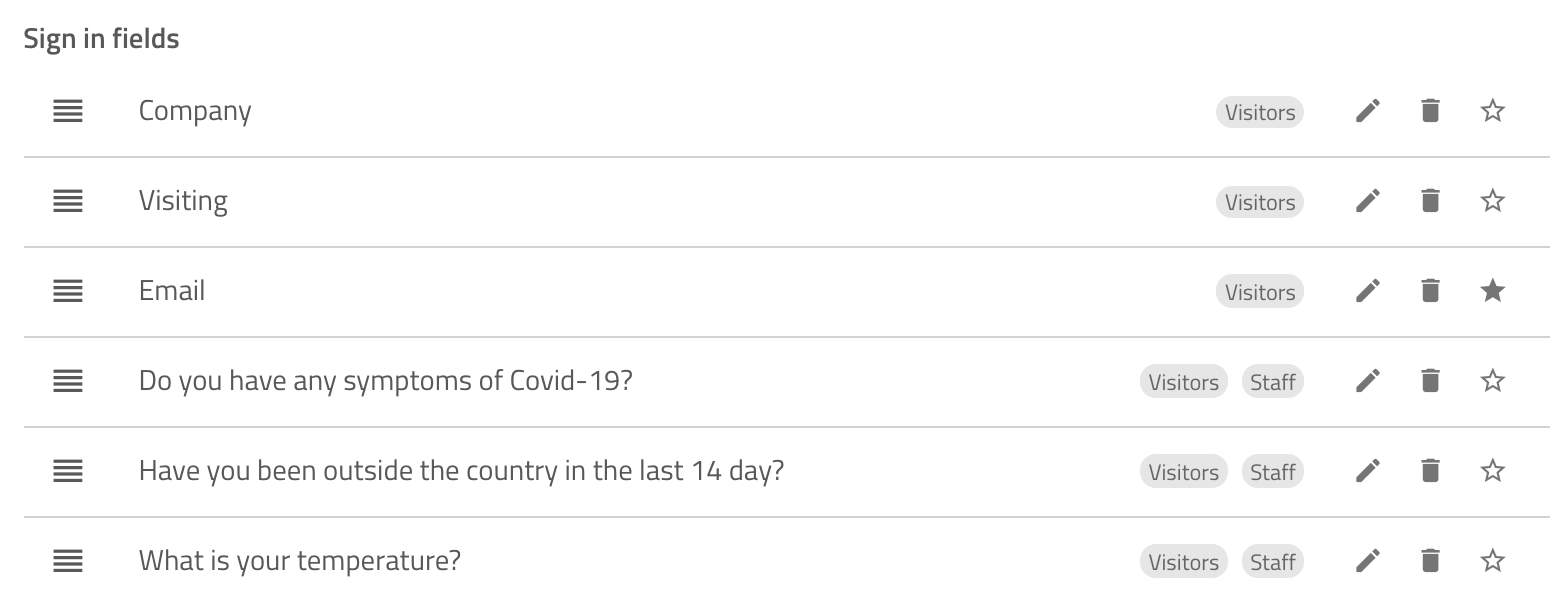
You can keep adding custom fields to build your questionnaire, each custom field can have different field types and be applied to different groups. You can click the three horizontal lines to the left of the field name and drag the field to change the order they appear in. This is the order they will be asked in the sign in process.
Tip
You can click the star icon on the right side of the custom field to favourite it. You can have 4 favourite fields and these appear at a glance when the expanded view is enabled. This can be enabled on the today screen, members section of repeat visitor groups, and the evacuation list.
Once you’ve added the custom fields they will be displayed to anyone signing in to the groups the custom field are applied to. Custom fields are compatible with all methods of signing in including from the iPad app, Companion app, and Contactless sign in.
Reports
The responses to all custom fields are visible in the history reports, just go to Reports > History > Export and from the dropdown select the group. If you scroll down you should then see the option to include the responses to your questionnaire in the history export.

We hope you've found this guide useful but if you have any questions around questionnaires or any Sign In App feature, please contact our support team at support@signinapp.com.

