Outlook Add-in
The Sign In App Outlook Add-in allows you to integrate a Sign In App pre-registration form with your Outlook calendar. Utilising the Add-in will allow you to pre-register visitors on Sign In App and then have the details pre-populated onto an event in your Outlook calendar. Once you have set up the Add-in on your account, your details will be saved to your Outlook account allowing you to utilise the Add-in no matter where you sign in from.
Important
The Sign In App Outlook Add-in is exclusively compatible with the cloud-based version of Outlook and is not supported in on-premises deployments of Outlook.
To add the Sign In App Outlook Add-in you will need to copy and paste the following manifest link:
https://signinapp.com/outlook-addin/manifest.xml
Installation - Outlook 365 Browser
You can install the Add-in in your browser (we recommend using Chrome, Safari or Firefox) by going to your Outlook 365
account and creating a new event in your calendar. In the popup select More options to reveal the full
Calendar event form. Select the three dots to the top right to reveal additional ribbon items and select
Get Add-ins.
In the new window, select My add-ins in the left-hand sidebar and scroll to the bottom to find the Custom add-ins
section. Clicking the Add a custom add-in link will reveal another menu where you can select Add from URL....
Copy and paste the manifest link provided at the beginning of these instructions into the provided input field
and select ok. You can now select Install to add the add-in to your Outlook account. Once complete you should
see the add-in appear under the Custom add-ins section.
Installation - Outlook 365 Desktop
To install the Add-in using the Outlook 365 desktop application, open the software and view your inbox. In the
Outlook ribbon, click Get Add-ins to open the add-in installer.

Select My add-ins in the left-hand sidebar and scroll down to the bottom to find the Custom add-ins section. Clicking
the Add a custom add-in link will reveal another menu where you can select Add from URL….
Copy and paste the manifest link provided at the beginning of these instructions into the provided input field
and select ok. You can now select Install to add the add-in to your Outlook account. Once complete you should
see the add-in appear under the Custom add-ins section.
Setting up the Add-in
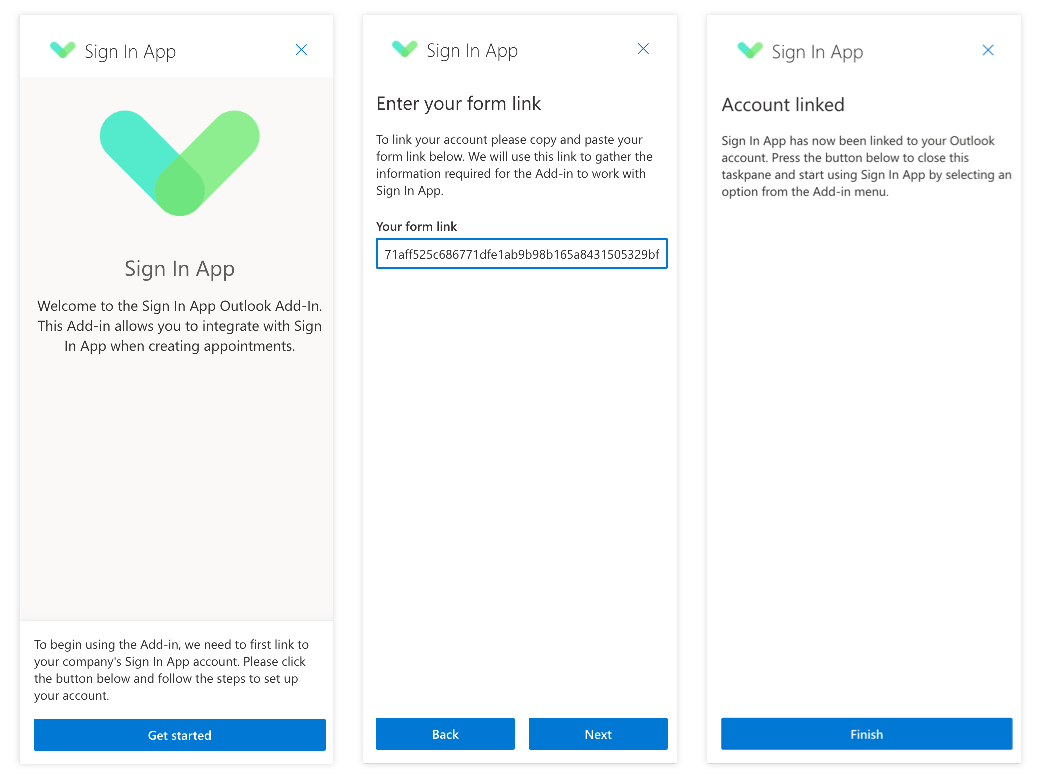
To access the add-in select the Sign In App logo in the New Event window ribbon (New Appointment in the desktop application). If it is not on the ribbon click the three dots to the right-hand side to reveal more options where it will be listed. The Sign In App menu items may appear directly on the ribbon rather than within a Sign In App menu on the desktop version of Outlook 365. When you first click on any of the Add-in's menu items you will be presented with a welcome wizard to connect your Sign In App account.

Form Link
To set up the add-in you will require a unique form link. If you have not been provided a link and do not have access to the Sign In App portal you will need to contact the appropriate persons within your company for one. If you have portal access you can click here to find out how to create a form link.
Add Pre-registration
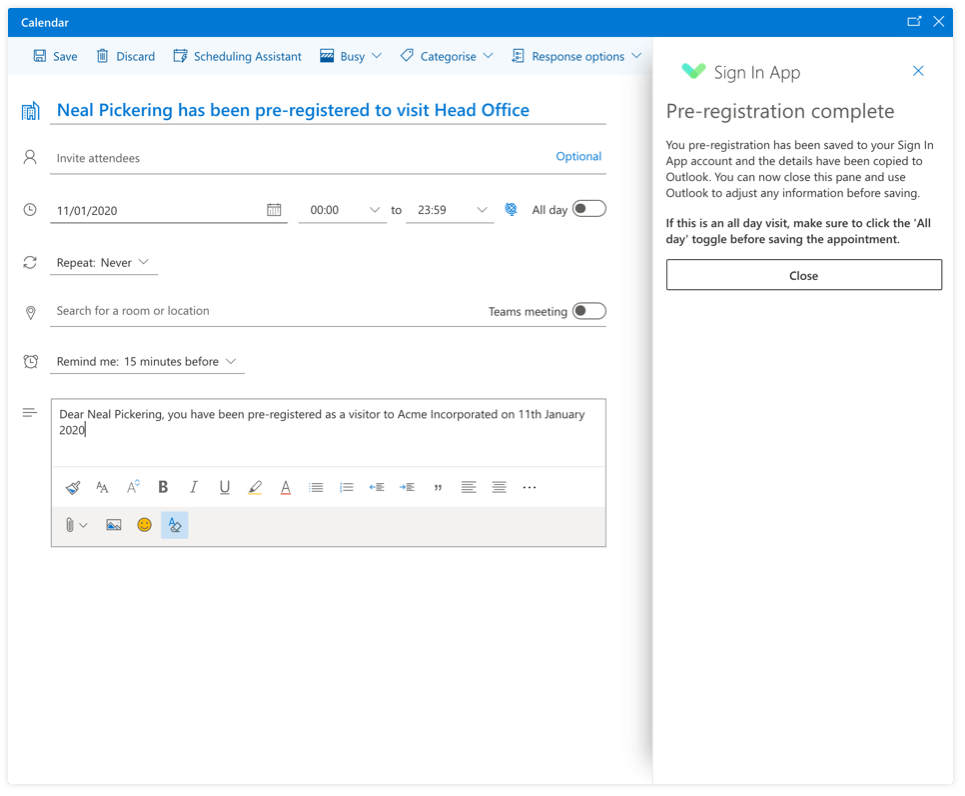
Once connected you can now create a new pre-registration by selecting the Create pre-registration menu item on the Sign
In App add-in menu. This will display a pre-registration form in a taskpane to the side of the Outlook event window. Fill
this form in before entering any details into the main Outlook event form. When you have completed the form provided by
the Sign In App Add-in, click the Create pre-registration button at the bottom of the form to send the information to Sign
In App. The Add-in will then copy the information into the relevant form fields on the Outlook event form. You can now close
the Sign In App Add-in taskpane and make any necessary adjustments to the event form before saving it to your Outlook account.

Tip
The Sign In App Add-in will pre-populate the body of the event with the same message you have set for pre-registrations under
Group > Pre-registrations > Pre-registration email message.
Warning
By selecting Send a pre-registration invitation at the bottom of the pre-registration form and entering a valid email,
the Add-in will send a pre-registration email similar to ones sent when pre-registering through the portal. When the Add-in
copies the information to the Outlook form it will pre-populate the Invite attendees field with the provided email. Outlook
will send a second email that is usually sent when an Outlook event is made upon saving in Outlook.
Settings
The settings pane allows you to adjust settings that can affect how the Sign In App Add-in behaves.
Clear form link
Clicking this button will clear the saved form link currently associated with your Outlook account. You will need to enter a new link to continue adding pre-registrations through the Add-in.
Troubleshooting
Some legacy versions of outlook may have trouble downloading the manifest file. An alternative installation method is
to download the manifest.xml file by visiting the link in a browser and selecting File > Save as in the browser
menu. In Outlook select Add from File… under the Add a custom add-in section to upload the file from your
desktop.
Enterprise versions of Microsoft Office allow an administrator to install and manage add-ins for all company users and prevent individual users from installing their own. If you are having trouble installing the Add-in please contact your IT department to check if this is the case for your company.
Tip
For advanced installation instructions, you can visit the official Office Add-in documentation here.
We hope you've found this guide useful but if you have any questions about the Outlook Add-in or any Sign In App feature, please contact our support team at support@signinapp.com.

