Sign In Points
Sign In Points can be used to display static QR codes so visitors can register without touching a shared device. You can print out as many copies of the static QR code as you need to cover all the entrances and exits on your site. This is great if you’re catering for a large number of visitors and need to collect important data without creating a central touchpoint.
Set up
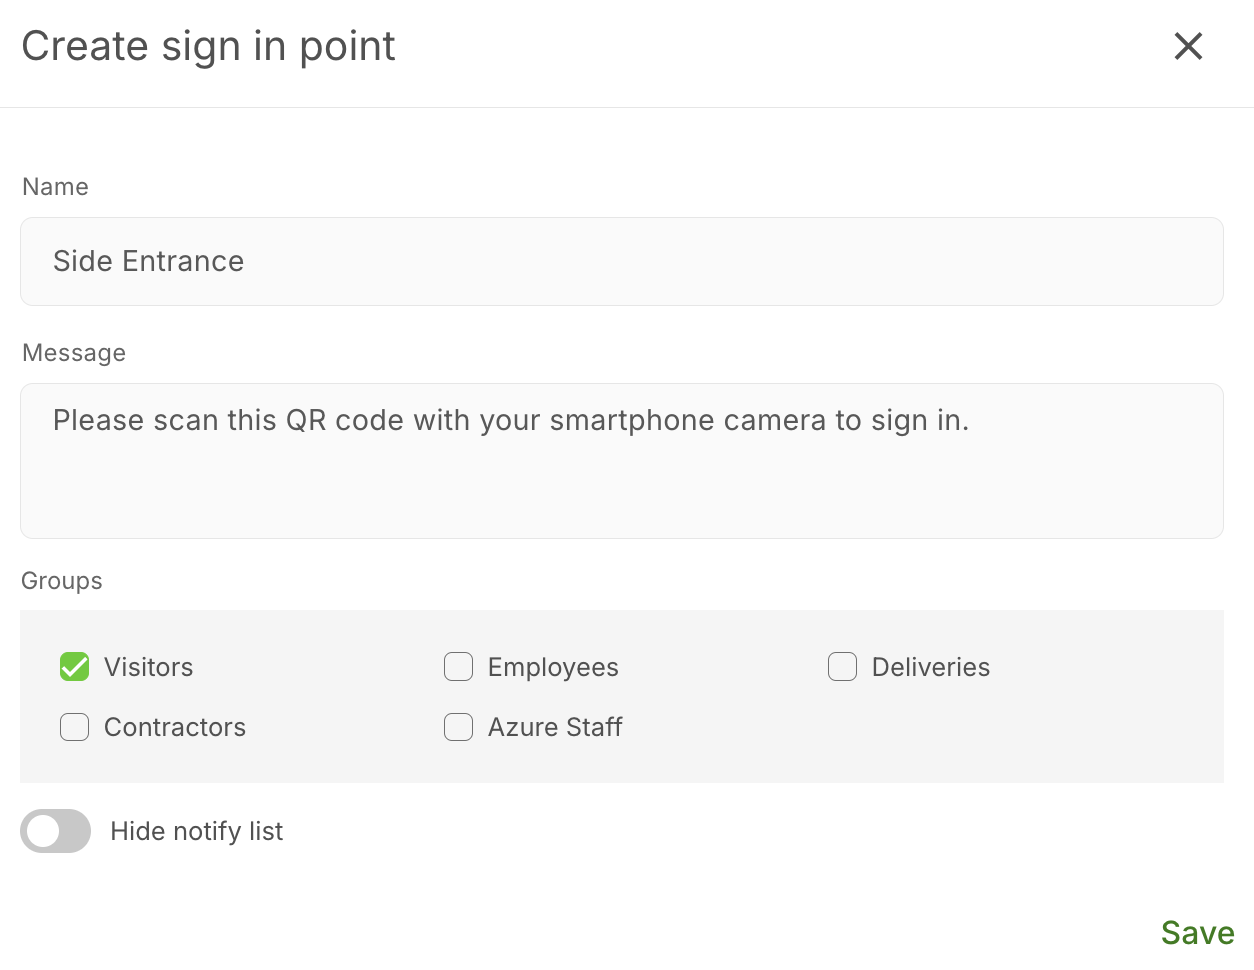
To get started you need to set up your Sign In Point from the online management portal. First, go to Manage > Sites > Select site > Sign In Points and click Add new.

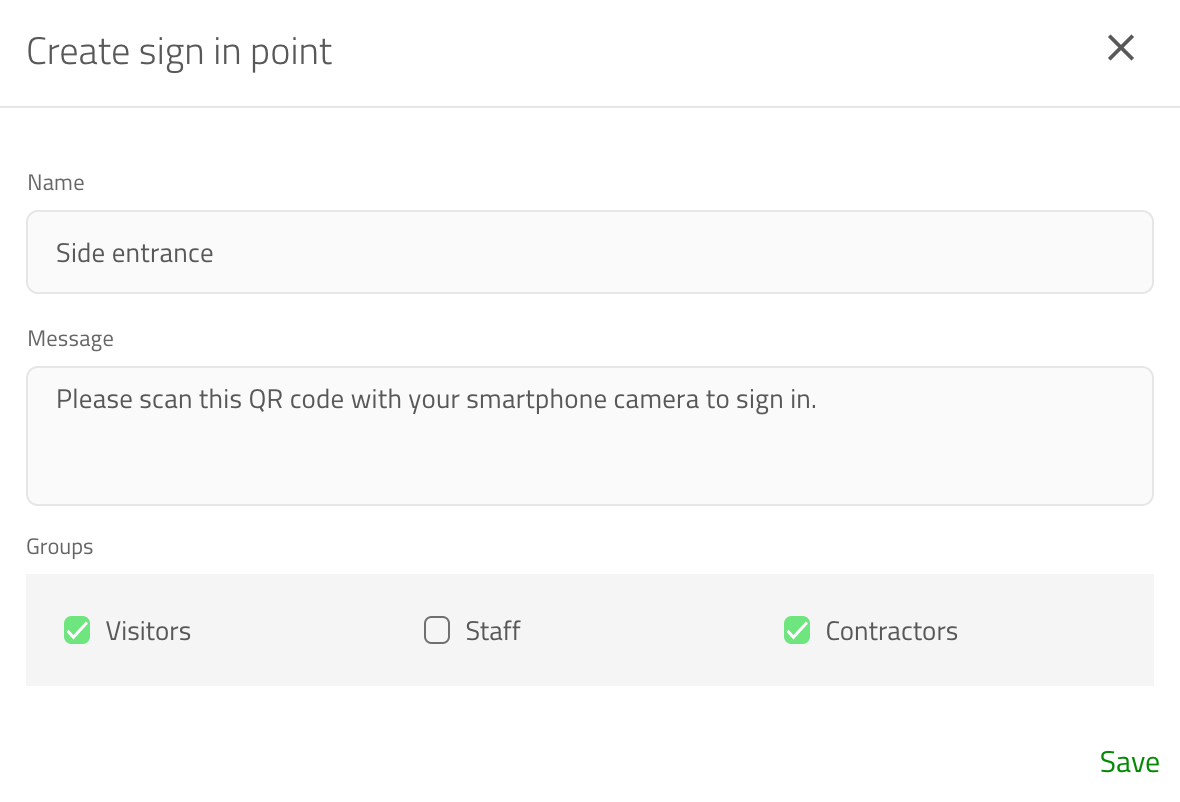
Clicking Add new will pop up a new window with a few different options. First, you need to add a name for your Sign In Point, this will appear just below the QR code on the automatically generated Sign In Point poster. Next, select the group that the visitor will sign into when they scan the Sign In Point. You can add multiple groups to a Sign In Point allowing the visitor to select which group they're signing in to. Finally, you need to add a Message, this can be some additional information on how to use Sign In Points or on what to do after you’ve signed in.
Hide notify list
Any person with access to your contactless Sign In Point code will be able to search members of this group from their smartphone device when selecting a host. This may expose personal data such as the group member's name and any personal fields stored against them.
If you have a Custom field of type notify list you can toggle this setting off to remove this custom field when signing in from a Sign In Point.

Important
By default, repeat visitor groups can't be included on Sign In Points. To change this go to Manage > Groups > Select repeat visitor group > Data & Privacy and under Visibility toggle Include group on Contactless on.
Information collected
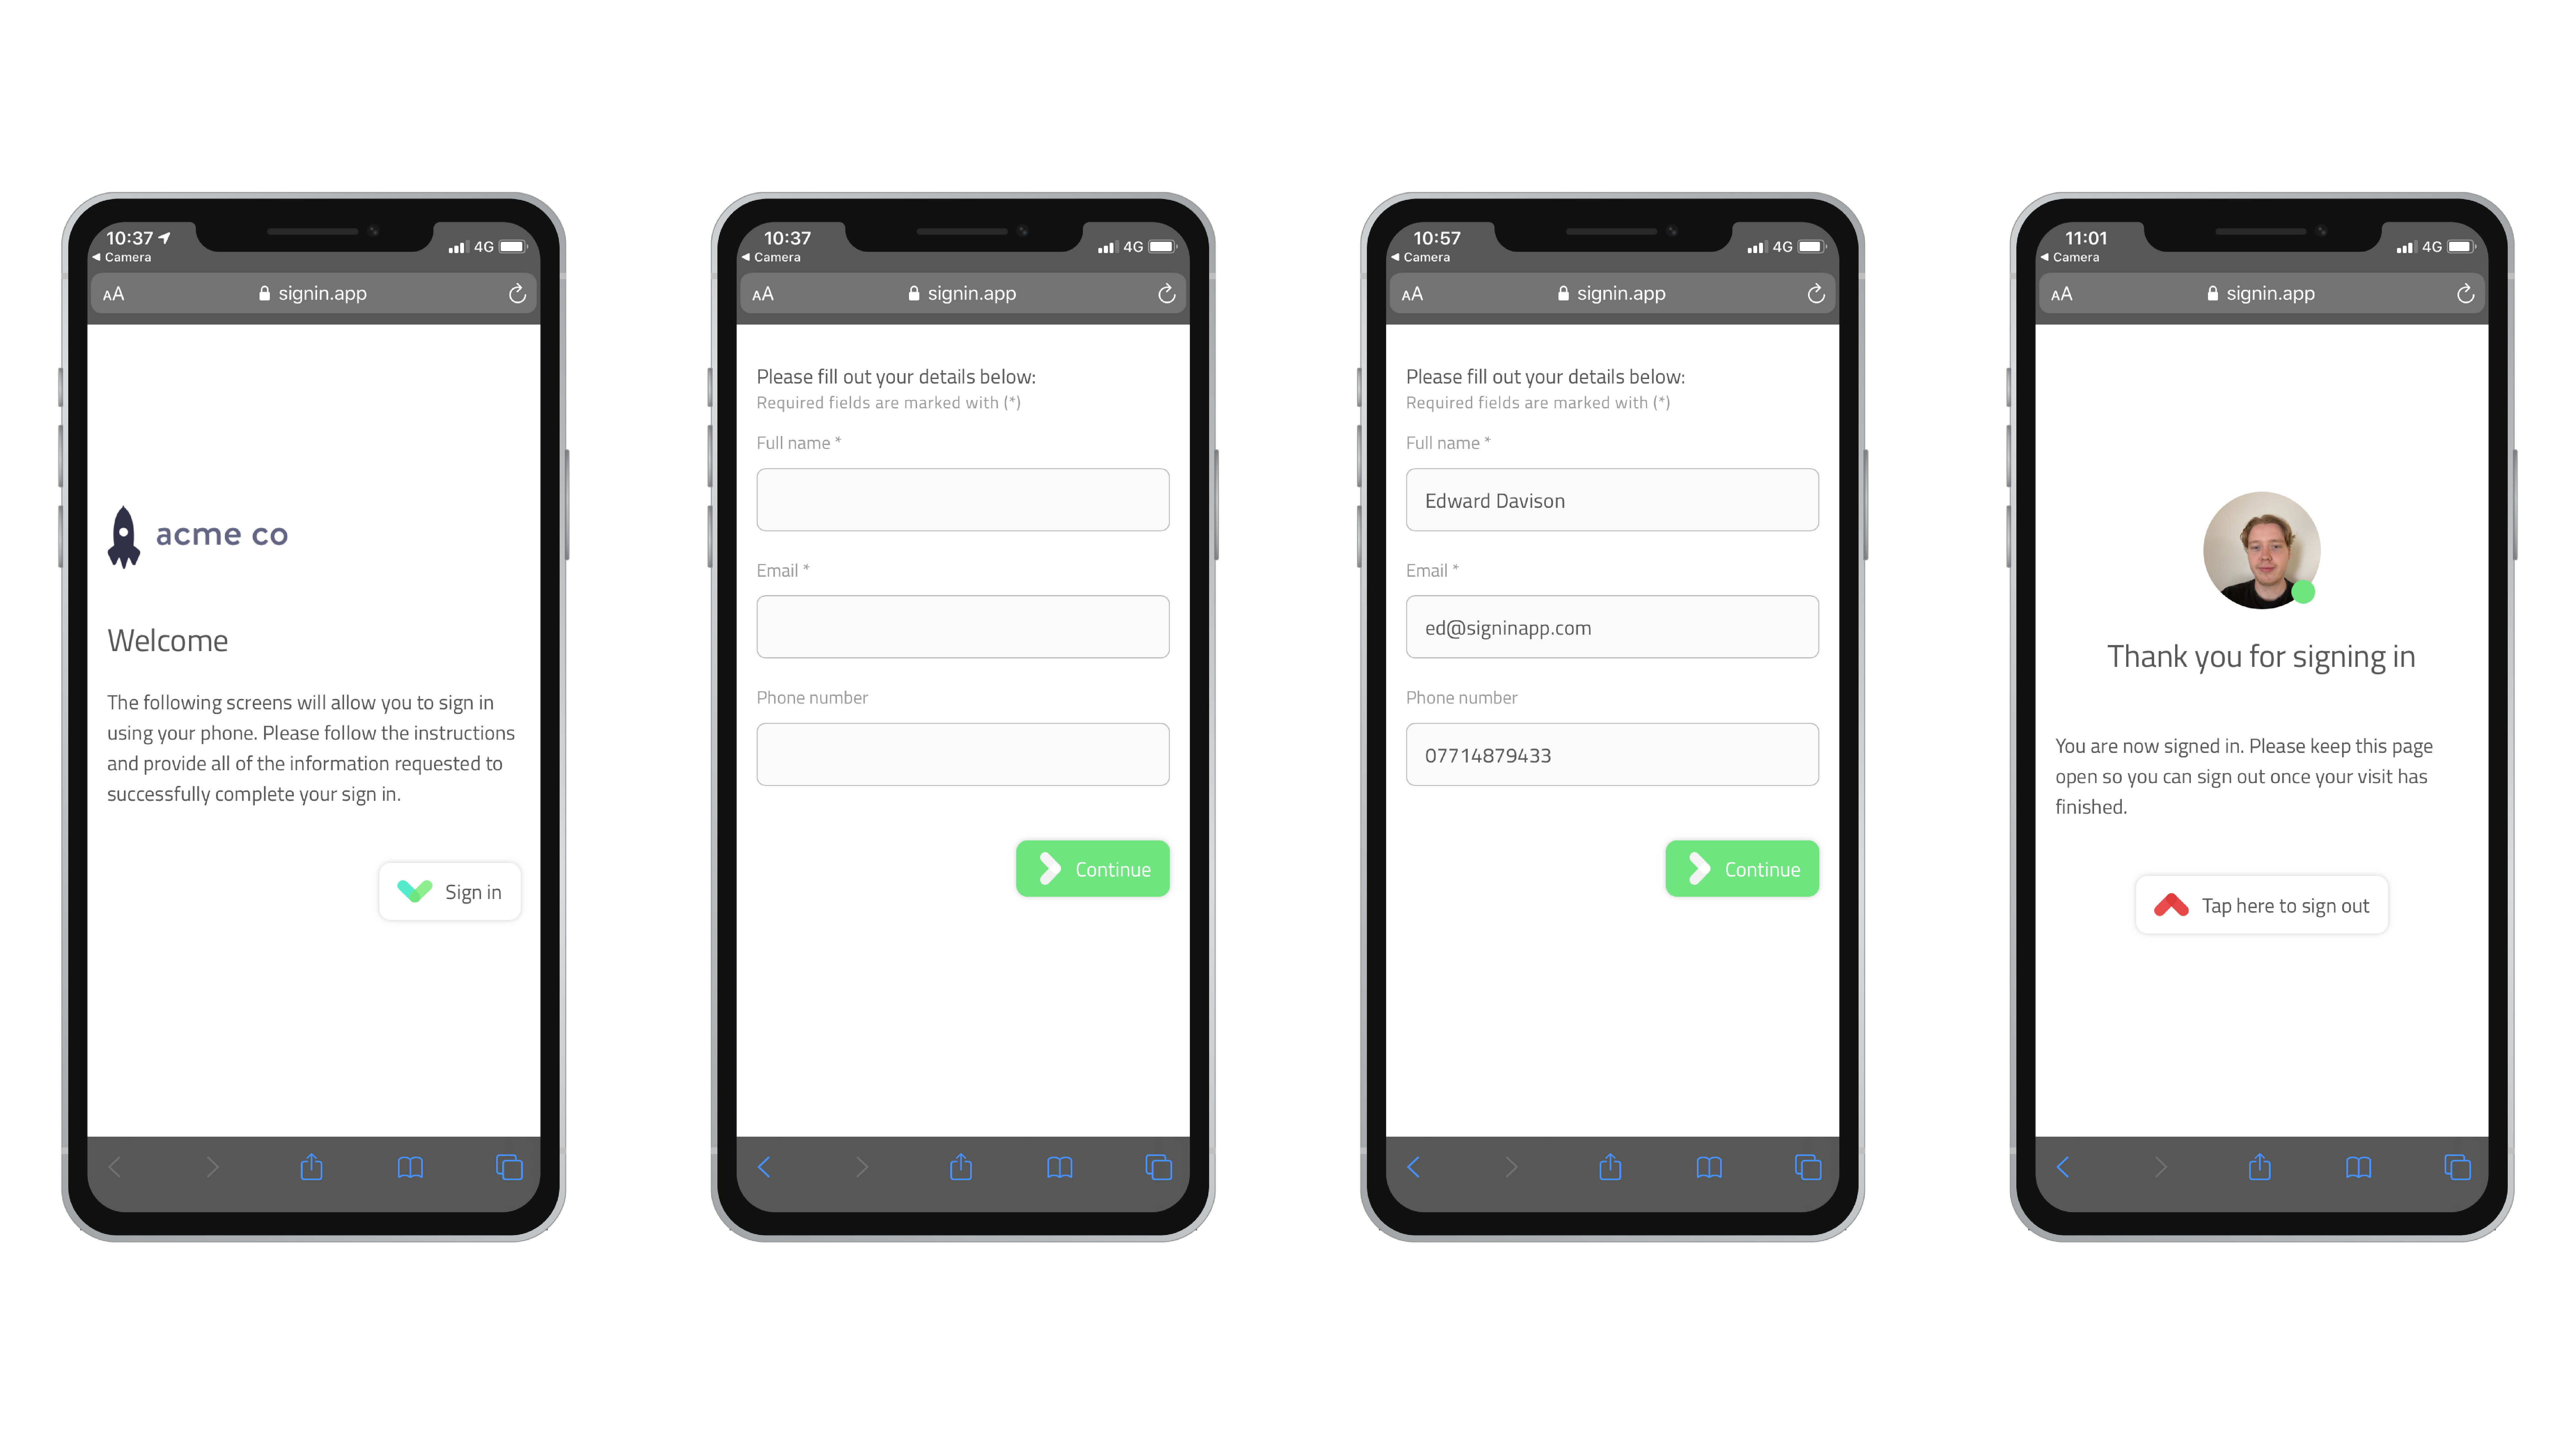
When a visitor signs in from the Sign In Point they will complete the same process as any other visitor signing into that group. This includes responding to Custom fields and agreeing to Messages.
Data retention
Sign In App gives you control over how long visitor data is retained. By default this is set to Indefinitely, but you can change this from the online management portal. Go to Manage > Groups > Select group > Data & privacy and select the period from the 'Keep visitor data' dropdown.
You can edit your Custom fields by going to Manage > Sites > Select site > Custom fields, from here you can add the fields you need for your Sign In Points. The default Custom fields for Sign In App are Company, Visiting, and Car reg, for Sign In Points you could change this to Email and Number of guests.
Messages are an important part of the sign in process and allow visitors to agree to your terms and conditions. To get started with Messages go to Manage > Sites > Select site > Messages and click the pencil icon to edit a Message or click Add new. Messages support text, pdfs, images and videos and a range of different response types including signatures.
Tip
Sign In Points will capture a picture of the visitor by default. You can turn this off by going to Manage > Sites > Select site > Features and toggling Visitor photos off.
Displaying your Sign In Point
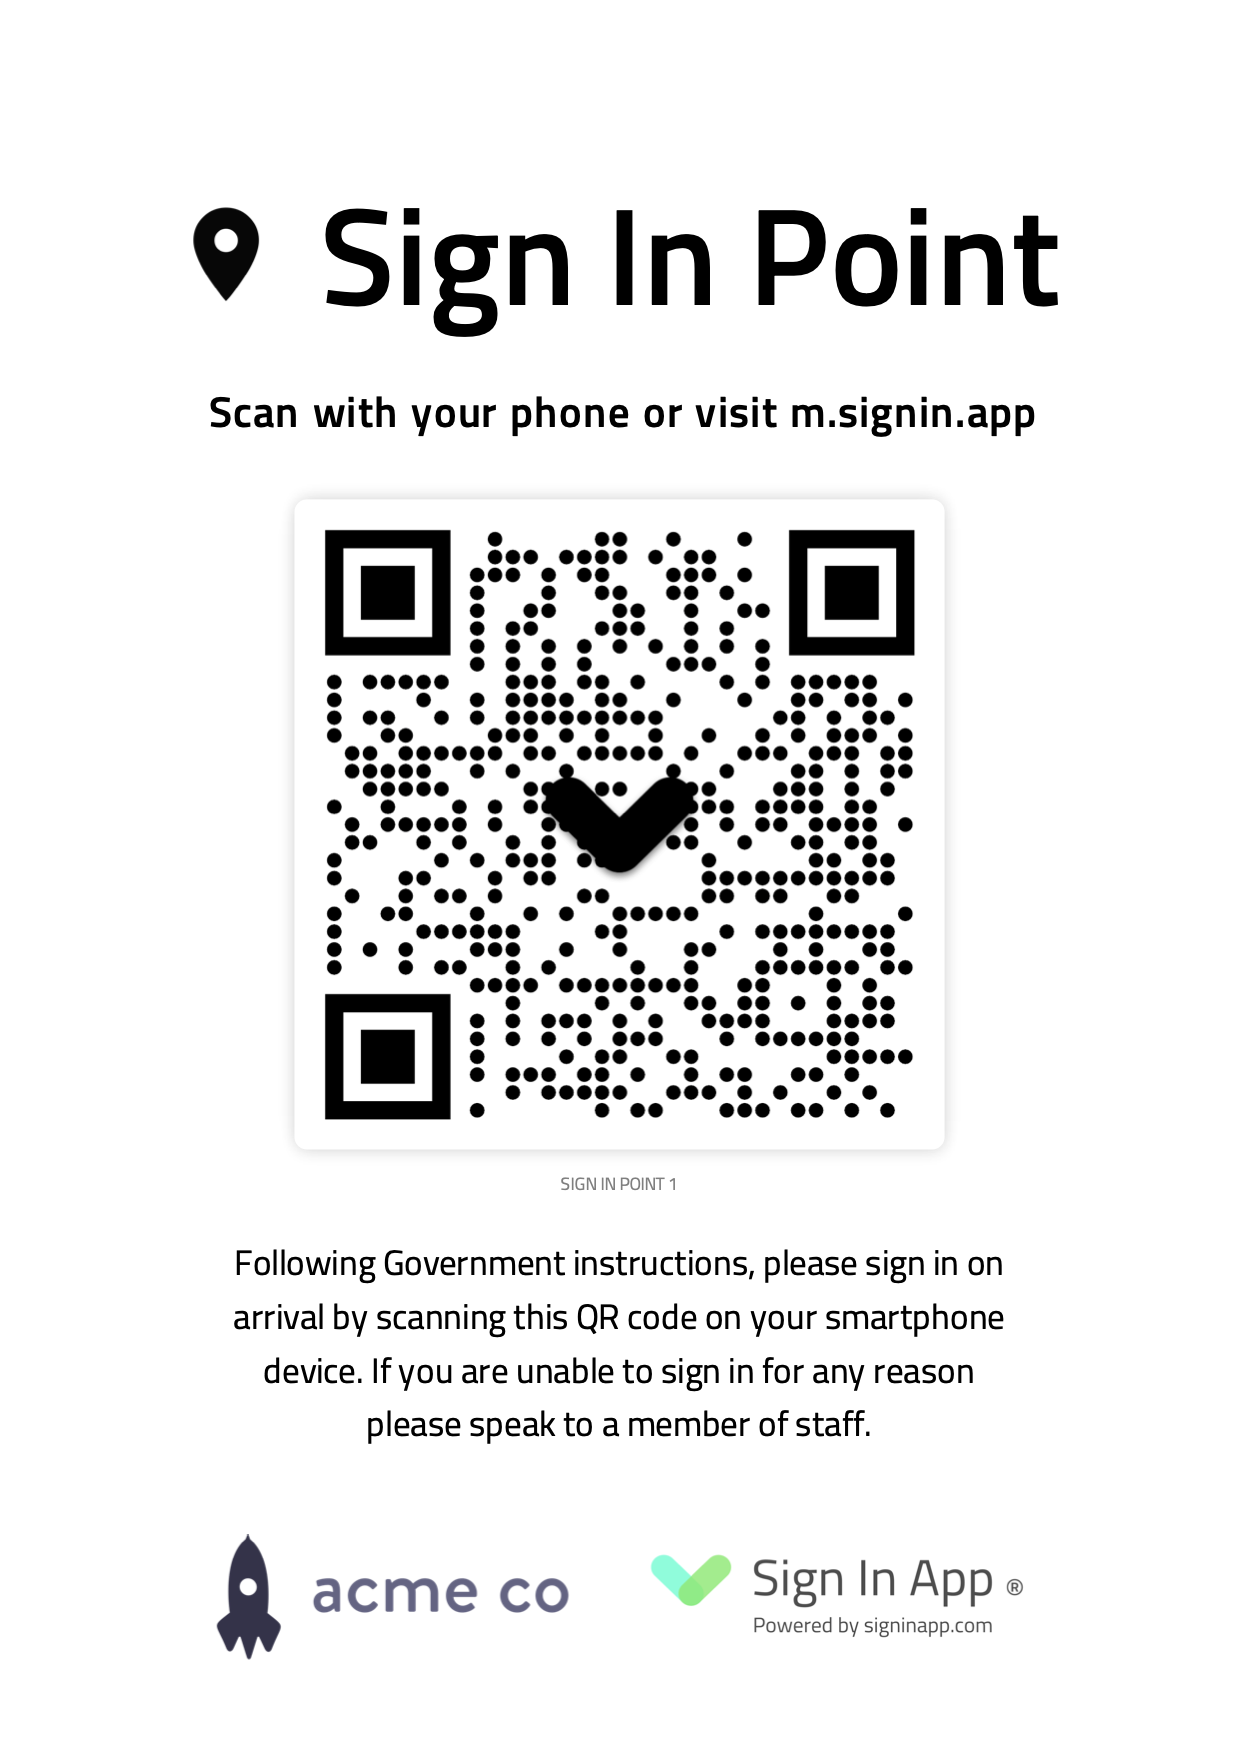
You can choose to display your Sign In Point in a couple of ways. You can either download and print the static QR code or make use of the PDF poster which will include additional information including the name of the Sign In Point and your Message. To do either of these, go to Manage > Sites > Select site > Sign In Points and click the QR icon to get the static QR code and click the PDF icon to Sign In Point poster.

Tip
You can edit Custom fields and Messages without needing to print out a new static QR or Sign In Point poster. If you delete the Sign In Point the QR code becomes redundant.
Using a Sign In Point
When a visitor arrives they need to scan the QR code with their smartphone or search m.signin.app in the smartphone’s browser. This will prompt the visitor to complete the sign in from a browser on their smartphone. When the visitor is ready to leave they need to scan the Sign In Point QR code again and sign out.

Tip
If your smartphone does not support QR code scanning from the camera you can scan the QR with Google lens or visit m.signin.app in your smartphone's web browser.
We hope you've found this guide useful but if you have any questions around Sign In Points or any Sign In App feature, please contact our support team at support@signinapp.com.

