Import visitors
Importing members
Importing members from a CSV file is one way to add members to a repeat visitor group. If you have Azure AD or Google integration, we recommend having a look at our guides on integration, if you don’t that’s ok too. You can easily import CSV files to populate the group with your members.
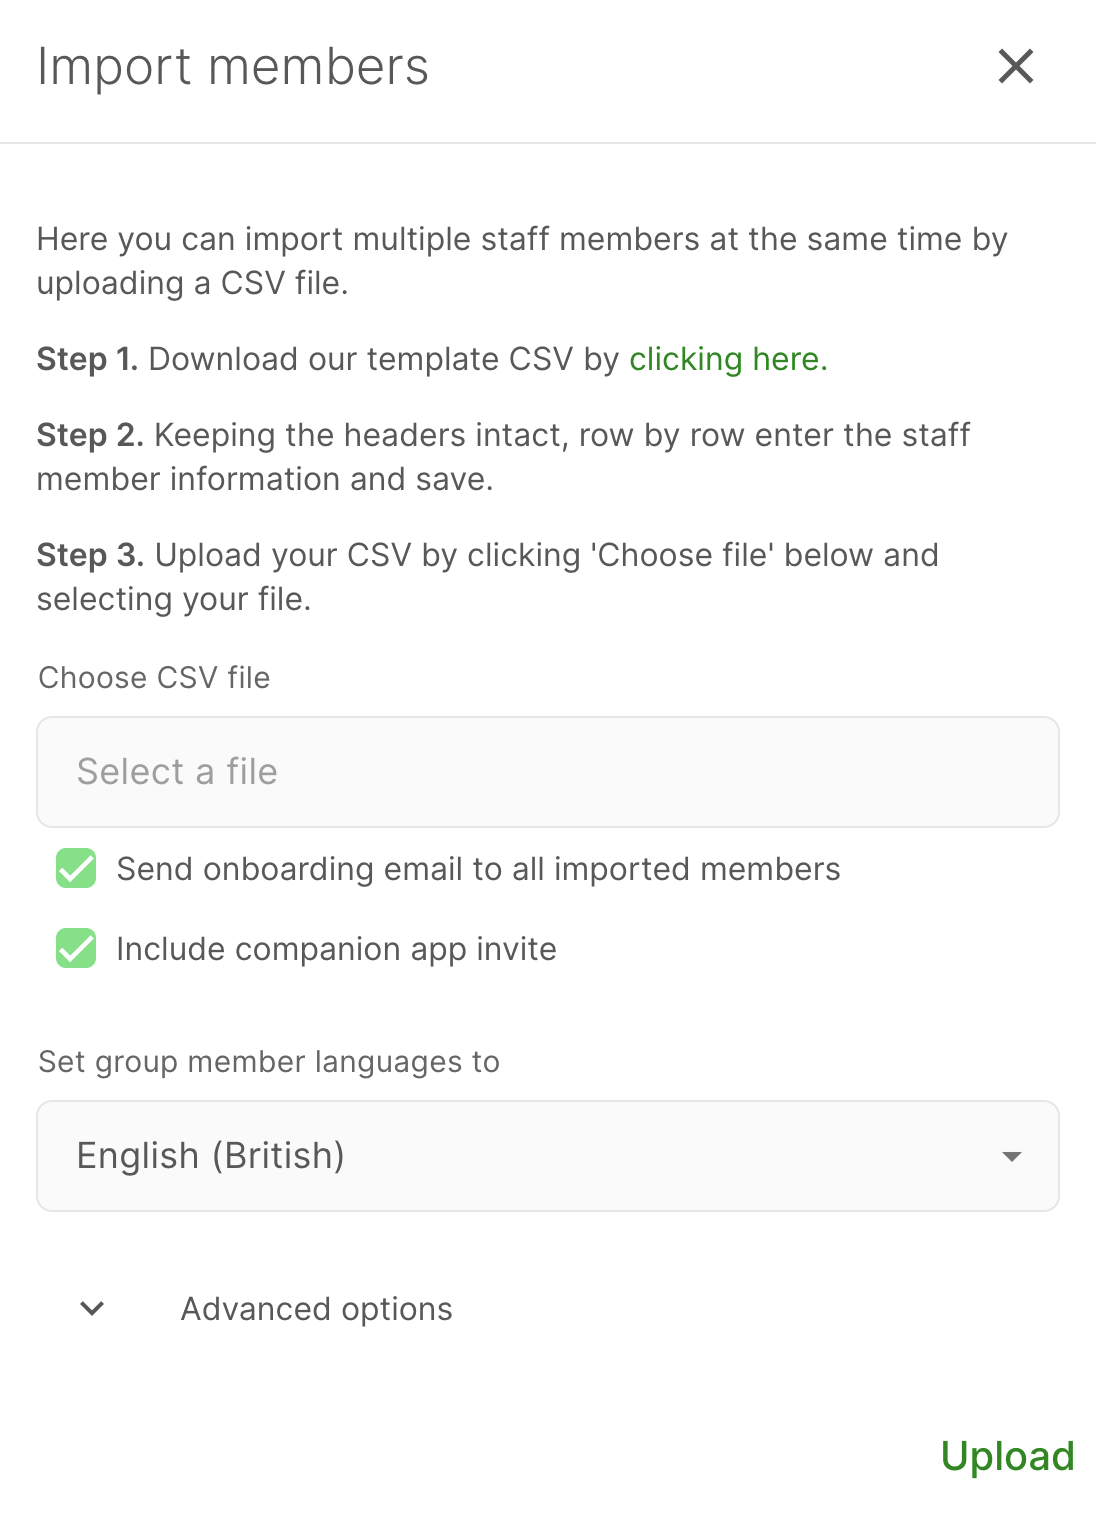
The CSV file must be formatted correctly or there might be an error importing the members. This is easy as we generate a template for you. Just go to Manage > Groups > Select group > Members and click Import. You should see a window like this.
Tip
You can select a different language from the dropdown list, this will mean all emails to that visitor will be automatically translated into the language selected. The language will default to the language set for the portal user doing the import.
Step-by-step
Step 1. Download our template CSV.
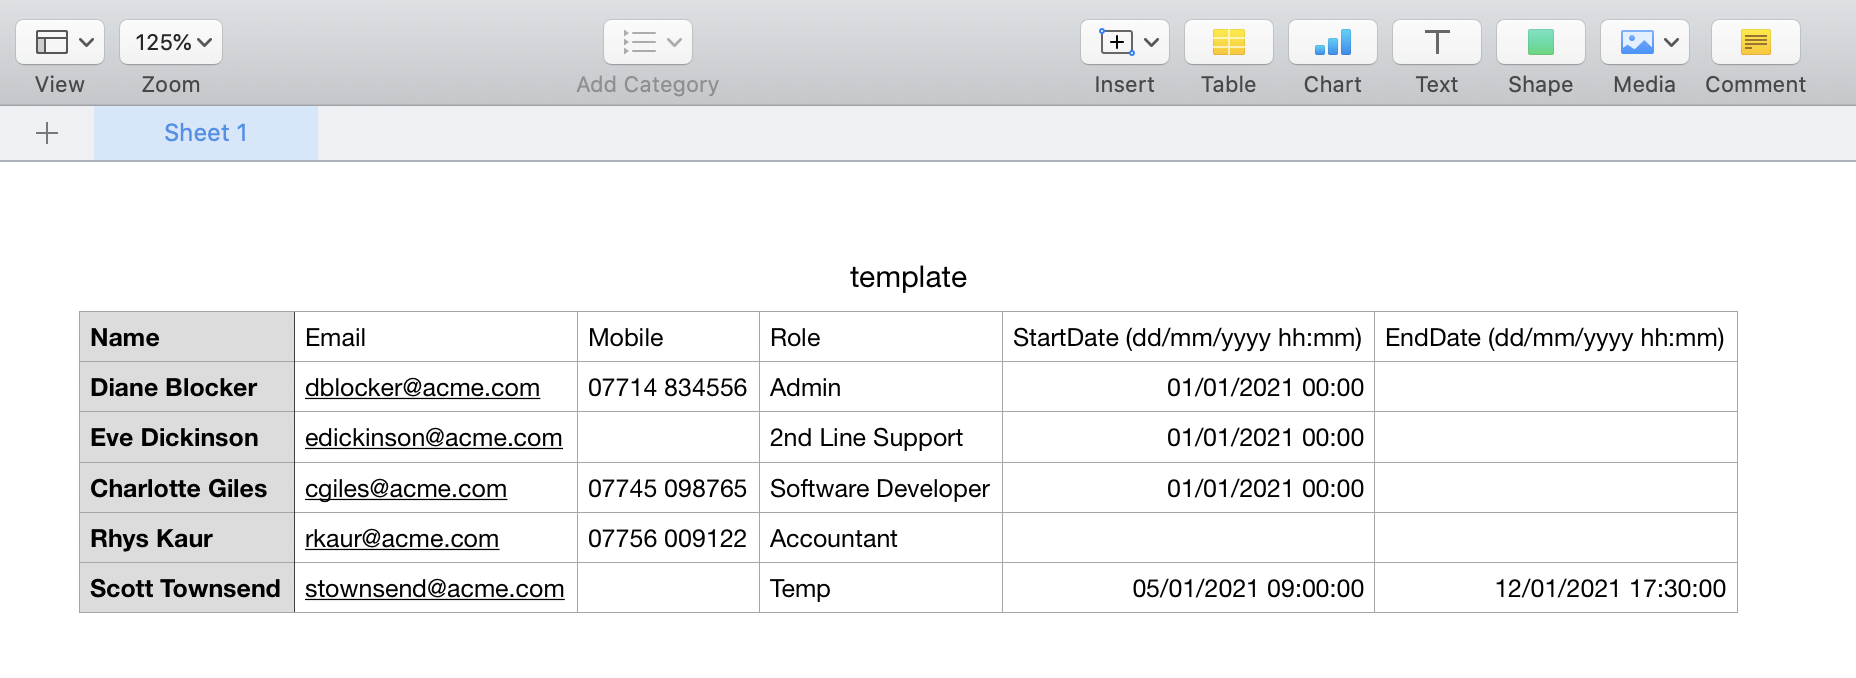
- Downloading this will give you a blank template, the headers will correspond to the personal fields you have for that group.
- Full name, Role, Email, Phone number, and Start/End dates are expected as default, they’re all optional, apart from Full name.
- Adding personal fields to a group will add that field to the template. If you want to include Car reg then add this as a personal field and then populate that column on the template.
Important
If you add Start and End dates to the repeat visitors import it's important to follow the date and time format in the column header. E.g. UK dd/mm/yyyy hh:mm or US mm/dd/yyyy hh:mm. The hours and minutes are required, leaving these out will cause an error. You can add 00:00 which will add a start or end date of midnight.
Step 2. Keeping the headers intact, row by row enter the staff member information and save.
- Make sure each member has the correct details as these will be saved against them on the portal.
- Enter accurate information in the correct column.
Tip
Additional column headers
Adding a column with the following name will allow you to import additional information.
• “Pin” will let you add a 4-digit pin for each person.
• "QR Code" will let you add a QR code for each person.
• "RFID" will let you add an RFID code for each person.
• "Site" will let you restrict that member to a site.
Step 3. Upload your CSV by clicking “Select file” below and selecting your file.
- Make sure this is the right file, easy mistake.
Important
Importing members doesn’t check against existing group members, so make sure you only import new people.
You should now have a group populated with all the members you need. If it failed to import, there may be a problem with the data on one or more lines. Check the red error message closely as it should direct you to the problem.
Advanced options
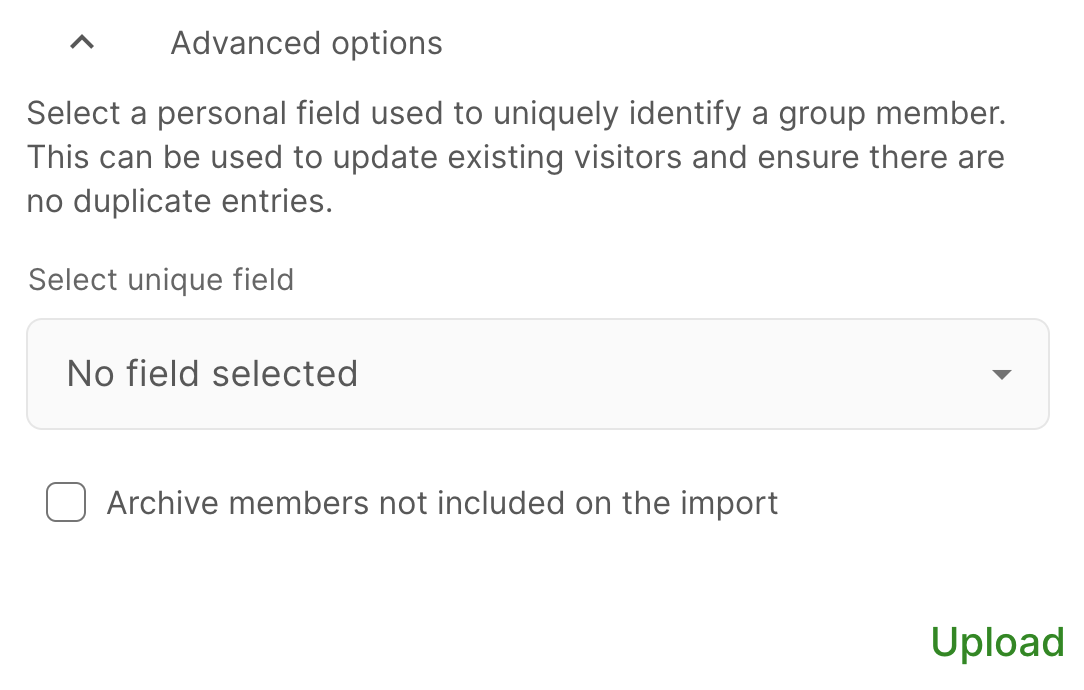
The advanced options for importing members allow you to do two things, update member data, and check for duplicates when importing.
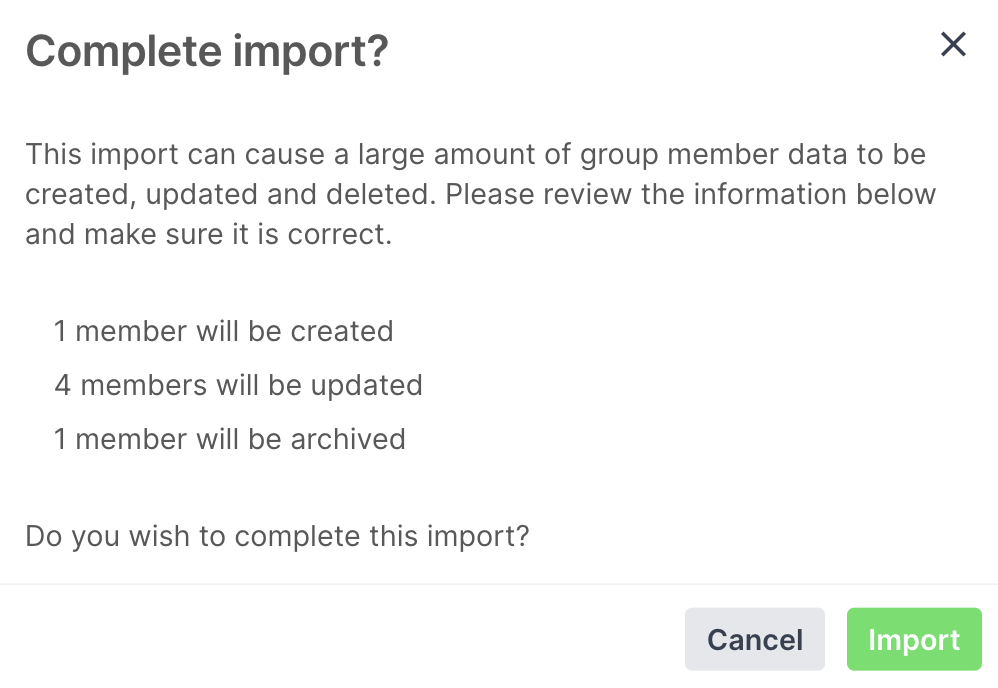
Before importing with advanced options you need to click the Dry run button. This will show an overview of how many members will be created, updated, and archived in this import. When you've checked the update report, click Import to confirm the import.
warning
When using the advanced options it’s possible to delete personal field data and archive members. Please ensure you read this guide carefully before using the advanced options. Contact support@signinapp.com if you have any questions.
Updating member data
There are several scenarios where you might want to update your group members data, this includes personal fields and QR/RFID codes. For example, you might want to add a payroll number for staff and rather than editing this one member at a time, you can use the advanced options to update this data by importing a CSV file. You need to select a unique field for the import, this is the field that the import will check to match the data in your CSV file with the member in your group. Email works well as a unique field.
From the management portal, go to
Manage > Groups > Select group > Members, clickImportand download the template byclicking hereAdd to the CSV template the unique field (e.g. email) for each member and the value you’d like to update
Important
The template generated for the import will include ALL of the groups personal fields as column headers. If fields are left blank the personal field data will be permanently deleted for that member. Ensure that you delete all columns you’re not using as either a unique identifier or want to update. You can also delete any members from the import if you do not want to update their data.
Go back to the import option, select the CSV file, click
Advanced optionsand select the unique field you’d like to match againstClick
Uploadand the import will check for the unique field and update the member’s record to reflect the import
Tip
You can export a group’s personal field data by going to Reports > Timesheets > Export, selecting the group, setting Activity to All, ticking the personal fields you need and then clicking ‘Export’. We recommend that you export all personal field data for a group before updating any field, this can then be imported again if data has been deleted in error.

QR / RFID codes
When importing with the advanced options you can also update QR / RFID codes. Simply add a column header to the import template with the heading QR Code or RFID. You still need to select a unique identifier and remove any columns you do not want to update.
Check for duplicate entries
When importing members the import does not check for duplicate entries by default, this means if you import the same CSV file twice the members will be duplicated. You can use the advanced option if you want to check for duplicate entries when importing. Select Archive members not included on the import if you’d like members not included to be archived.
- From the management portal, go to
Manage > Groups > Select group > Members, clickImportand download the template byclicking here. - Populate the CSV file with all members that should be in the group (this will include any new starters and exclude any leavers)
- Ensure ALL personal field data is included in the import file.
- Select the file and tick
Archive members not included on the import - Click
Uploadand the import will use the unique identifier to archive any members that aren’t included in the import file, and create the new members that were included in the import file.
Deleting archived members
Go to Manage > Groups > Select group > Members > and change the Show current dropdown to Show archived to view the archived members. Select Edit all and click Delete all to permanently delete all archived members. That cannot be undone.
Importing pre-registrations
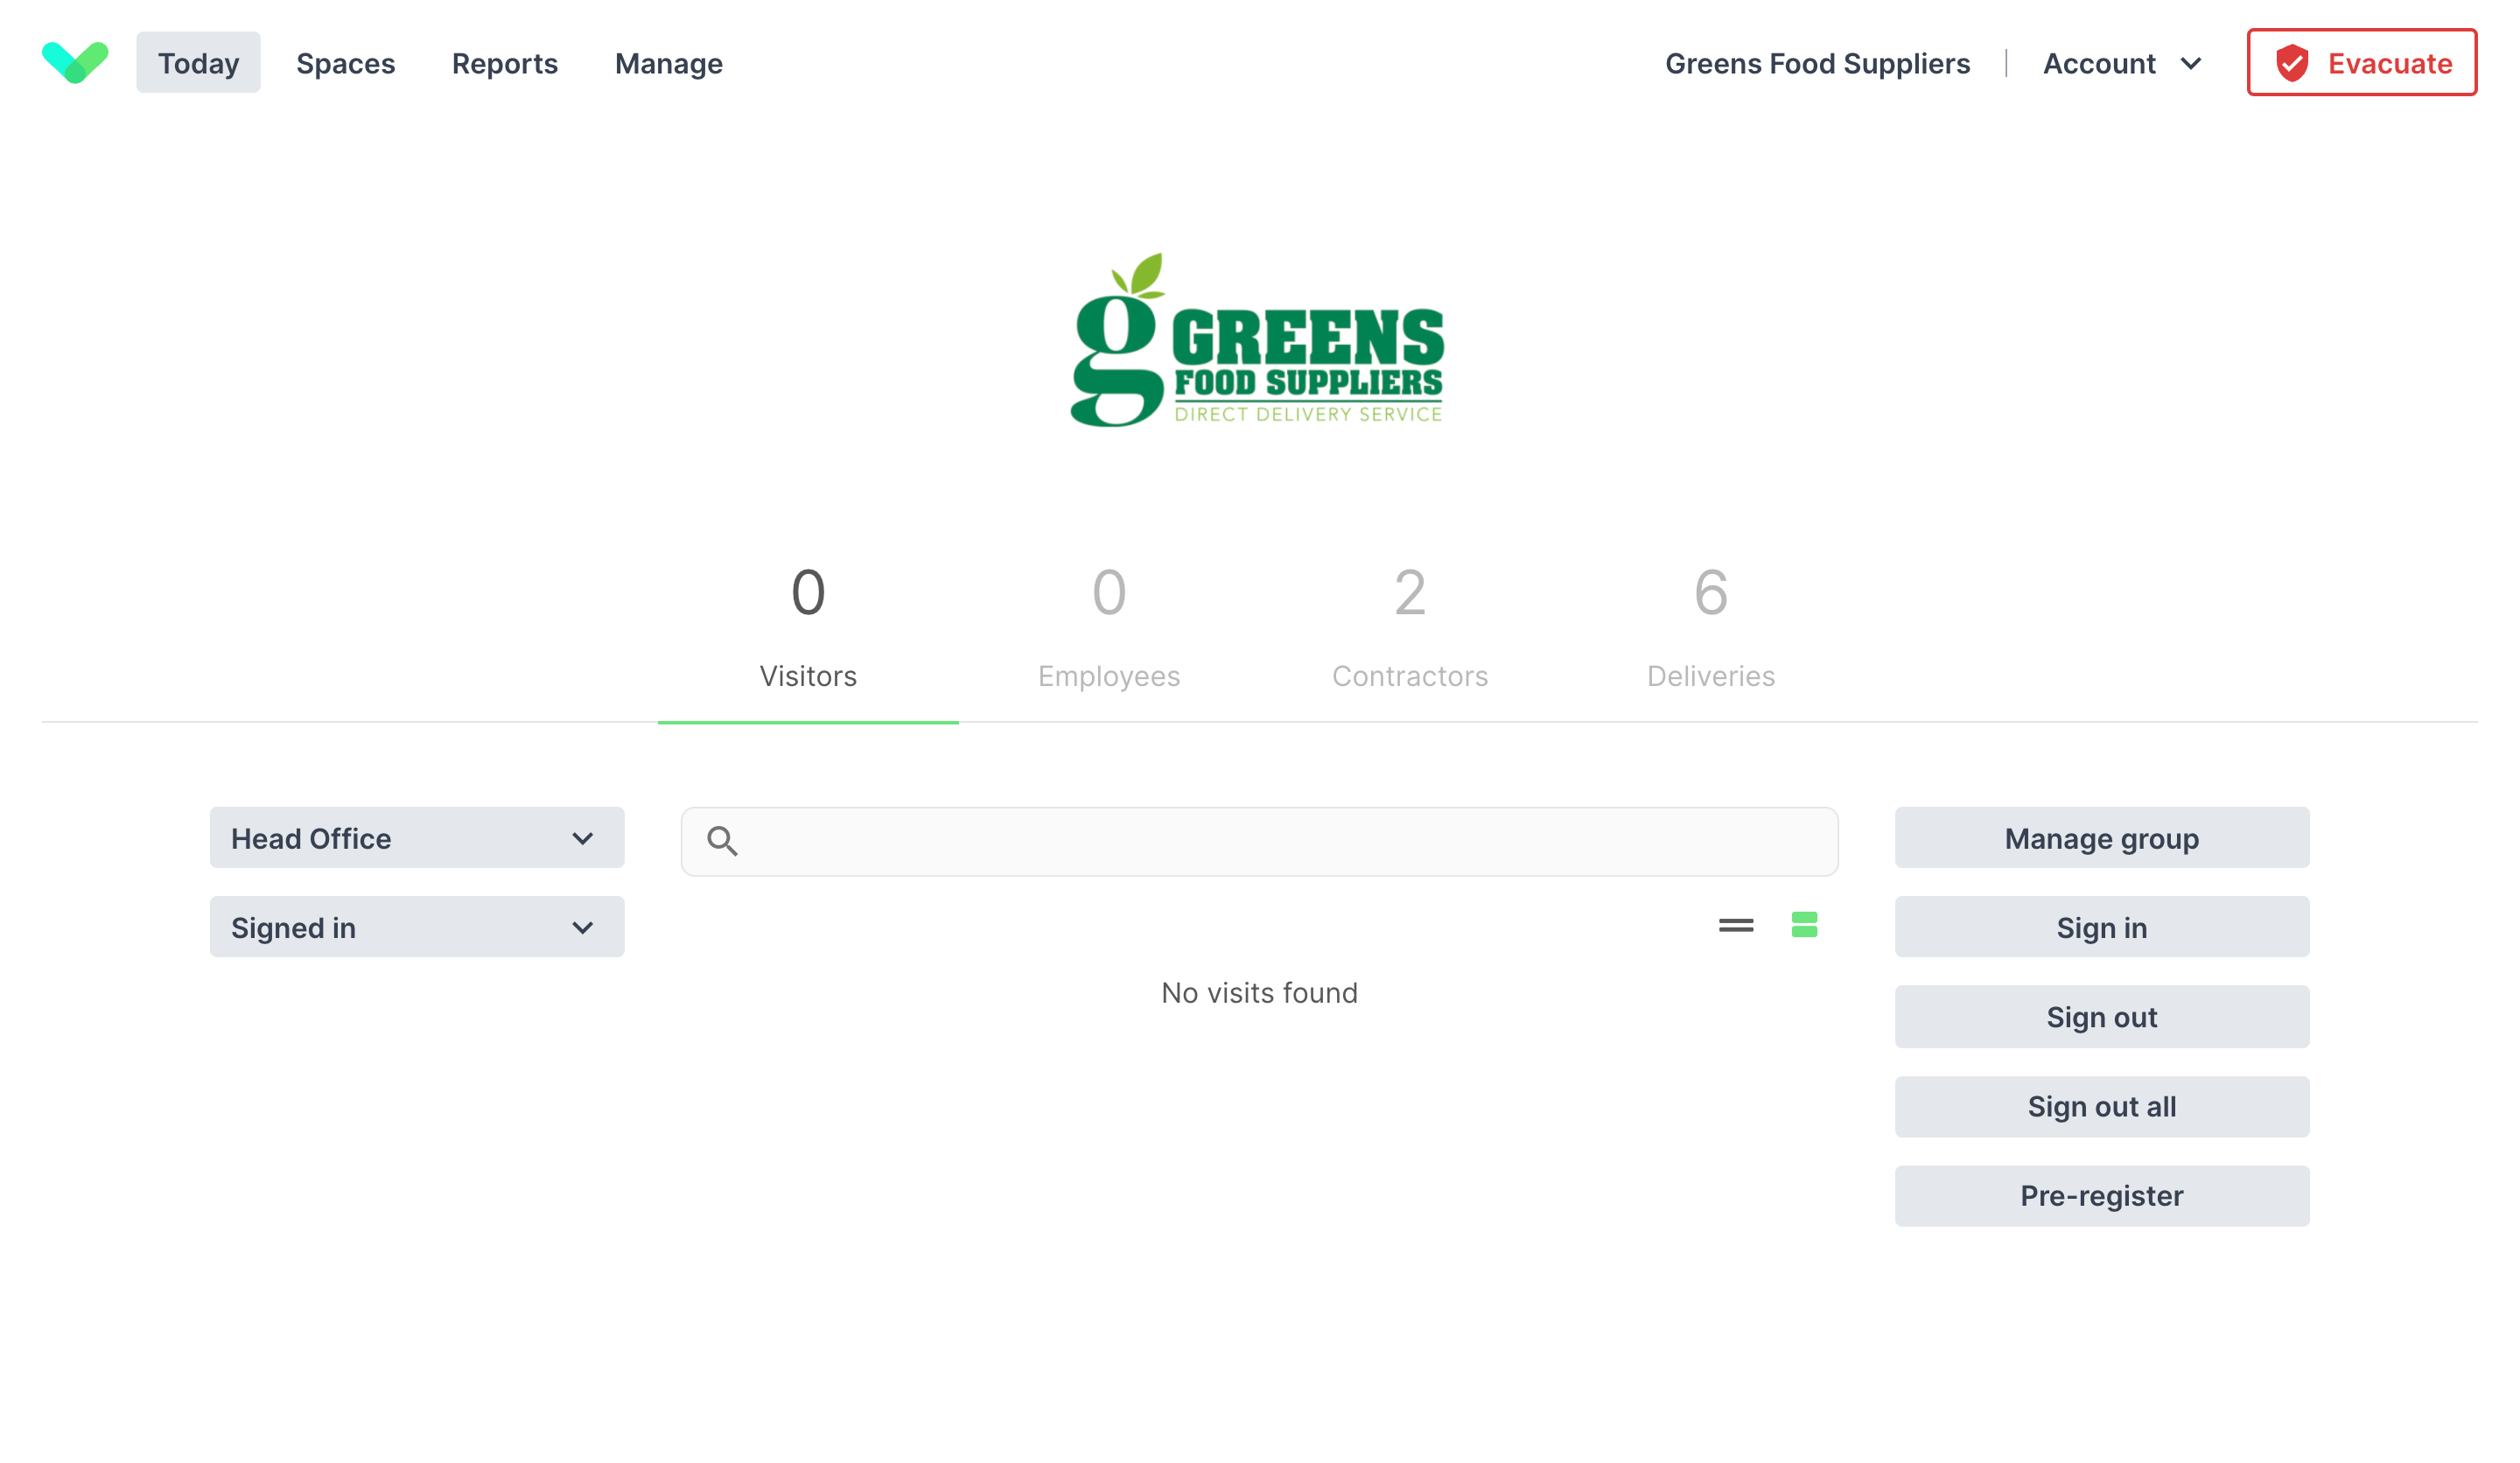
Importing pre-registrations is very similar to importing members for a repeat visitor group, it's important to ensure the information is accurate and in the correct column. To import pre-registrations, go to the Today page of the portal and select a standard visitor group from the group selection. You will then see a Pre-register button on the right side of the screen, click this and then select Import. Next, download the pre-registration import template by Clicking here. Once the template has been populated, click Select a file and find the template. Click Upload to create the pre-registrations in the template.
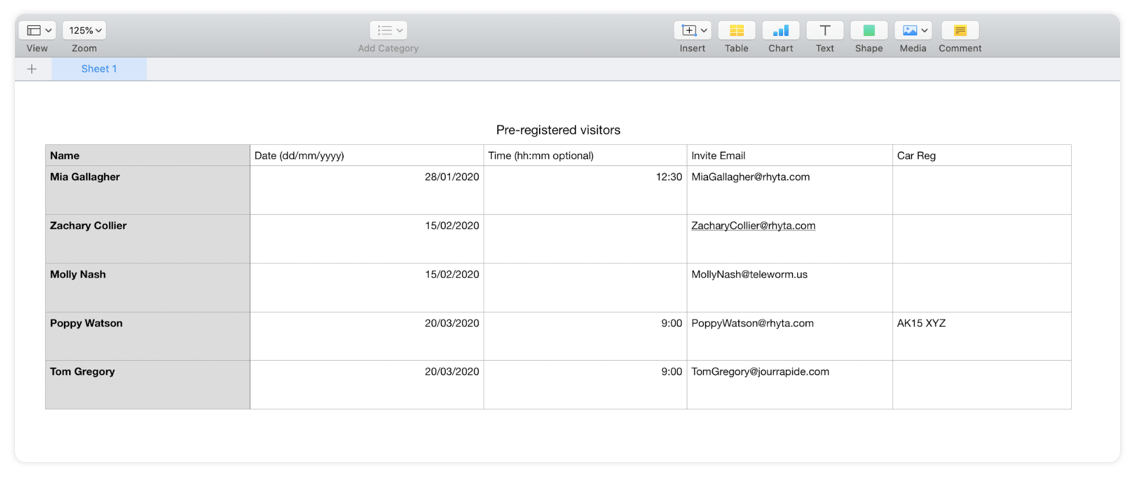
This is an example of a pre-registration import. Name and date are required, but the other fields you can leave blank. Any custom fields applied to this group will appear as column headers, these are optional fields.
Troubleshooting
Error
- “Full Name” is a required field so if any name fields are left blank will cause an error.
- Spaces either side of an email address will cause an error.
- Blank rows at the top or bottom of the CSV file will cause an error
- Non-UK phone numbers need their international prefix e.g France +33
- Check that the date matches the format displayed in the Date column title row
- Start and end dates have been included, but are in the wrong format or for repeat visitors doesn't include hours and minutes
Inaccurate Data
- Check that the data you’ve entered is in the correct column. For example, First name in the Full name field and Surname in the second column will cause Role to be listed as the surname.
European decimal separator
Some European countries use a comma as a decimal separator. In this case, the comma in Comma Separated Value files is sometimes replaced with a semi-colon. Please ensure that the document you import to Sign In App has values separated by commas and not semi-colons.
Microsoft excel help: How to change semicolon to comma when saving CSV file
Google sheets help: Change semicolon to commas in formulas - Docs Editors Help
We hope you've found this guide useful but if you have any questions around Mobile sign in or any Sign In App feature, please contact our support team at support@signinapp.com.

