Safety Check
Safety check combines two features, health certificates and block list, to help ensure everyone signing in to your site meets the criteria you set. Health certificates help facilitate the private, discrete, and secure checking of vaccination status and test results. Block list allows you to configure a block list for visitors that are signing in, visitors that have been added to the block list will be rejected.
Enable Safety check
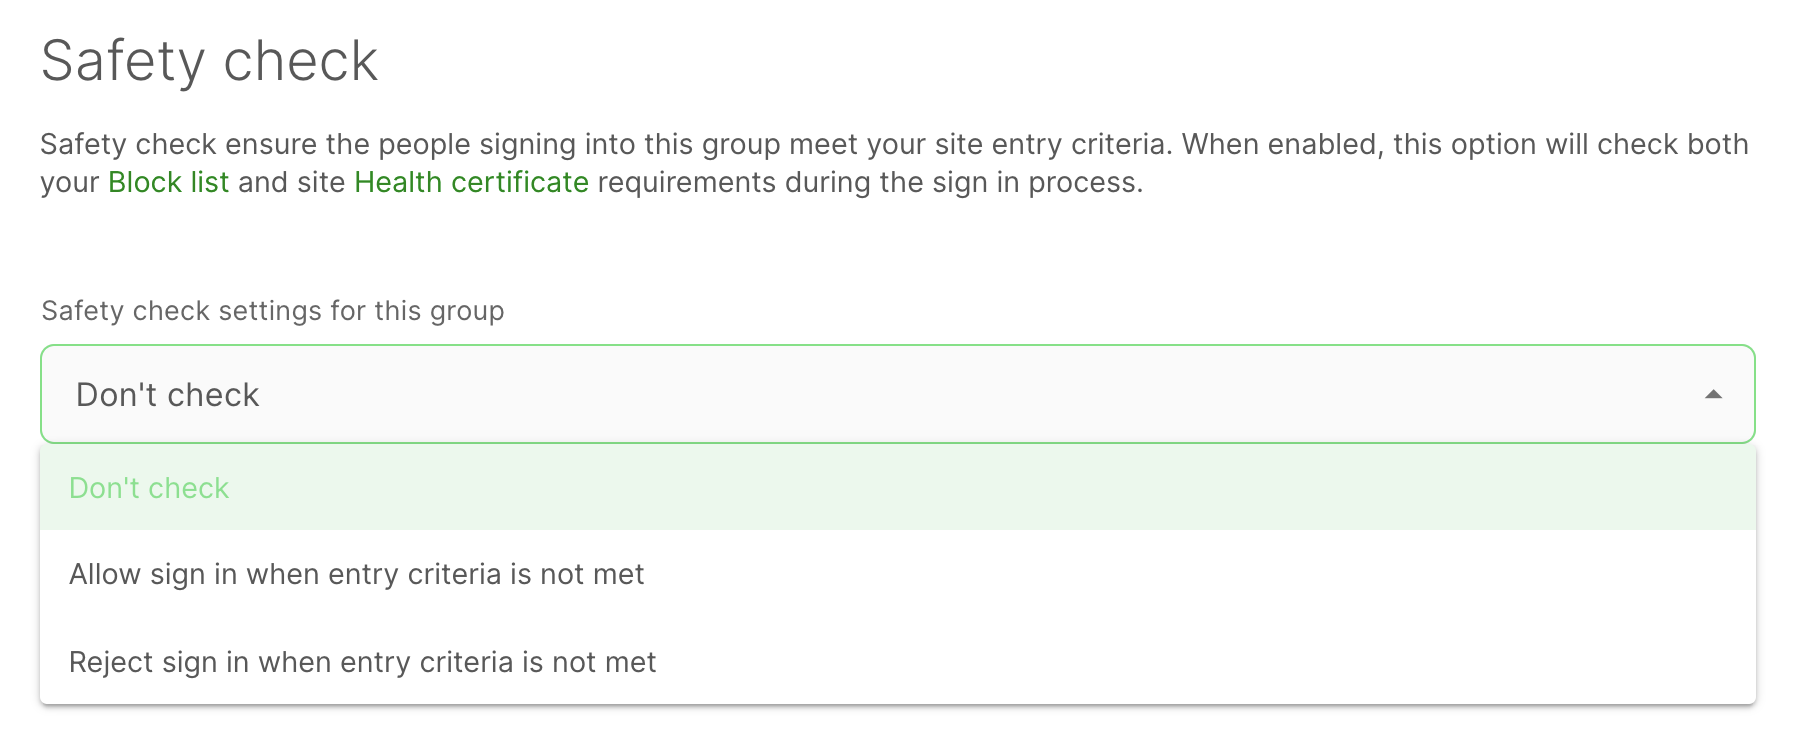
To use health certificates or block list, Safety Check needs to be enabled for each group that requires the specific criteria to be met. From the online management portal, go to Manage > Groups > Select group > Sign in options and scroll down to Safety check. There are three options for Safety Check on each group.

Don’t check
By default, Safety check is set to Don’t check meaning health certificate and block list criteria are not checked for people signing in to this group.
Reject sign in when entry criteria is not met
This option allows you to reject anyone from signing in who does not meet the health certificate or block list criteria. A message will be displayed on-screen so the person signing in is aware they have not met the criteria for entry to the site. When setting up notifications the event that should be used is Rejected sign in.
Allow sign in when entry criteria is not met
This option allows the person signing in to complete their sign in, no message is presented on screen, the person signing in will not be aware they haven’t met the criteria for entry to the site. When setting up notifications the event that should be used is Block list matched.
Health certificates
Using health certificates as part of Safety Check allows you to validate if the people signing in to your site have the necessary certificates, such as Covid-19 vaccines or recent negative test results. You have control over which vaccines and test results meet the criteria for your organisation. If the individual signing in hasn’t been issued the relevant Health Certificate, they will either be denied access or allowed on site depending on the group settings.

Site entry requirements
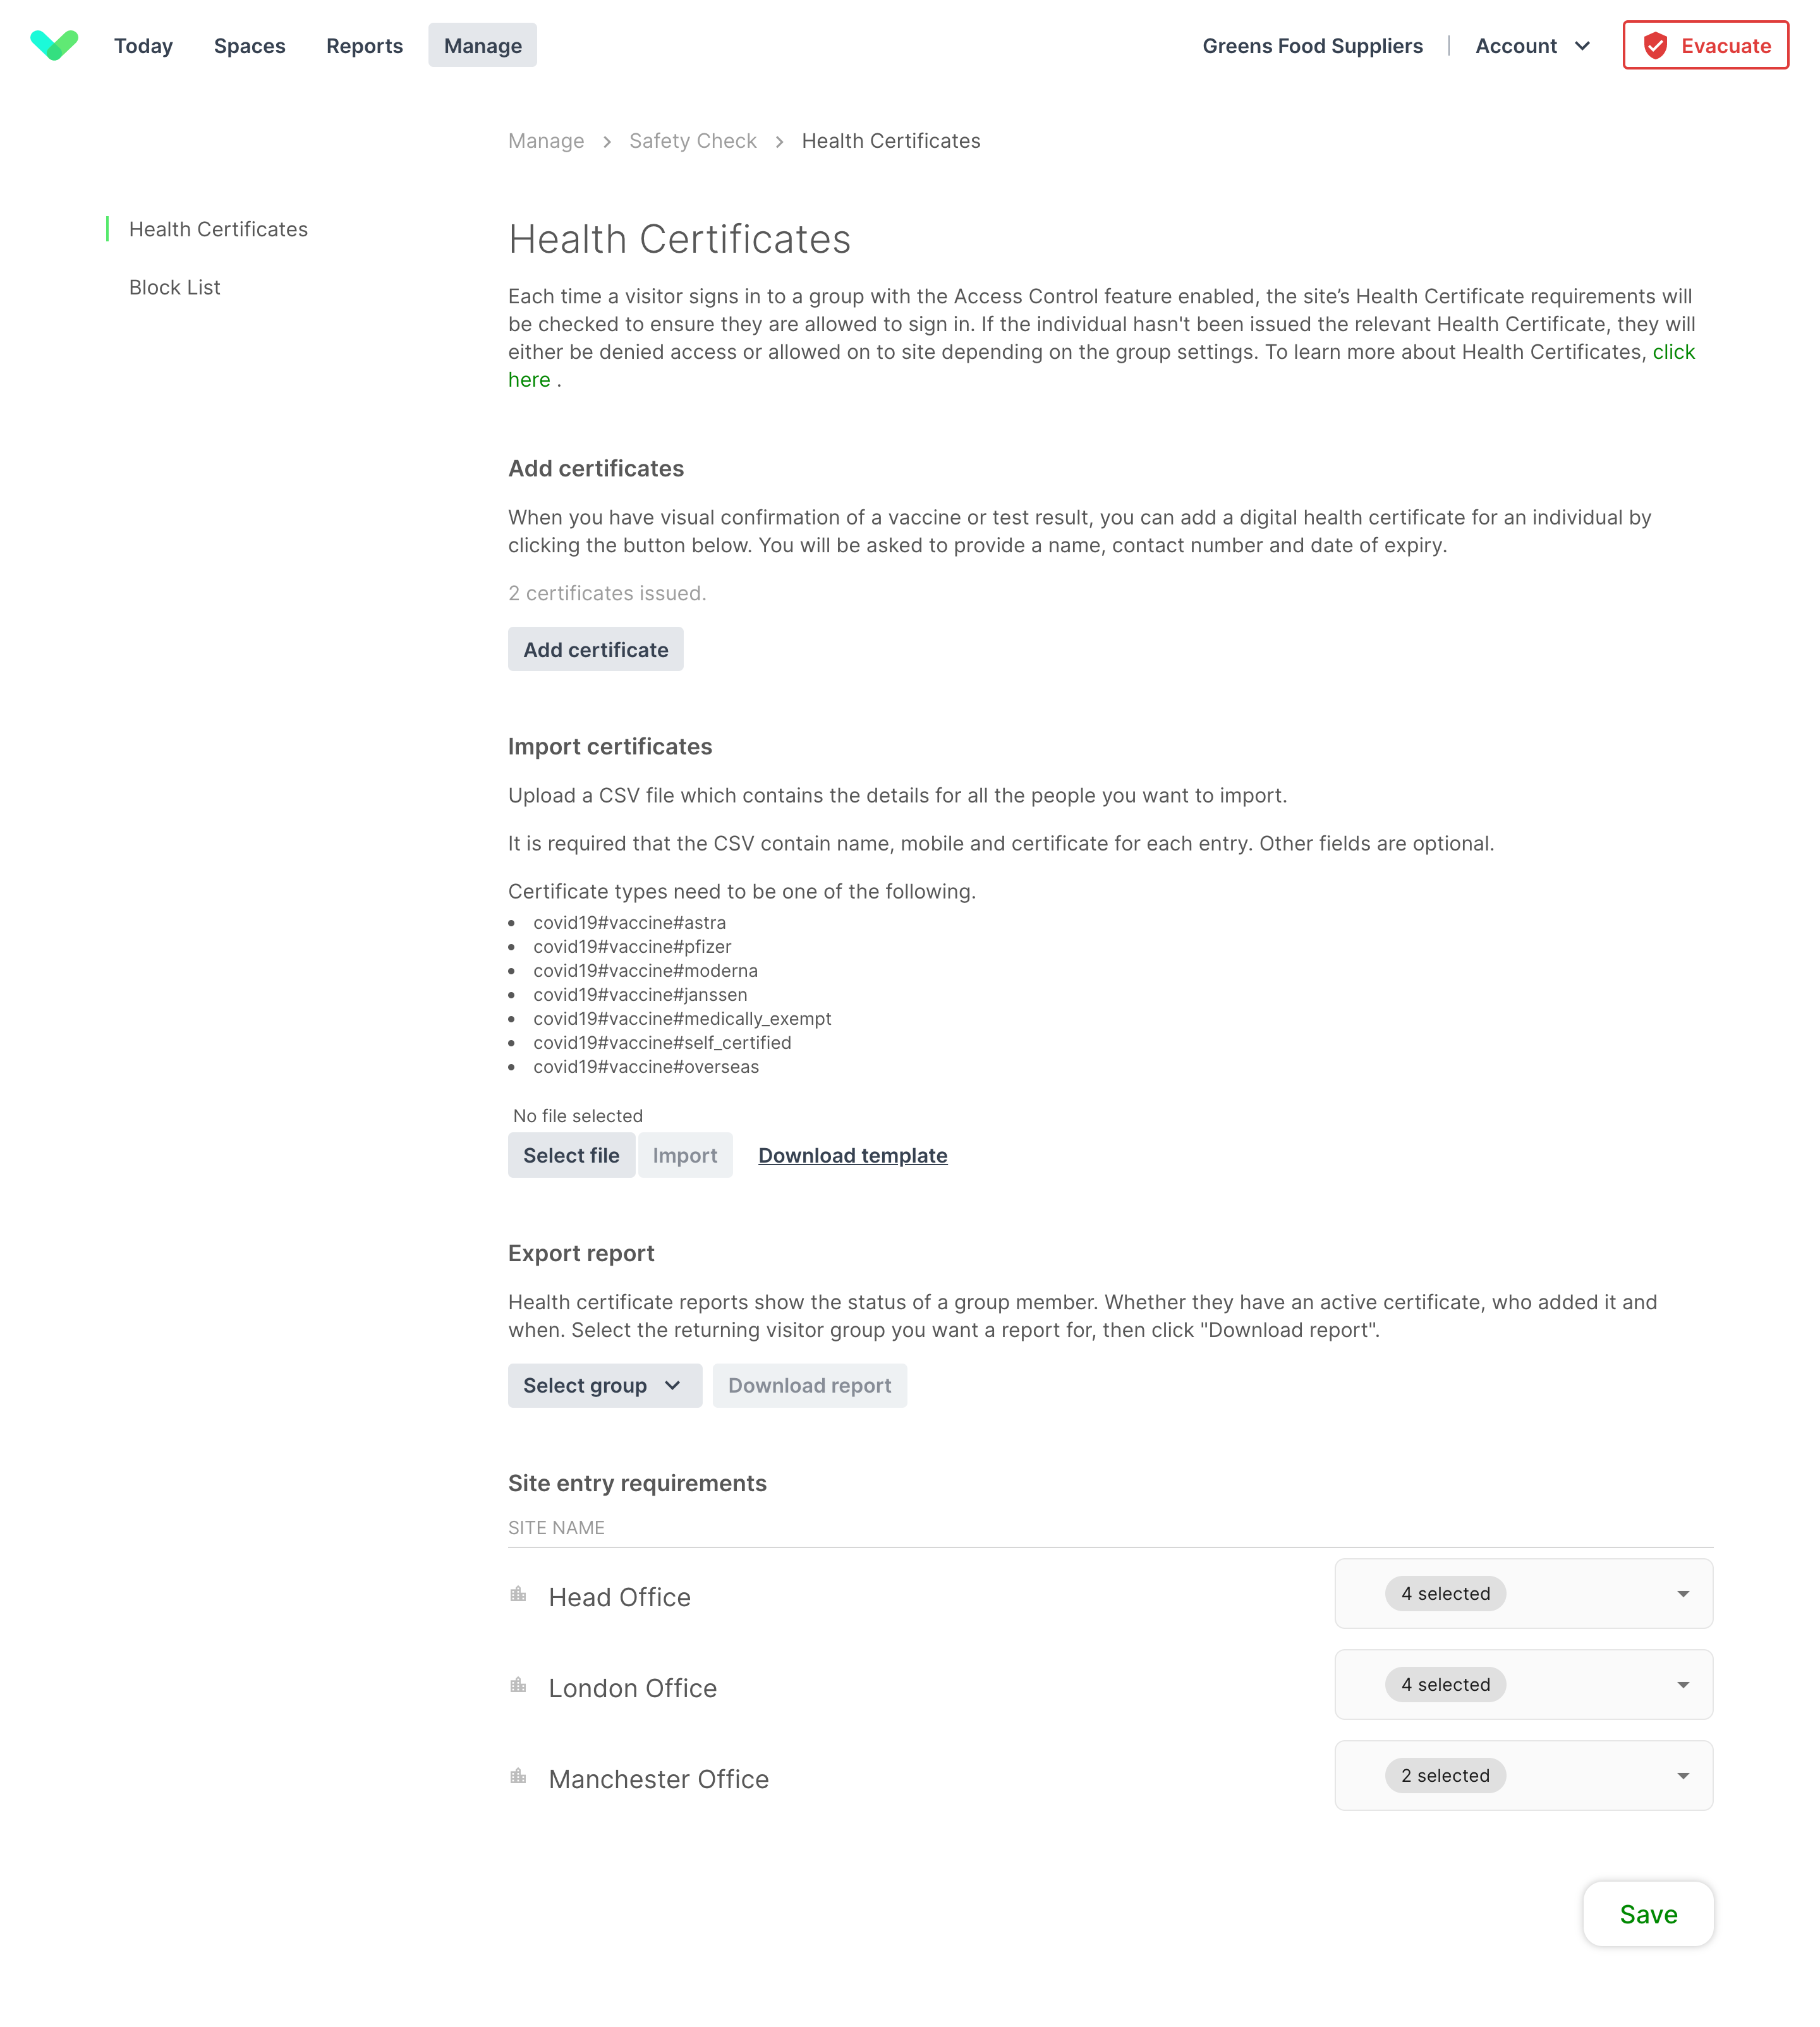
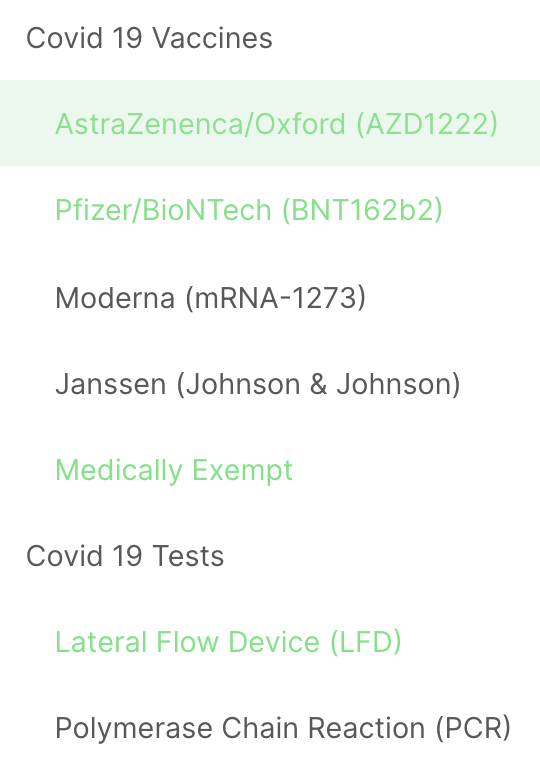
Once you’ve enabled Safety check for the groups that need to meet the criteria in health certificates, go to Manage scroll down to Sign In App+ and click Safety Check. Each site or upcoming event can have different entry requirements, so the first step is to add the Covid-19 vaccines and tests that can satisfy the requirements for Safety check. Click the dropdown next to the name of the site and select the first vaccine or test, you can select as many as necessary and they’ll be added to the list.

Add certificate
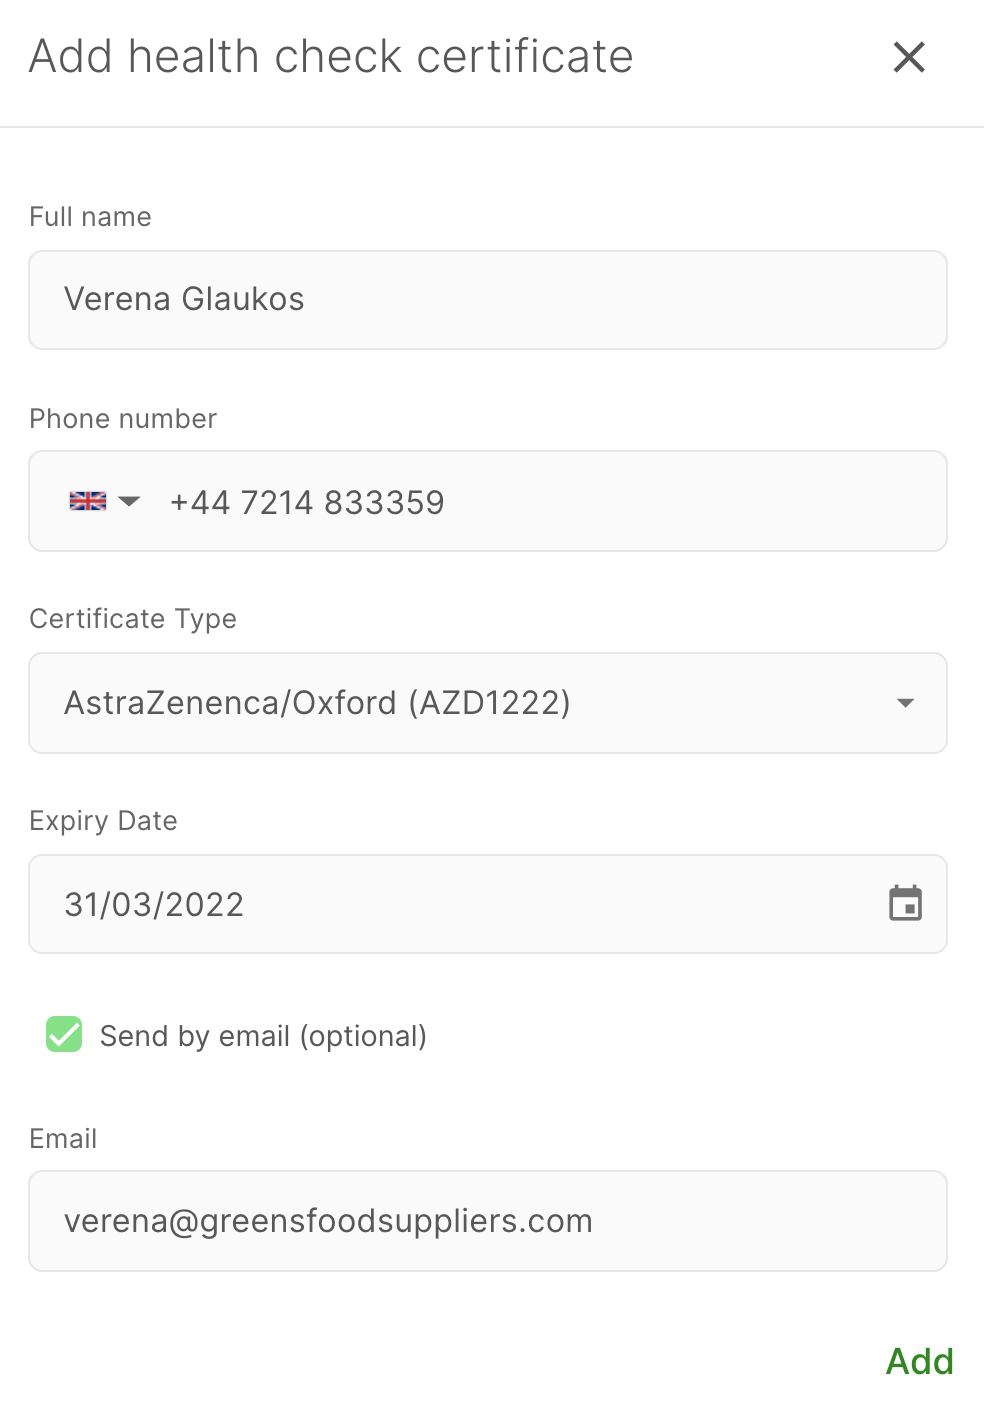
When you have added all of the vaccines and tests that can satisfy entry requirements you can start adding health certificates. When you have visual confirmation of a vaccine or test result, you can add a digital health certificate for an individual by clicking Add a certificate. First, add the full name of the individual the health certificate is for. Next, add their phone number - this step is important and is required, the phone number is a unique identifier that ensures that after the data is encrypted, individuals with the same name can be differentiated. Use the certificate type dropdown to select the vaccine or test result that’s being added and then set the expiry date for the certificate, after this date the health certificate will no longer meet the criteria for entry.

Important
Each health certificate needs a phone number. When signing in the same number must be provided.
Standard visitors need a custom field of type Phone number for the health certificate to work. To set this up go to Manage > Sites > Select site > Custom fields and click Add new and ensure the Field type is set to Phone number.
Repeat visitors can use either personal or custom fields. Personal fields are a better solution as the information doesn’t need to be provided on each sign in. A phone number personal field is added by default for repeat visitor groups. To add a phone number for a repeat visitor go to Manage > Groups > Select group > Members search for the member, click Edit and check they have a valid phone number.
The last step of adding a certificate is to select if you’d like to send an email confirmation of the certificate. To do this tick Send by email and then enter the person’s email address, the email will include details of the health certificate, its expiry date, and a QR code or contactless link to sign in or out on site.
Import certificates
If you have a number of health certificates you’d like to add all at once, you can use the import option.
- Click
Download templateand a CSV template will be generated. - Populate the CSV file with the health certificates. Name, Mobile number, and Certificate are all required. The other fields are optional.
Tip
Certificate types need to be one of the following
• covid19#vaccine#astra
• covid19#vaccine#pfizer
•covid19#vaccine#moderna
•covid19#vaccine#janssen
•covid19#vaccine#medically_exempt
•covid19#vaccine#self_certified
•covid19#vaccine#overseas
- Click
Select fileand pick the file for importing the health certificates. This needs to be a CSV file. - Click
Importand the health certificates will be added. You will see a confirmation that the import has been successful.
Export report
You can export a report to show which repeat visitors do and don’t have a health certificate. First, use the Select group dropdown to select the group you’d like to run the report for.
Important
Standard visitor groups are not supported for the export. Only members of repeat visitor groups with a phone number that matches the phone number on their health certificate will appear on the report.
Block list
Block list allows you to manage who can sign in at your site, giving you an extra layer of control over site security. You have the option to block the sign in completely and make the visitor aware they’re not able to sign in, or alternatively allow the visitor to sign in but send a notification to relevant team members to make them aware.

Once you’ve enabled the Safety check for the group go to Manage and scroll down to Safety Check and select Block list. From there, click Add new and enter the full name of the person you’d like to add to the block list. You can then choose any additional custom fields you’d like to use when verifying a visitor's identity.
We hope you've found this guide useful but if you have any questions around Safety Check or any Sign In App feature, please contact our support team at support@signinapp.com.

